A few months ago, GitLab announced changes to the Free tier, including limiting private namespaces to 5 users. As my team will be impacted by those changes, we decided it was time to give a try to Self-Hosting! The update will soon come live, so here I am sharing some guidance on the steps I followed, gathering and synthetizing the documentation I used.
In this guide, I will detail how to :
- Deploy a Self-Hosted GitLab instance with Docker
- Migrate from GitLab SaaS to a Self-Hosted instance
- Migrate GitLab container registry
- Configure scheduled back-ups uploading to a S3-compatible storage
What you need to achieve the same configuration:
- A VM instance
- A DockerHub account (to migrate your container registries only)
- A S3 bucket with read and write access (to store back-up archives) -Basic understanding of Docker to launch the GitLab server
Evaluate your needs
The very first step is to determine the resources you need to deploy your server. You can follow GitLab’s requirements depending on your number of users, repository storage, but also container storage and so on. You can choose to store data directly on the VM storage for better data transfer speed, or on cloud-based storage for scalability.
Deploying GitLab
GitLab’s official documentation offers multiple deployment methods for Self-Hosted servers. Here I chose the Docker method as I am familiar with Docker deployments. Other methods include the Omnibus package, or Helm for Kubernetes clusters, and are compatible with this guide.
Please note that the Docker deployment actually deploys the Omnibus package inside a container, many configuration options will be similar.
Configure your VM
If you’re deploying on a brand new machine, you might want to check some pre-requisite first, especially for beginners.
- SSH : some providers deliver machines with a set of default user and password, change it to secure your server. You can create a password-less user and connect with ssh keys for example (see this tutorial).
- Install docker and other tools: choose the server version that suits your OS. At this point, you may want to install a text editor also.
Deploy with Docker compose
GitLab documentation offers a sample Docker compose configuration. Here I share my version with a few modifications explained bellow:
version: "3.6"
services:
  web:
    container_name: gitlab
    environment:
      GITLAB_OMNIBUS_CONFIG: |
        external_url 'https://X.X.X.X'
        gitlab_rails['gitlab_shell_ssh_port'] = '2222'
        gitlab_rails['omniauth_providers'] = {
            name: "gitlab",
            app_id: "###",
            app_secret: "###"
          }
        gitlab_rails['backup_keep_time'] = '86400'
        gitlab_rails['backup_upload_connection'] = {
          provider: 'AWS',
          region: '###',
          aws_access_key_id: '###',
          aws_secret_access_key: '###',
          host: '###',
          endpoint: '###',
          path_style: '###',
          aws_signature_version: '2'
        }
        gitlab_rails['backup_upload_remote_directory'] = 'backup/gitlab'
image: gitlab/gitlab-ee:latest
    ports:
      - 2222:22/tcp
      - 443:443/tcp
      - 80:80/tcp
    restart: always
    volumes:
      - $GITLAB_HOME/logs:/var/log/gitlab
      - $GITLAB_HOME/data:/var/opt/gitlab
      - $GITLAB_HOME/config:/etc/gitlab
Most of the configuration is provided in the GITLAB_OMNIBUS_CONFIG variable that can contain any gitlab.rb argument. Here I used :
-
gitlab_shell_ssh_port: to map the port used by GitLab and keep the standard SSH port 22 free for SSH connexions. Match with the Docker ports configuration. -
omniauth_providers: follow this configuration to enable easy projects import management from GitLab.com. -
backup_*: to upload backup archives to S3, more details in the back-ups section bellow. -
volumes: to access and persist configuration and data directories located inside the container. Note the$GITLAB_HOMEvariable, to specify the root folder of volumes inside your VM local storage.
Updating your server
You might later need to change your server’s configuration. To do so, you can edit the compose file then delete the container to create a new one.
You can also apply changes to the current server by modifying configuration files in the $GITLAB_HOME/config folder, and update with the following command: docker exec gitlab gitlab-ctl reconfigure . This execute the _reconfigure _command inside the container named gitlab.
Migrate your projects
Now your server is ready and should be available on https://<your-host>/. To connect to the root user, you can retrieve the password in the file $GITLAB_HOME/config/initial_root_password and log into your server. You can now start to populate your server with all the data you want to migrate.
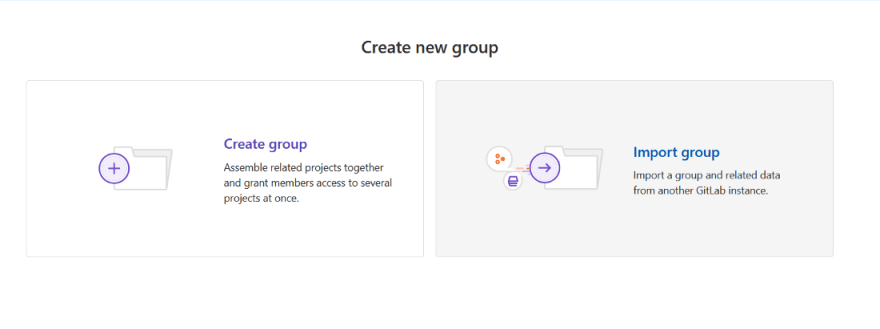
First, you can create a new group or import existing ones from you GitLab.com account. Note that importing groups only retreive the sub-groups structure, projects will be imported in the next step. Here is the list of all items migrated with groups import.
Then, you can head to the create project page and choose your import method.

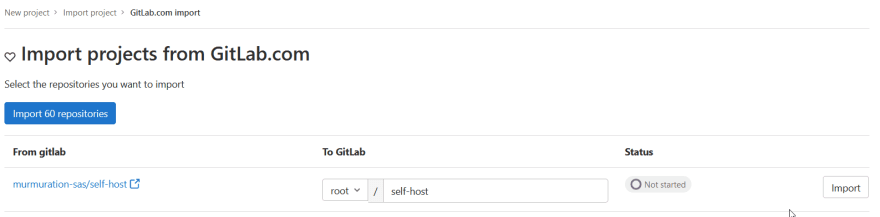
If you configured the omniauth_providers option, you can access the GitLab.com import page to easily import many projects at once, this is the recommanded method for importing a large number of projects, by specifying the target group and queuing multiple imports at once.
Note that you can also import projects from GitLab.com through the URL import. Check here the list of items migrated with the project import.
Migrating container registries
If you’re using GitLab.com container registry extensively, migrating your images to your self-hosted instance might take up a lot of space, more than your VM could handle perhaps. I personally chose to migrate my images to DockerHub with a pro account for unlimited private repositories. Whatever solution you opt for, you need to consider the following:
- images need to be _pushed _to the new container registries,
- you need to update your CI/CD pipelines if they push/pull images. I recommend using GitLab variables to easily change your registry url and logins,
- you need to update any service that interacts with the registry: docker-registry secrets for Kubernetes, or docker login on your servers and developers’ computer for example.
Configuring back-ups
One final step for a reliable deployment is to ensure your data is safe and recoverable from storage failure. GitLab self-hosted version offers built-in back-up functions to create and upload archives of a server’s data. I used this functions to automate a daily back-up of all my repositories and upload the archive to a S3 compatible storage.
Automated back-ups
GitLab offers a built-in function to create an archive of your server’s data (repositories, builds, artifacts…). It also uploads the generated archive to the cloud storage specified in the docker-compose file. I used the following configuration:
gitlab_rails['backup_keep_time'] = 86400
gitlab_rails['backup_upload_connection'] = {
    'provider' => 'AWS',
    'region' => '###',
    'aws_access_key_id' => '###',
    'aws_secret_access_key' => '###',
    'host' => '###',
    'endpoint' => '###',
    'path_style' => '###',
    'aws_signature_version'=> 2
   }
 gitlab_rails['backup_upload_remote_directory'] = 'backup/gitlab'
Note:
-
backup_keep_time: time in seconds of archive retention on your VM, archives older than this threshold will be deleted during the next back-up execution. It does not handle archives uploaded on cloud storage. - In case of a S3-compatible storage, use
'provider'=>'AWS'withendpointas your service’s url, and some providers require the following version for compatibility'aws_signature_version'=>2.
However, GitLab built-in back-up function does not backup the configuration files, so here I share the bash script used to back-up my server. It uses MinIO client to save files not included in the built-in function, and delete old archives, and assumes that the S3 compatible storage is aliased as my-s3. It stores the only the current configuration and keep data archive for up to one week, then notifies by mail the output of this script.
#!/bin/bash

# move old config files
mc mv --recursive my-s3/backup/gitlab/config my-s3/backup/gitlab/old

# copy files to s3
{ mc cp $GITLAB_HOME/config/gitlab-secrets.json my-s3/backup/gitlab/config/gitlab-secrets.json ; \
  mc cp $GITLAB_HOME/config/gitlab.rb my-s3/backup/gitlab/config/gitlab.rb ; \
  mc cp --recursive $GITLAB_HOME/config/ssl my-s3/backup/gitlab/config/ssl ; \
  mc cp --recursive $GITLAB_HOME/config/trusted-certs my-s3/backup/gitlab/config/trusted-certs ; \
} 1> /tmp/mc_logs.txt 2>&1

# auto backup with gitlab
if docker exec gitlab gitlab-backup create skip=builds,artifacts,registry CRON=1 1> /tmp/backup_logs.txt 2>&1
then
  status="Success"
  # remove old files
  echo 'Removing old config files'
  { mc rm --recursive --force my-s3/backup/gitlab/old ; \
    mc rm --recursive --force my-s3/backup/gitlab/* --older-than 7d ; \
  } 1>> /tmp/mc_logs.txt 2>&1
else
  status="Failed"
fi

cat /tmp/mc_logs.txt | mail -s "GitLab Backup $status" my-mail@company.com -a FROM:backup@gitlab-server -A /tmp/backup_logs.txt
Please note :
- the first step moves the configuration currently saved on S3 to an
oldfolder instead of overwritting it in case of copy failure, - mc steps are executed in a list followed by
1>> /tmp/mc_logs.txt 2>&1to save the logs in a temporary file to later send it in the mail notification. Read more about UNIX redirections here, you can send the mail notification from a non-existing address, however it might end in spam folders, especially with attachments. There are multiple mail clients to choose from, and you can authenticate the sender to an existing account, or create filters in your inbox to prevent the notification from getting tagged as spam (example with Gmail).
I chose to run this script as a CRON every morning with the following cronjob : 0 7 * * 5 /bin/sh /home/admin/self-host/backup.sh. Read more about cronjobs here.
Restoring your data
GitLab provides official restoration guidelines here. However, we need to retreive the file from S3 before execution the restore function. The following script gathers all the steps to download the back-up files, stop the services and launch the restore function.
#!/bin/bash

backup_name=$1_gitlab_backup.tar

# download config files
mc cp my-s3/backup/gitlab/config/gitlab-secrets.json ./config/gitlab-secrets.json
mc cp my-s3/backup/gitlab/config/gitlab.rb ./config/gitlab.rb
mc cp --recursive my-s3/backup/gitlab/config/ssl ./config/ssl
mc cp --recursive my-s3/backup/gitlab/config/trusted-certs ./config/trusted-certs

sudo cp -r ./config $GITLAB_HOME/config
sudo rm -rf ./config# download archive
mc cp my-s3/backup/gitlab/$backup_name $backup_name
sudo mv ./$backup_name $GITLAB_HOME/data/backups/$backup_name# auto backup with gitlab
docker exec -it gitlab gitlab-ctl stop puma
docker exec -it gitlab gitlab-ctl stop sidekiq
docker exec -it gitlab gitlab-ctl status

docker exec -it gitlab gitlab-backup restore --force BACKUP=$1

docker restart gitlab

docker exec -it gitlab gitlab-rake gitlab:check SANITIZE=true
Usage : ./restore.sh <BACKUP_NAME>
Notes :
-
BACKUP_NAMEis the name of the backup archive without the_gitlab_backup.tarextension. - MinIO stores the S3 storage aliases as user-dependant configuration. Althoug writting to my GitLab config folder needs root permission, running this script as sudo requires to configure the MinIO aliases for
root. I prefered to not execute this script with sudo and instead divided the download operation in 2 parts : first download to a temporary file, thensudomove the file to the desired path.
Watch your disk space
As you import your projects or use CI-CD builds and artifacts, your storage will take more and more space. If you store your data on your VM's local storage and end up with no disk space left, storage failure can occur and lead to data loss. You can set up another cronjob to watch periodically the disk space available and send a notification when it reaches a critical threshold. This tutorial details how to implement such job.
One source of growing memory usage by GitLab is CI-CD logs, it is officially recommended to delete them periodically, you can find GitLab's example here.
Conclusion
At the end of this tutorial, you should be able to deploy a functioning GitLab self-hosted server with automated back-ups. You can also manage you container registries with external tools if they take up too much space, and restore your server in case of storage failure. Once you have migrated your projects, you can start using your instance by cloning your repositories locally and invite other users on the server.
Did you have any difficulty in setting up your server? Did you find any other method useful? Don’t hesitate to share any feedback and happy coding !

Top comments (1)
Any Idea how to re-link the Images which are inside issues?
I've done a Project-Export and upload the contained
uploadsdirektory to the new Server :/var/opt/gitlab/gitlab-rails/uploads/. I change owner & group to git (like the other directories in gitlab-rails-directory are).I've done
gitlab-ctl reconfigure && gitlab-ctl restart, but the image are still broken.Any Idea how to re-assign the images to the issues?