HTML elements typically come with default behaviors that can sometimes be frustrating. However, these behaviors are inherent to their design and may include padding, margins, icons, borders, outlines, and more. Fortunately, CSS allows for the customization, manipulation, and removal of many default behaviors.
This article will specifically address the file input, which is an input element with a "file" type. Here is an example of what it looks like:
<input type="file" />
The file input always display two different default features.

The first default feature is the "chose file" while the second features is the "No file chosen" text. These features can be manipulated and customized with text or icons like the file input in Instagram or LinkedIn:
Instagram file input:

LinkedIn file input

To customize the file input above, there are tow different ways to go about it.
First Method
In my opinion, this method is inefficient as it does not allow for complete customization. While it is possible to remove the "choose file" feature, it is not possible to remove the "no file chosen" feature. This method utilizes the pseudo element ::after, position:absolute, and visibility:hidden to hide the "choose file" feature. Below is the code:
HTML:
<input class="custom-file-input" type="file" />
CSS:
.custom-file-input {
  border: 1px solid red;
}
.custom-file-input::-webkit-file-upload-button {
  visibility: hidden;
}
.custom-file-input::before {
  content: "Select some files";
  display: inline-block;
  border: 1px solid #999;
  border-radius: 3px;
  padding: 5px 8px;
  outline: none;
  white-space: nowrap;
  -webkit-user-select: none;
  cursor: pointer;
  text-shadow: 1px 1px #fff;
  font-weight: 700;
  font-size: 10pt;
}
The output pf the code above will give this:
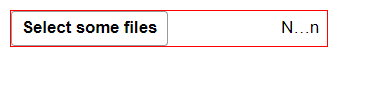
From the output, the "no file chosen" is still visible.
Second Method
In my opinion, this method is superior because it allows for complete customization. To further enhance this method, it would be beneficial to place the input within a container alongside the accompanying text or icon to be displayed.
   <div class="container">
      <input type="file" />
      <p>Select a file or use icon</p>
    </div>
Next is to style the container and position it relative while all the contents i.e. the input and <p> tag absolute. The code below
.container {
  border: 1px solid red;
  width: 20rem;
  height: 5vh;
  position: relative;
  display: flex;
  align-items: center;
}
input {
  position: absolute;
  inset: 0;
  z-index: 2;
  opacity: 0;
}
p {
  position: absolute;
  text-align: center;
  top: -10;
  left: 40%;
}
In this method, the input element is assigned a higher z-indexvalue than the <p> tag to ensure that it always appears on top of it. Then, its opacity is set to 0, allowing it to remain present but invisible. This allows the <p> tag to remain visible underneath the input element. Finally, the <p> tag can be centered according to your desired style. See the output below:

Ultimately, when it comes to CSS, there is no one definitive "best" way to implement things. It's important to experiment and find the approach that works best for your specific needs and preferences.

Top comments (0)