
NextJs 9.4 ... When Tim introduced the new features of NextJs I understood from that moment on, this framework came to start a new era of server-side rendering. It came just on time as I was about to set up a new side project, and it's the perfect excuse to do some playgrounds with the new functionalities while doing so. Check out the new changes here.
One thing I noticed, were the vast amount of examples available. Great, I wanted to set up a page with Prismic, so I can just check the example and based on that move on. Well there's an example, and a bunch of boilerplate to look nice and complete. So it does its job, but I was looking only for the connection to Prismic, and that example was too complete for my learning purposes. Plus, where's the fun when everything is already set? Check out the example
Wait! I do not know your current knowledge of NextJs, or Prismic. So why am I showing you already the changelog from a framework that maybe you never worked on it? Let's move back 1 step back, so we can move 2 steps forward. In this tutorial I intend to briefly explain to you:
- What is NextJs?
- What is Prismic?
- How do they work together?
- Why is this combo good?
How do I intend to answer all these questions? Making a tutorial of how to set up a NextJs project, explaining what we are doing, and connecting it to Prismic. We'll be doing a blog
- Set up a NextJs project
- Prismic
- Connecting NextJs with Prismic
- Understanding NextJs and its pre-render
- Dynamic routing
- Where to go from now
⚠️ For this tutorial is necessary some knowledge in React and HTML
Set up a NextJs project
NextJs is a framework to do Server-side rendering in React applications. If you don't know what is Server-side rendering (from now on SSR), just check other pages from dev.to In the last 2 years, NextJs gained popularity, being one of the most solid solutions when you think in your app in SSR. So, let's start a new project:
npm init next-app
It will ask for the name of the project, and which template do you want. You can pick the default starter, since we are building everything from scratch.
Check the code and discover there's the following structure:
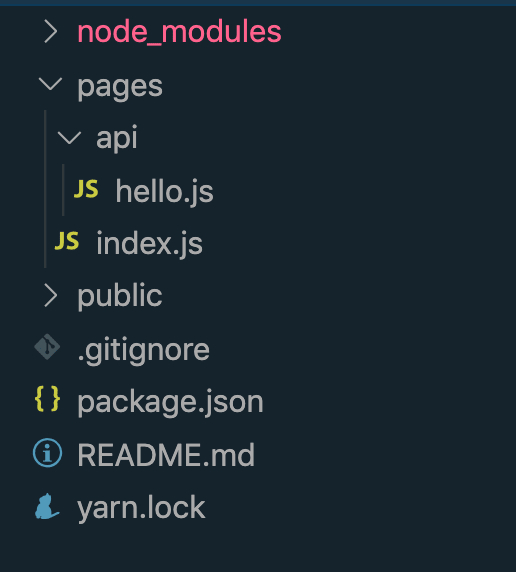
The pages folder is the most important folder. To get all the benefits from NextJs, you need to keep your pages under this folder. Notice that there's as well a sub-folder called api with a hello.js file. Go ahead and remove the folder and the file, we don't need them for the tutorial. Now, you can run the server:
npm run dev
You should see a page like the following picture:
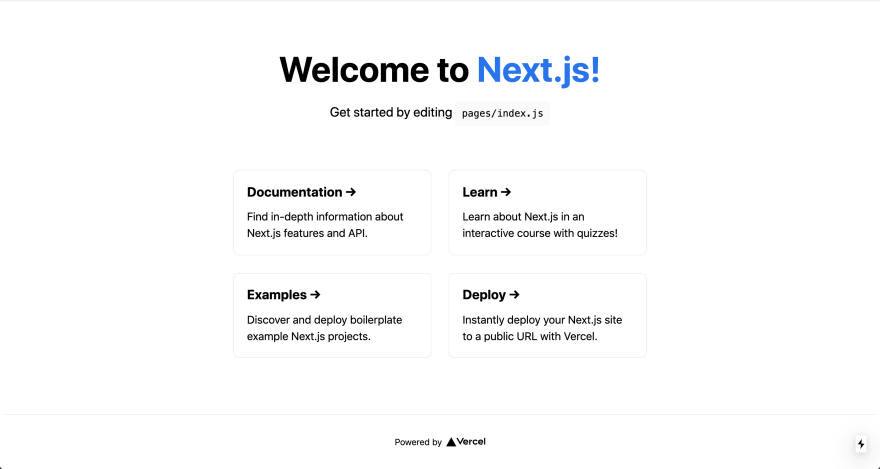
Notice as well that a new hidden folder has been created as .next. This is internal from the framework and we shouldn't touch it.
If we analyze the code from pages/index.js we'll see a React component with some info. as well in the bottom some JSX. NextJs by default supports CSS modules, and support Sass. You can work with CSS in JS as well. For this tutorial we don't need any CSS at all, but I can refer you where to go once this tutorial is finished to learn more about it.
An important detail; do you see import * as React from 'react' ? The definition is implicit by NextJs. If you need to use explicitly the React library, you may need to import it (like a Fragment or one of the React hooks), otherwise, you can leave it as it is. Check what Tim said about it.
As well there's a Header internal component from NextJS. There are 4 in build components( and really important ones) out of the box:
In short words: Head is the component to place HTML tags in your head of the HTML document. But for this tutorial we don't need it either. Let's leave the document like the following snippet:
export default function Home() {
  return <></>
}
Prismic
Prismic is a headless CMS. In short words: You prepare your pages and your frontend receives a payload with the structure (JSON response) but it is up to you to do what you want with that info. What is the benefit of it? You can usually specify components in a headless CMS, and when you receive it in the payload, it tells you: Hey, here the content creator said it wants component X, so you can take the info from here, and delegate it into a React component, styled as you want.
It's perfect to separate content and code. Also great if the person who maintains the website does not know how to code. This gives them a solution and you just take care of processing the info.
Said that you need to open an account on Prismic. It gives great pricing offers, so there's a free plan for small projects. This is perfect for our tutorial, and even small apps like blogs/portfolios/newsletter.
Once you're logged in, create a new repository. Name it is as you wish (be creative! Otherwise just call it Blog 🤣). Enter into that repo afterwards.
On the left side you should see these 4 logos:
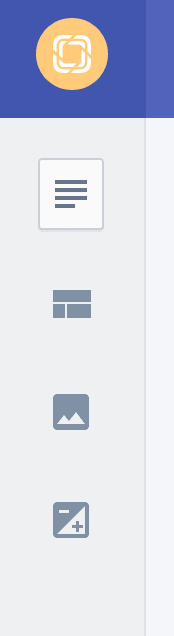
Let me quickly cover the first two:
- Custom types(second logo): Here relies 'the skeleton' of our entries. You specify what do you want as a page. You can have single elements, or compose multiple elements interconnected with them. As well you can specify if this element is going to be unique on your website, or can be used multiple times. Think of it as the blueprint of a house. This section is for the dev.
- Content(first logo): Here is mainly where you consume those custom types, those blueprints, and turn them into real pages. This section is for content creators/maintainers.
Let's go into the custom types and create a new one. We'll create the home of our blog. Since usually a homepage exists only once in your website, this is going to be a single type. Name it Blog home and give it the API id blog_home.
I'll briefly explain this page, but for a deep understanding I recommend check their documentation
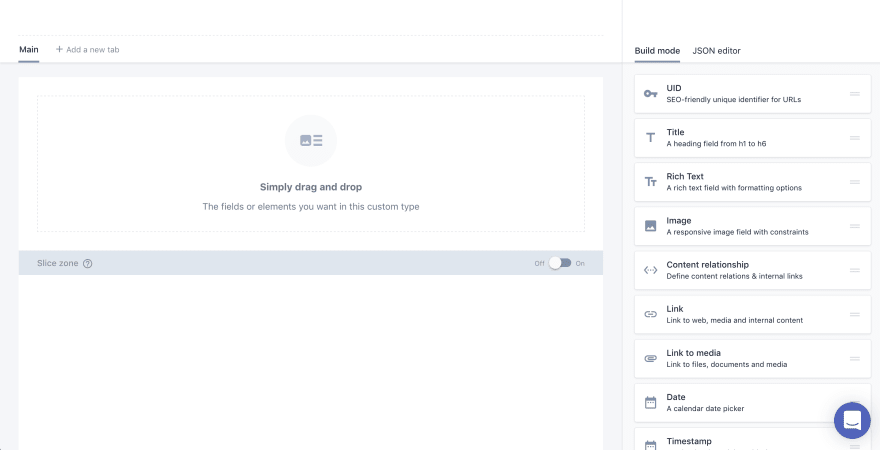
On the left side, there are primitive elements that you can put on the main page. There's a drag'n drop concept. You can add it in the order you want and how you want it. The slice zone is a really interesting concept. Here you can create repeatable 'Components'. It will ask you for a name, and then you can drag and drop what you need to be there. Then this component will be consumed and added as many times as the editor needs. We won't use it for this tutorial, but keep in mind that this feature can give you a lot of power.Definitely try it out in some playgrounds once you are more confident with Prismic!
Check on the right side, there's a JSON builder as well, so you can edit it from there. To go aligned, I paste here my JSON and you can just add it in your example. You should have the same structure as in here:
{
  "Main" : {
    "headline" : {
      "type" : "StructuredText",
      "config" : {
        "single" : "heading1",
        "label" : "Headline",
        "placeholder" : "Main title..."
      }
    },
    "description" : {
      "type" : "StructuredText",
      "config" : {
        "multi" : "heading2",
        "label" : "Description",
        "placeholder" : "Sub-title..."
      }
    },
    "image" : {
      "type" : "Image",
      "config" : {
        "constraint" : {
          "width" : 140,
          "height" : 140
        },
        "thumbnails" : [ ],
        "label" : "Image"
      }
    }
  }
}
I added a Title, a subtitle, and an Image. Respectively, they are a head, a rich text and an image primitives from the visual builder.
You should see a page like this now:

I added the image field just for learning purposes, so we don't receive only formatted text. Don't forget to press the save button on the top right side of the page!!
Let's go ahead and build what we'll call a post entry. This time, the custom type can be used as many times as we want (we will have multiple post entries), so go ahead and create a Post custom type with API-ID as post. Here is the JSON:
{
  "Blog Post": {
    "uid": {
      "type": "UID",
      "config": {
        "label": "UID",
        "placeholder": "unique-identifier-for-blog-post-url"
      }
    },
    "title": {
      "type": "StructuredText",
      "config": {
        "single": "heading1",
        "label": "Title",
        "placeholder": "Blog Post Title..."
      }
    },
    "date": {
      "type": "Date",
      "config": {
        "label": "Date"
      }
    },
    "post_body": {
      "type": "StructuredText",
      "config": {
        "multi": "paragraph, preformatted, heading1, heading2, heading3, heading4, heading5, heading6, strong, em, hyperlink, image, embed, list-item, o-list-item, o-list-item",
        "label": "Post body",
        "placeholder": "Content of the blog post"
      }
    }
  }
}
We got it! Let's just go into the content tab on the left sidebar and create 1 Home Blog and 2 Posts. Feel free to add the content you want. The only thing you need to keep in mind is to save the content and publish it (top right side of the page). Until you don't see the bar in green, this content won't be public. This is how it should look once everything is saved and published:

Feel free to create 2 Post entries as well in the same way and save and publishing them.
Time for a break!🍵☕
Hey, a lot of new concepts and features. Why don't you refresh your mind for 5 minutes and go for a tea/coffee? A lot of new concepts and steps, you deserve it 💪
Once you are ready we'll get back into NextJs and apply all the connections to consume this new content.
Connecting NextJs with Prismic
Let's add 2 libraries to make the connection:
npm I prismic-javascript prismic-reactjs
prismic-javascript will establish the connection, and prismic-reactjs will format the rich text we added.
Let's add a new file in the top level of our project called prismic-configuration.js
import Prismic from "prismic-javascript"

// Prismic API endpoint
export const apiEndpoint = process.env.PRISMIC_URL

// Access Token if the repository is not public
// Generate a token in your dashboard and configure it here if your repository is private
export const accessToken = process.env.PRISMIC_TOKEN

// Client method to query Prismic
export const client = Prismic.client(apiEndpoint, { accessToken })
Not a mystery, we establish the endpoint + token to connect to prismic and pass it into the library. From there we'll receive all the methods to keep working.
To retrieve the endpoint + token, we need to go in the settings sections (engine icon, bottom left of the page) from Prismic. Under the API & Settings tab, you will find easily the API Endpoint field, which holds our URL. Make sure it's under the JS option.
For the token, you will need to generate a new one on the same page. Just say it's private (only you query it). Once it's generated, it is the field that holds the Permanent access tokens section.
We got the info, so let's create a .env file at the top of our project:
PRISMIC_TOKEN= GENERATED_TOKEN
PRISMIC_URL= GENERATED_URL
Remember to add the .env file in the git ignore. With those steps, we are ready to consume our pages from prismic in the new NextJS Format.
Understanding NextJS and its pre-render
We set up a project, set up Prismic, and established connection. Our objective now is communicate this connection with NextJS. To make the call in the server-side we need to fetch data and pre-render it with getStaticProps. Let's go back into our initial index.js and extend it a little bit:
import Head from "next/head"
import Prismic from "prismic-javascript"
import { client } from "../prismic-configuration"

export default function Home() {
  return <></>
}

export async function getStaticProps() {
  const home = await client.getSingle("blog_home")
  const posts = await client.query(
    Prismic.Predicates.at("document.type", "post"),
    { orderings: "[my.post.date desc]" }
  )
  return {
    props: {
      home,
      posts,
    },
  }
}
Step by step:
- We invoke
getStaticPropsto do the call in pre-render mode. This is how NextJS works to send data into the component then. - The client, from Prismic library, contains different helper methods. The
getSinglemeans we want to retrieve a unique content (remember that we declared our home as a single type? Thanks to that we can retrieve it with this method). We pass as argument theUIDwe established for in the custom type. - We are doing another query into Prismic, but this time to ask about all custom types
post, afterwards, we are ordering them. Learn about predicates in prismic. Notice how I needed the Prismic library to work with it. - It returns an object that contains the props, and inside the info that we want to send into the component.
⚠️ It is very important to return the
propsobject, otherwise, it will fail.
At the end we can receive all this data in the component, and add it there:
import Link from "next/link";
import Prismic from "prismic-javascript";
import { RichText } from "prismic-reactjs";
import { client } from "../prismic-configuration";

export default function BlogHome(props) {
  return (
    <div>
      <img src={props.home.data.image.url} alt="avatar image" height="140px" />
      <h1>{RichText.asText(props.home.data.headline)}</h1>
      <p>{RichText.asText(props.home.data.description)}</p>

      <ul>
        {props.posts.results.map((post) => (
          <li key={post.uid}>
            {RichText.render(post.data.title)}
          </li>
        ))}
      </ul>
    </div>
  );
}

export async function getStaticProps() {...}
One thing that's worth to mention: Check out how is used now prismic-reactjs. You can convert rich text from Prismic into HTML with it. And its documentation is pretty quick and intuitive
Go ahead and see the home page:
npm run dev
Hey, we got it 🎉! Yes, I know..., the page looks quite horrible for now. But first things first, you learned this connection, now you can aply some CSS without mixing it to the basic structre.
Dynamic routing
We have a home page, but we want to have some pages. We would like to have one for every single post we have. To do that, we have to find a system that asks Prismic for the posts, checks if it exists, and if so, renders the content. NextJs has thought about this and provides a nice solution.
Let's create a folder inside pages called posts. Inside this folder, we'll create a [uid].js file. It should look like in the picture:
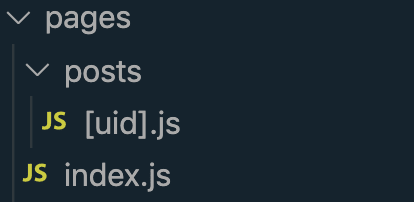
Why this weird brackets syntax? Because NextJs has established this way to know that this is going to be a page with a dynamic route. From now we can retrieve pages like:
http://localhost:3000/posts/:uid

We can retrieve the uid as a param and check in which page it belongs. Examples:
http://localhost:3000/posts/hello-world
http://localhost:3000/posts/hey-macarena
http://localhost:3000/posts/etc
Since we added this file under the folder posts, now every page is scoped under this name. An unrelated example would be: Image I create a file under pages/about/index.js will be found under /about route. Or if I create pages/services/our-services.js this page can be found under /services/our-services. In my opinion, it is an intuitive system and pretty straightforward to work.
Let's go back to our objective: Make this route dynamic. To do that we'll need two helper methods: 1- The getStaticProps that we already worked. 2- The new method getStaticPaths
Mainly getStaticPaths is the helper that builds all the pages in build time to match with the possible paths that the user can insert. Let's start with something easy:
import { client } from "../../prismic-configuration"
import Prismic from "prismic-javascript"

export async function getStaticPaths() {
  const { results } = await client.query(
    Prismic.Predicates.at("document.type", "post")
  )

  const paths = results.map(post => ({
    params: {
      uid: post.uid,
    },
  }))
  return {
    paths,
    fallback: false,
  }
}
- We call Prismic and ask for all the posts. We've already seen this behavior with the previous page.
- We map the results to have an array of object with a
uidproperty. ⚠️ Two really important points - The array of objects always needs to be encapsulated under theparams- The key of the params object, needs to match with the name of the file. In our caseuidmatches with[uid].js - We return the paths and the fallback as false.
I won't enter into a lot of details for fallback, just let you know that if it's false when no page is matched it will show a 404 page. Learn more about the fallback key.
Once more, we must return an array of objects that contains the params and the key inside the param is matching with the name of the file.
This helper won't work unless it goes together with getStaticProps, so let's add it:
export async function getStaticProps({ params }) {
  const { uid } = params
  const { data } = await client.getByUID("post", uid)
  return {
    props: { data },
  }
}
Now the function is expecting some parameters. Inside param we'll find what the user typed in the URL:
URL /posts/hello-world

Is transcribed into
{
    params: {
        uid: 'hello-world'
    }
}
Remember that what you called as the name of the file, is what you'll receive as param. In our case uid.
We ask to Prismic, with the helper getByUID to retrieve what the user adds in the URL. It must match with the uid value you added when you created a content in Prismic that is type Post. Otherwise, you won't be able to retrieve the content.
Once we got the page, we just return it in the props for the component. And now we can create a component that just inserts the info. So the whole file can look like this:
import { client } from "../../prismic-configuration"
import { RichText } from "prismic-reactjs"
import Prismic from "prismic-javascript"

export default function Post({ data }) {
  return (
    <React.Fragment>
      <article>
        <header>{RichText.asText(data.title)}</header>
        <main>{RichText.asText(data.post_body)}</main>
      </article>
    </React.Fragment>
  )
}

export async function getStaticProps({ params }) {
  const { uid } = params
  const { data } = await client.getByUID("post", uid)
  return {
    props: { data },
  }
}

export async function getStaticPaths() {
  const { results } = await client.query(
    Prismic.Predicates.at("document.type", "post")
  )

  const paths = results.map(post => ({
    params: {
      uid: post.uid,
    },
  }))
  return {
    paths,
    fallback: false,
  }
}
Check-in your app that enter into http://localhost:3000/posts/uid-of-your-post, and see the result. We did a great job here 👏 There's one last detail we forgot: How to link the home page with a post.
Links in NextJs with dynamic routing
Going back into our index.js. We find a list with all posts:
//Imports

export default function BlogHome(props) {
  return (
  ...
     {props.posts.results.map((post) => (
       <li key={post.uid}>
           {RichText.render(post.data.title)}
       </li>
     ))}
  ...
  );
}

export async function getStaticProps() {...}
To link them, we can use the in-build component Link from NextJs. Let's add it and explain what's going on:
// Other Imports
import Link from "next/link";

export default function BlogHome(props) {
  return (
  ...
       <li key={post.uid}>
           <Link href="posts/[id]" as={`/posts/${post.uid}`}>
              <a>{RichText.render(post.data.title)} </a>
            </Link
       </li>
     ))}
  ...
  );
}

export async function getStaticProps() {...}
- The Link component needs an
hrefprop, and this href needs to point into the path we specified in pages. Since it's dynamic, it goes under the brackets convention. -
asis then to transform the path dynamically, based on the info we received from the list of posts. - For SEO reasons, you should wrap it with an
<a>HTML tag. Then it can be properly read by BOTS.
Phewwww, so we got it! We created a new NextJS project from scratch, understood how it works, connected with Prismic, and consumed it. I hope this helped you to understand the basics of NextJS, and have the first contact with Prismic as headless CMS.
If you would like to compare your work with this tutorial, check the final result I wrote
Where to go from now
Now, we got the basics of the framework. If you would like to learn more about it, I strongly recommend do their tutorial. You will see some concepts as we saw here, but they are explaining as well what is static generator vs SSR, or which options do you have to apply some styles in your project, etc.
If you don't want to do another tutorial, I recommend jumping directly into their documentation. We covered the basics and from here you can start to develop with NextJs as well.
The last step would be to check Prismic documentation in detail to get all the benefits they can provide to you. There's even a CLI tool from Prismic for creating a new repository + all the custom types from the terminal. In my case I wanted to show you step by step how to do it, and that's why we didn't cover it with this tool.
I wish you the best in this journey of SSR. If you want to share feedback, experience, or just explain some code battles, you can find me on twitter 😊

Top comments (3)
Can you make tutorial about Pagination ?
Hi Ruben,
Thanks for the NextJs Prismic setup, it was very helpful.
Thanks Khadar for your words :)