
In this article I will explain to you how to dockerize ReactJS App from scratch.Some time back I had created a Todo App using ReactJS and wanted to dockerize it.
So one fine day while doing so I thought to note down the step as well and share it with fellow developers and the result is this article.
If you have some basic idea about Docker or have just heard about it and want to learn how to dockerize ReactJS app then this article is for you.
What is Docker?
In brief, Docker is an open source DevOps tool designed to help developers and operations guys to streamline application development and deployment.
By dockerizing an application means deploying and running an application using containers.
Containers allow a developer to package up an application with all of the parts it needs, such as libraries and other dependencies, and deploy it as one package.
By doing so application can be deployed on any target environment/machine regardless of any customized settings that machine might have that could differ from the machine used for writing and testing the code.
Thus removing the deployment issues that occur due to various environment spec mismatch.
To learn more about docker checkout this link.
Prerequisite
- First, we need to have docker installed on our machine so that we can build docker image and run docker containers. There are different installation for Mac and Windows. For Windows 10 Professional and Enterprise install docker for desktop from this link but if you have Windows 10 Home edition like I have then you will have to installed Docker Toolbox from this link.
- We also need to have account at Docker Hub registry so that we can pull and push Docker images. It’s free so if you already haven’t one, checkout this link to create one for yourself.
- Last, we need ReactJS application that we want to dockerize. So if you already have one that’s great but if you don’t then you can get the ReactJS app code that I am using in this article from my GitHub repository from this link.
Get Started…
In order to dockerize our ReactJS App we need to perform following steps.
- Launch the Docker machine.
- Create Dockerfile in our Angular app folder.
- Create Docker image from the Dockerfile.
- And last, run the ReachJS Todo App in the container using Docker image.
So let’s get started…
Launch Docker Machine
Docker machine is a small Linux VM that hosts the Docker Engine which is a client-server application consists of Docker Daemon and Docker CLI that interacts with Docker Daemon to create Docker images or running containers etc.
- In case, you have installed Docker Desktop for Window or Mac when the installation finishes, Docker Machine is launched automatically. The whale image in the notification area indicates that Docker is running, and accessible from a terminal.
- If you have installed Docker Toolbox then there are 2 ways to create docker machine locally.
- By double clicking on the docker Quick Start Terminal icon on your desktop.
- Using docker-machine CLI “create” command to create new Docker machine.
Since I have Docker Toolbox installed so I will choose the easy way and click on the Quick Start Terminal icon that will open the terminal and launch the Docker machine.

You can run following docker-machine CLI command to check the Docker machine details and note the URL that we will use to open our ReactJS app in the browser.
$ docker-machine ls
You can do much more with docker-machine CLI commands like create, kill, start, stop Docker machine and much more but that is not in scope for this article however you can check-out docker.com for complete documentation on docker-machine CLI and also docker CLI as well.
Since now our Docker setup is up and running now we will focus on creating Dockerfile for our ReactJS app.
Create Dockerfile
Now in the terminal change directory to your ReactJS app folder and create a file name “Dockerfile” without any file extension using any dev editor like VS Code or just use Notepad.
Write following instructions in the Dockerfile and save it.
# Step 1
FROM node:10-alpine as build-step
RUN mkdir /app
WORKDIR /app
COPY package.json /app
RUN npm install
COPY . /app
RUN npm run build

# Stage 2
FROM nginx:1.17.1-alpine
COPY --from=build-step /app/build /usr/share/nginx/html
Explanation
- In Stage 1 we are copying our app code in the “app” folder and installing app dependencies from package.json file and creating production build using Node image.
- In the Stage 2 we are using nginx server image to create nginx server and deploy our app on it by copying build items from /app/build folder to nginx server at /usr/share/nginx/html location.
Create .dockerignore file
Although it’s not necessary to have this file but it’s a good practice to have it since it can speed up image build process and also keep the image lean by excluding the unnecessary code from the Docker build context so that it doesn’t get into the image.
So just the way we created Dockerfile at the same location we create .dockerignore file and add following items that we don’t want to be copied into our docker image.
/node_modules
/build
.git
*.md
.gitignore
Create Docker Image
Now run Docker build command to build Docker image of our app using Dockerfile that we have just created.
Note that I have given sanjaysaini2000/react-app as name to my Docker image but you must replace it with the name you want to give to your app’s Docker image.
Also note that image name must be followed by the dot which means that the path of the Docker build context and Dockerfile is the current folder.
$ docker build -t sanjaysaini2000/react-app .
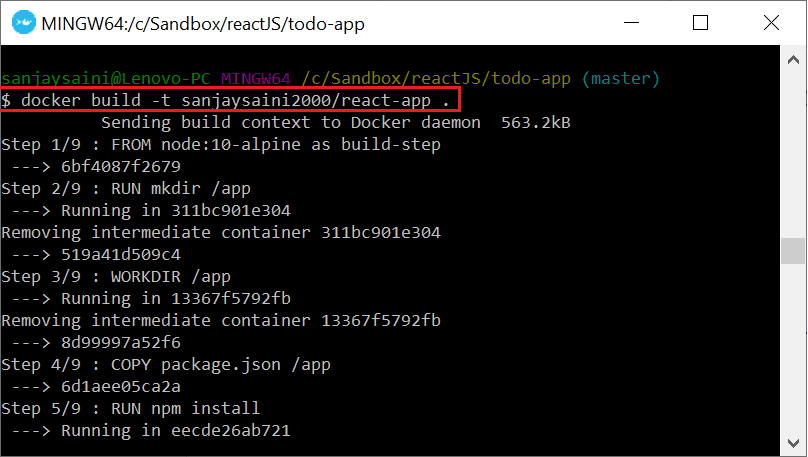
This process will take 1-2 minutes to complete and at the end you will get successful message with image tag name.

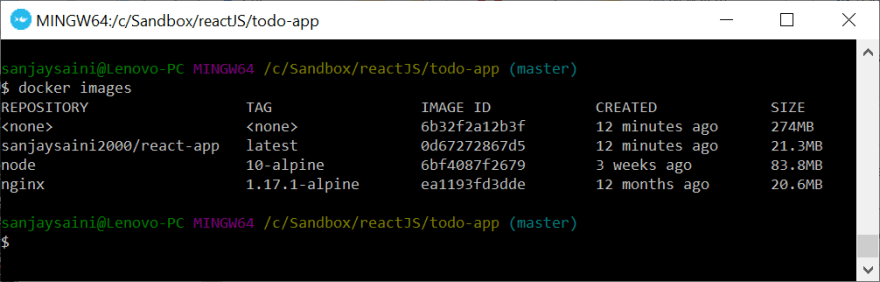
You can run following Docker command to list the images created along with your ReactJS app image. You will also find node and nginx images that we used to create our app image and an intermediate image . However these images are not required and can be deleted.
$ docker images
Run Docker Container
Finally run the following command in the terminal to run your ReactJS Todo App in the Docker container and make sure to replace sanjaysaini2000/react-app with your image name in this command.
$ docker run -d -it -p 80:80/tcp --name react-app sanjaysaini2000/react-app:latest
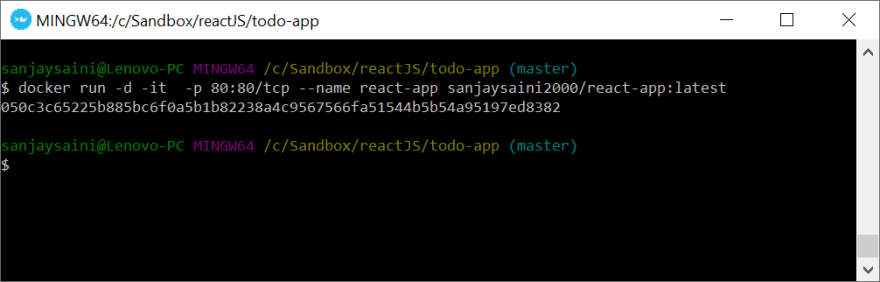
Basically, we want to create and run an interactive container in the background so we have used options –d and –it with the Docker run command. Since app in the container is available at port 80 so we used –p option and map the container port to the external host port using 80:80/tcp and name our container using –name option to react-app followed by the image name.
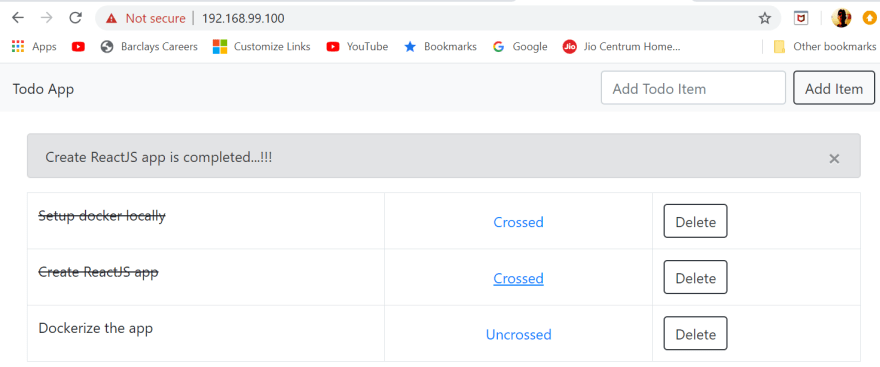
Now open the browser and type URL http://<docker machine url>:80 in the address bar.
In my case it’s http://192.168.99.100:80
Congratulation…you have successfully dockerize and hosted ReactJS app in a Docker container.
This Docker image is also available at my Docker Hub registry as well. So if you don’t want to go through above process and only interested in test running this ReactJS app in the Docker container then You can get it from my react-app repository at Docker Hub registry.
Keep reading and learning…Cheers!!!
The post How to dockerize ReactJS App? appeared first on Sanjay Saini’s Tech World.

Top comments (0)