
Did you know there are 8.93 million apps worldwide? Of those, 3.553 million are on the Google Play Store, and 1.642 million are on the Apple App Store.
Last year, there were around 250 million app downloads daily. With so many apps vying for attention, creating the perfect one requires a deep understanding of the programming language and its intricacies.
While languages like Swift and Kotlin are popular choices for native app development, Python offers a compelling cross-platform solution with the Kivy framework. Kivy allows you to create native-like applications for desktop, mobile, and even embedded devices, all while leveraging Python's simplicity and power.
Let's get started.

Check out this article: Building a Simple Spy Camera with Python
Setting Up the Development Environment
Before diving into Kivy, you must ensure your development environment is properly configured. Follow these steps:
- Install Python
Kivy requires Python to be installed on your system. Using Python 3.12 or later is recommended, as earlier versions may lack some necessary features. You can download the latest version of Python from the official website.

- Set up a Virtual Environment (Optional but Recommended)
It's a good practice to work within a virtual environment to isolate your project dependencies from other Python projects on your system. You can create a virtual environment using Python's built-in venv module or the virtualenv package.
For explanation, I will be using VScode, and you can download and install it from here.

Using venv
- Open your terminal or command prompt.
Navigate to the directory where you want to create your project.

-
Run the following command to create a new virtual environment.
python -m venv myenv

This will create a new directory called myenv containing the virtual environment.
- Activate the virtual environment:
- On Windows, run:
myenv\Scripts\activate - On macOS or Linux, run:
source myenv/bin/activate
- On Windows, run:

Your terminal should now show the name of the activated virtual environment.

Data mining is the future and you don’t know anything about it then check out this guide Scraping Websites With Python Scrapy Spiders
Using virtualenv
- If you don't have
virtualenvinstalled, you can install it using pip:pip install virtualenv - Navigate to the directory where you want to create your project.
-
Run the following command to create a new virtual environment:
virtualenv myenv
-
Activate the virtual environment:
- On Windows, run:
myenv\Scripts\activate - On macOS or Linux, run:
source myenv/bin/activate
- On Windows, run:
Note you can use either Virtualenv or venv
Install Kivy
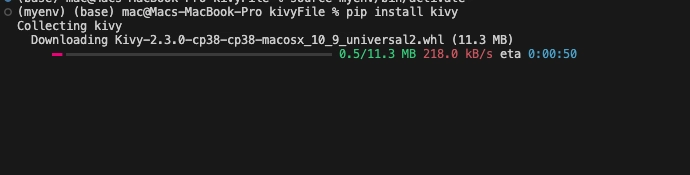
With your virtual environment activated, you can now install Kivy using pip:
pip install kivy
This command will install the latest version of Kivy and its dependencies.
Understanding Kivy's Architecture
Kivy follows a specific structure that keeps the user interface (UI) code separate from the application logic code. This separation makes it easier to manage and maintain your app as it grows in complexity.
Kivy uses two main components to achieve this separation:
Python Code The Python code is where you write the logic for your application. This includes processing user input, manipulating data, and controlling the flow of your program. Think of this as the "brain" of your app, where all the behind-the-scenes work happens.
-
Kivy Language (KV) Files The KV files define the visual elements of your app's user interface. This includes buttons, labels, and text inputs and how they are arranged on the screen. KV files use a special syntax that makes it easy to describe the UI components without writing much Python code.
Creating Your First Kivy App
Let's start with a simple "Hello, World!" app to get a feel for Kivy's structure:
-
Create a new Python file, e.g.,
main.py, and add the following code:from kivy.app import App
from kivy.uix.label import Labelclass HelloApp(App):
def build(self):
return Label(text='Scofield, World!')if name == 'main':
HelloApp().run()
Save the file and run it with Python: python main.py
You should see a window with the "Hello, World!" text displayed.

from kivy.app import App
from kivy.uix.label import Label
In the code above, we import the App and Label . In this case, we are importing the App class from the kivy.app module, and the Label class from the kivy.uix.label module. App is a class that represents our Kivy application, and Label is a widget (a user interface element) that displays text on the screen.
class HelloApp(App):
This line defines a new class called HelloApp which inherits from the App class we imported earlier. In Python, classes are like blueprints for creating objects. By inheriting from App, our HelloApp class will have all the functionality of a Kivy application.
def build(self):
    return Label(text='Scofield, World!')
This is a method (a function inside a class) called build. Kivy expects every app to have a build method that returns the root widget of the user interface. We are returning a Label widget with the text "Scofield, World!". This label will be displayed on the screen when we run our app.
if __name__ == '__main__':
    HelloApp().run()
This common Python idiom checks if the script is being run directly (not imported as a module). If that's the case, it creates an instance of our HelloApp class and calls the run() method on that instance.
The run() method is inherited from the App class and is responsible for starting the Kivy event loop, which keeps the application running and handles user input and other events.

Block website from disturbing your work time: Build A Website Blocker App With Python
Building User Interfaces with Kivy Language
While you can define your UI entirely in Python code, using the Kivy Language (KV) is generally preferred for better separation of concerns and code organization. KV files use a declarative syntax to define the UI elements and their properties.
- Create a new file called
hello.kvin the same directory asmain.py. -
Add the following code to
hello.kv:Label:
text: 'Hello, World!'

Modify main.py to load the KV file:
from kivy.app import App
from kivy.lang import Builder

kv = Builder.load_file('hello.kv')

class HelloApp(App):
    def build(self):
        return kv

if __name__ == '__main__':
    HelloApp().run()
When you run main.py, Kivy will load the UI from the hello.kv file.

Adding Widgets and Layouts
Kivy provides rich widgets and layouts for building complex user interfaces. Widgets are individual UI elements like buttons, labels, and text inputs, while layouts manage the positioning and arrangement of these widgets.
-
Create a new file called
button.kvand add the following code.BoxLayout:
orientation: 'vertical'
Button:
text: 'Click Me'
on_press: app.button_pressed() -
In
main.py, add abutton_pressedmethod to theHelloAppclass:from kivy.app import App
from kivy.lang import Builderkv = Builder.load_file('button.kv')
class HelloApp(App):
def build(self):
return kvdef button_pressed(self): print('Button pressed!')if name == 'main':
HelloApp().run()
When you run main.py and click the button, you should see "Button pressed!" printed in your terminal or console.


Handling User Input and Events
Kivy provides a robust event system that allows you to handle user input and other events within your application. This is crucial for creating interactive and responsive applications.
-
Modify
button.kvto include aTextInputwidget.BoxLayout:
orientation: 'vertical'
TextInput:
id: text_input
Button:
text: 'Click Me'
on_press: app.button_pressed(text_input.text) -
Update the
button_pressedmethod inmain.pyto take the text from theTextInputwidget.def button_pressed(self, text):
print(f'You entered: {text}')

Now, when you run the app, type some text in the TextInput widget, and click the button, you should see the entered text printed in your terminal or console.

Packaging and Deploying Your App
Once you've built your Kivy application, you must package it for deployment on various platforms. Kivy provides tools and documentation to help you package your app for desktop (Windows, macOS, Linux), mobile (Android, iOS), and even embedded devices (Raspberry Pi).
Packaging for Android
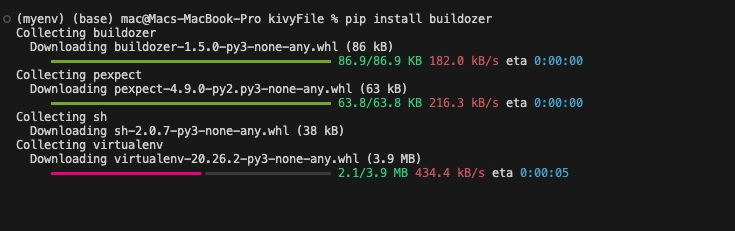
To package your app for Android, you'll need to install the buildozer tool.
pip install buildozer
Then, follow these steps:
Create a new directory for your project and navigate to it.

Run
buildozer initto create a configuration file (buildozer.spec).

Open the
buildozer.spec and customize the configuration file as needed (e.g., set the app title, package name, etc.). For starters, you can leave the file with the default name,but keep in mind the default name.

Copy your Kivy application files (
.pyand.kv) to the project directory.

Run
buildozer android debugto build a debug version of your app.
You might come across a missing dependency called cython. Install it using pip
pip install cython

After the build process completes, you'll find an .apk file in the bin directory. You can transfer this file to your Android device and install it.
![]()
Best Practices and Tips
As with any development project, following best practices and adhering to industry standards is crucial for building high-quality, maintainable, secure applications. Here are some tips and best practices to keep in mind when working with Kivy:
Separation of Concerns: Kivy encourages separating UI and application logic by using KV files for UI definition and Python code for application logic. Maintaining this separation improves code organization and maintainability.
Code Style and Conventions: Follow the PEP 8 style guide for Python code and Kivy's recommended conventions for KV files to ensure consistent and readable code across your project.
Documentation and Comments: Document your code with clear and concise comments, especially for non-trivial or complex sections. This will make it easier for others (or your future self) to understand and maintain the codebase.
Testing: Implement unit and integration tests to ensure your application's functionality and catch regressions early. Kivy provides testing utilities and frameworks like Pytest and Unittest to help with this.
Performance Optimization: Kivy applications can be resource-intensive, especially on mobile devices. Keep an eye on performance bottlenecks and optimize your code accordingly. Techniques like caching, lazy loading, and GPU acceleration can help improve performance.
Responsive Design: Since Kivy applications can run on various screen sizes and resolutions, it's essential to design your UI with responsiveness in mind. Utilize Kivy's layout and widget properties to ensure your app looks and functions correctly on different devices.
Security Considerations: When developing applications that handle sensitive data or have network connectivity, it's crucial to implement proper security measures. Follow best practices for secure coding, data encryption, and communication protocols.
Community Involvement: Kivy has an active and vibrant community. Engage with other developers, contribute to the project, and stay up-to-date with the latest developments and best practices.
Third-Party Libraries and Plugins: Kivy has a rich ecosystem of third-party libraries and plugins that can extend its functionality. Explore and leverage these resources when appropriate, but ensure they are well-maintained and secure.
-
Continuous Learning: Mobile app development is a rapidly evolving field. Stay up-to-date with the latest trends, technologies, and best practices by reading documentation, attending conferences, and participating in online communities.
Conclusion
In this comprehensive guide, we've covered the essential steps for getting started with mobile app development using Python and the Kivy framework. From setting up your development environment to building user interfaces, handling user input, and packaging your app for various platforms, you have a solid foundation to begin your journey.
Remember, the best way to learn is by practicing and experimenting. Don't be afraid to explore Kivy's features, create your projects, and engage with the vibrant Kivy community. With dedication and persistence, you'll be well on your way to becoming proficient in cross-platform mobile app development with Python and Kivy.
Resources
As you continue your journey with Kivy and mobile app development, here are some additional resources to help you expand your knowledge:

Top comments (2)
It's been quite sometime since I've used Kivy but making Android apps in it used to be pretty bad. Has it become more stable and performant over time?
A lot of work has gone into it; I think the team saw the need to put in more work, and I am really proud of what they did as a Python lover myself.