
Today, I’m sharing how I built my first machine learning project after restarting my tech journey — and I’ll walk you through it step-by-step so even beginners can follow along!
We’ll build a simple Iris Flower Classification project using Python.
Let’s dive in! 🚀
Step 1: Setting Up the Project
First, I created a clean folder structure like this:
iris-classification/
│
├── data/
├── notebooks/
├── src/
├── README.md
├── requirements.txt
└── .gitignore
✅ data/ for datasets
✅ notebooks/ for Jupyter notebooks
✅ src/ for Python scripts
✅ README.md to explain the project
✅ requirements.txt to list all needed Python packages
I highly recommend starting with good organization — it makes everything easier later!
Step 2: Loading and Exploring the Data
I used the famous Iris Dataset.
import pandas as pd

df = pd.read_csv('data/iris.csv')
print(df.head())
Then, I checked basic information:
df.info()
df.describe()
✅ Tip: Always look at your data first before modeling!
Step 3: Visualizing the Data
I made some simple visualizations to understand the features better.
import seaborn as sns
import matplotlib.pyplot as plt
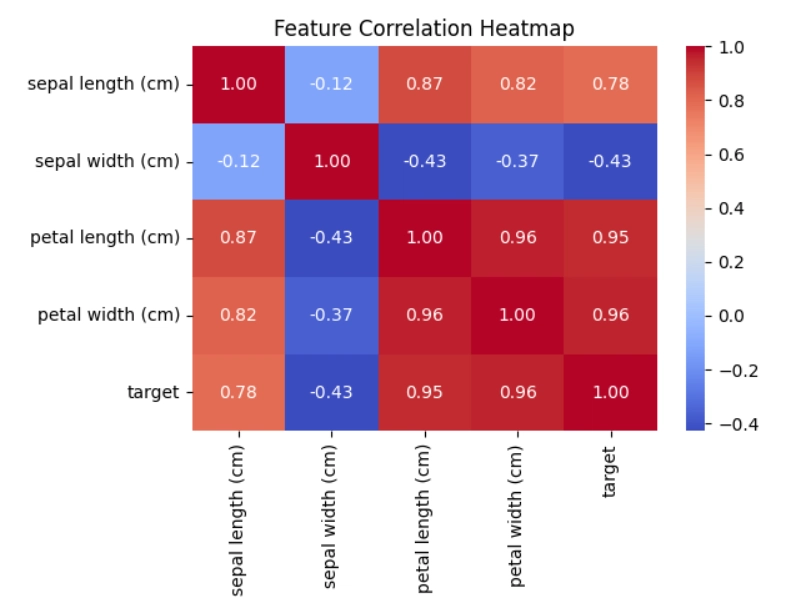
Correlation heatmap
plt.figure(figsize=(10,8))
sns.heatmap(df.corr(), annot=True, cmap='coolwarm')
plt.title('Feature Correlation Heatmap')
plt.show()
Pairplot
import seaborn as sns
import matplotlib.pyplot as plt

# Create a smaller pairplot using the correct label
g = sns.pairplot(df, hue='target', height=2.3)

# Add a title
g.fig.suptitle('Pairplot of Iris Features', y=1.03)

# Clean layout
plt.tight_layout()

# Save if needed
plt.savefig('pairplot.png', dpi=300, bbox_inches='tight')

plt.show()

✅ Tip: Visualization helps you see patterns that numbers alone can't show!
Step 4: Preparing the Data
I separated features (X) and labels (y).
X = df.drop('species', axis=1)
y = df['species']
Then I split the data:
from sklearn.model_selection import train_test_split

X_train, X_test, y_train, y_test = train_test_split(X, y, test_size=0.2, random_state=42)
✅ Tip: Always split your data — training and testing on the same data gives fake results.
Step 5: Organizing and Pushing to GitHub
Finally, I learned to push my project properly to GitHub:
git init
git add .
git commit -m "First ML project: Iris Classification"
git branch -M main
git remote add origin https://github.com/ShamantaSristy/iris-classification.git
git push -u origin main
✅ Tip: Save your work online — GitHub shows your growth and makes you look professional!
🎉 What I Learned
💡How to structure and organize a machine learning project
💡How to analyze, visualize, and prepare data
💡How to push and maintain a clean GitHub repository
👉 My full project is here:
🔗 Iris Flower Classification GitHub Repo
If you're also starting your journey, trust me — you can do this! 🌱
One small project at a time, and you’ll get better every day.
See you in the next post, where I'll tackle my next project: the Titanic Survival Prediction 🚢❓

Top comments (3)
Welcome back to Dev! Nice write up. Clear, concise and well structured. Keep at it! Titanic Survival Prediction sounds like an interesting topic.
Thank you so much for the kind words and encouragement! 🌻
Pls visit my GitHub profile at:
github.com/Debottam1234567890
look at my scam detectors and dream insights projects
hope u have a good time!!
Tip: You can learn a lot!!!