
Welcome to Part 2 of our series, 'Classic Editor CI/CD Walkthrough.' Following the successful launch of our web app using Azure Web App Service in the previous part, we'll now delve into creating a classic editor pipeline. Get ready to build our first job in Azure DevOps as we explore the intricacies of the classic editor in this installment.
=================================================================
*Note: *
When you are doing practical work, don't delete anything because our Azure DevOps series relies on continuity between each part. Ensure that you are not cleaning your workspace. Additionally, don't worry about charges, as our account is on a free trial. We are covering beginners or basic Azure DevOps, so our project is not large. If a bill is generated, it will not go higher. For some knowledge, you can budget or be ready to invest some money.
=================================================================
-> So, let's get started.
-> Now, navigate to 'Azure DevOps' and enter the 'Pipeline' section. Our first step is to create a build pipeline, so click on 'Create Pipeline'.

-> After clicking on 'Create Pipeline,' you'll be presented with various options for building pipelines. For our initial steps, let's opt for the 'Classic Editor' as mentioned earlier.

-> Keep the options as default, and ensure you've selected the correct one, as shown below, then proceed by clicking 'Continue.'

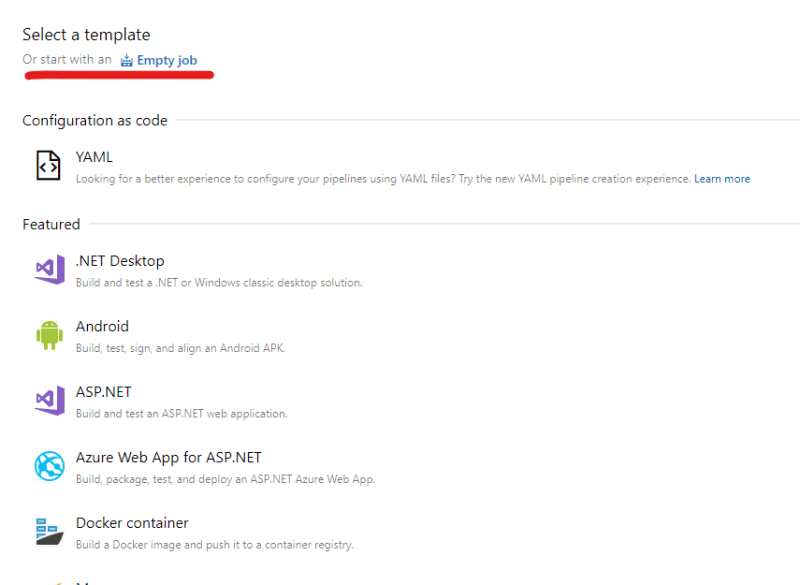
-> Skip the template selection and choose 'Empty Job' on the next window, as we want to customize our steps.
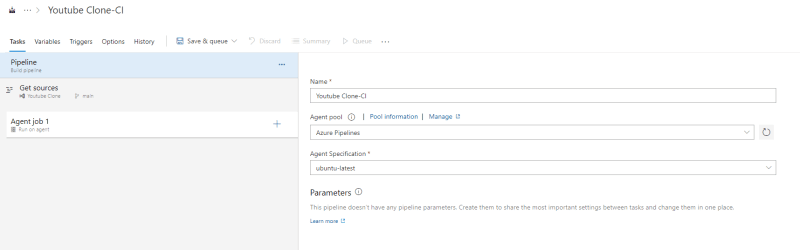
-> Provide a name for the pipeline and choose an agent pool. The agent pool represents the underlying infrastructure where your code will be built. Also, select the operating system for the build.
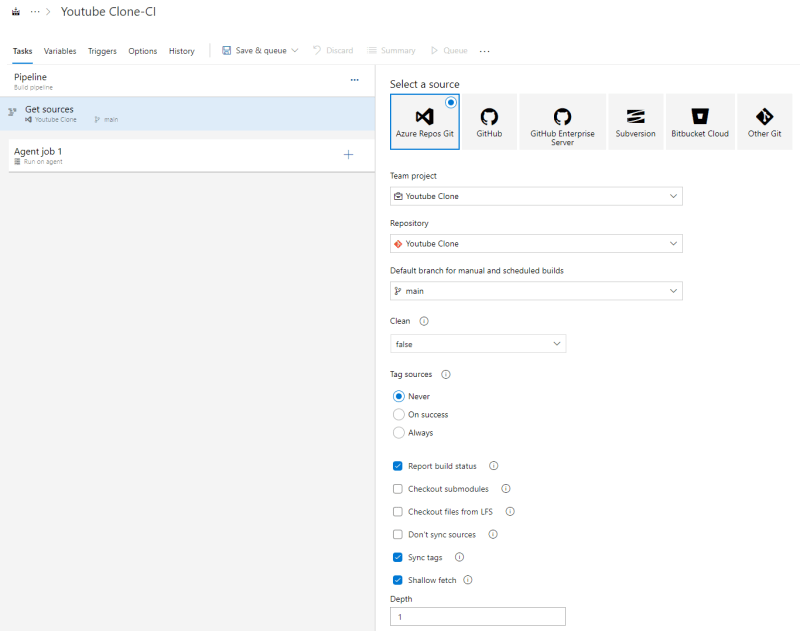
-> In the 'Get Sources' step, the pipeline will fetch or download your application code or pipeline code (YAML). Keep the options as the default settings.
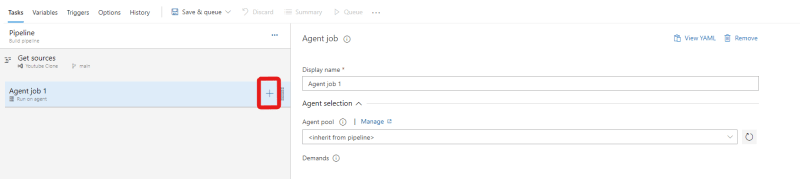
-> After checking out the code, the next step is to run the application on the agent. You can select the agent at different levels such as build, test, or deploy. Click on the '+' sign to add additional steps.
-> After opening it, search for 'npm' because, after checking out, our first step is to run 'npm install'. After searching, click on 'Add'.

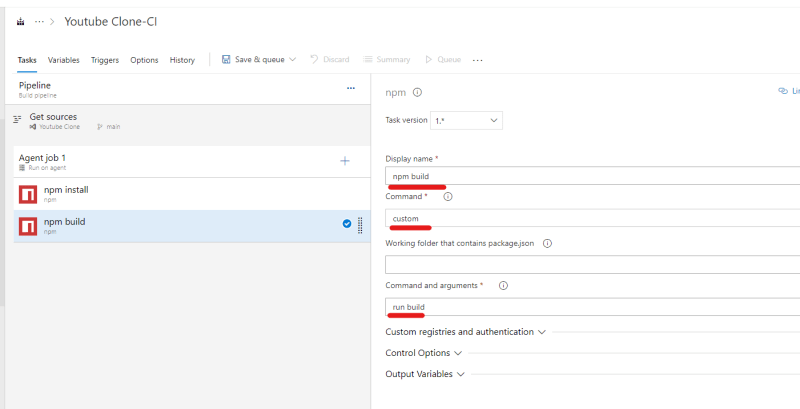
-> After 'npm install', the next step will be 'npm build'. For that, click on the '+' button again, search for 'npm', and add it.
-> After clicking on 'npm', another window will open where you need to define the command to run. Select 'Custom' as the command, and the command & argument should be 'run build'.
-> Now, for the next step, which is publishing the build for use in the release pipeline or later stages, click on '+', and search for 'Publish Artifact: drop'.
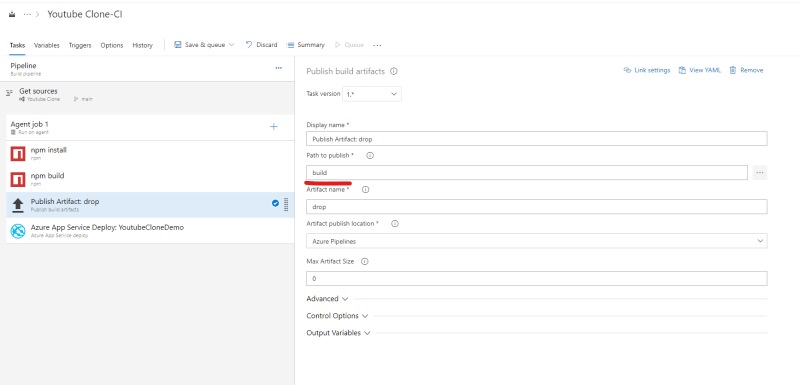
-> If you notice, I added '/build' in the location because in Node.js, after building the code, it is stored in the 'Build' folder by default. Keep the other options as default.
-> Now, the next step is the 'Application Deployment.' Within this step, we will create the entire CI/CD pipeline, and later on, we will also create a release pipeline.
-> Now, click again on “+” and search for 'Azure App Service Deploy.' Inside it, select 'Azure subscription.' When your 'Azure Portal' is connected to 'Azure DevOps,' it requires a service connection for authentication. This authentication is provided by a service principal, which is an entity with specific permissions. You create a service principal in the Azure Portal, assign some permissions to it, and then use that service principal to create the service connection in Azure DevOps.
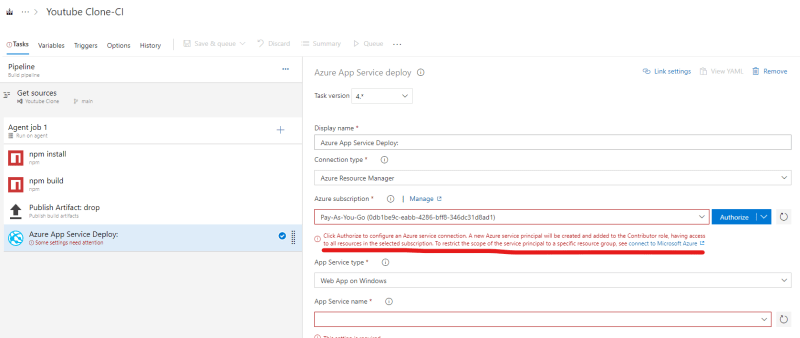
-> Now, during the configuration of the subscription, it will ask to authorize the service connection. Click on 'Authorize,' and a window will appear asking for your Microsoft ID. Log in with the same email used for Azure Portal. After authorizing, the error will be resolved.

-> Next, in 'App Service type,' select 'Web app on Linux.' Follow the instructions in the image below for further configuration.
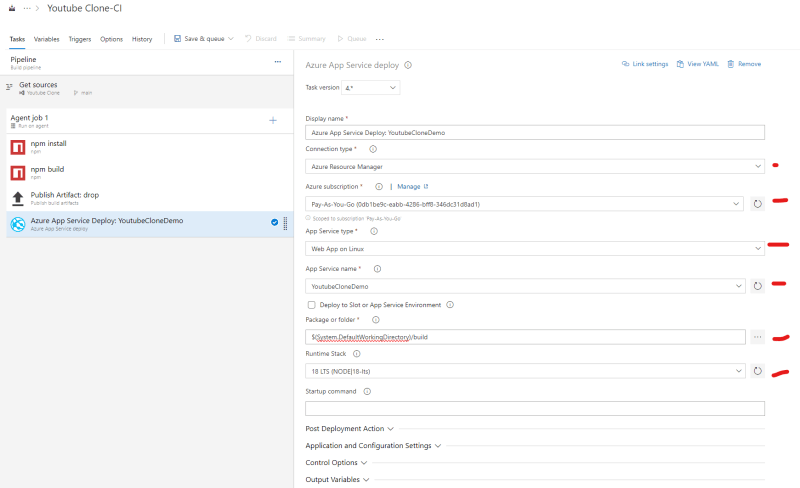
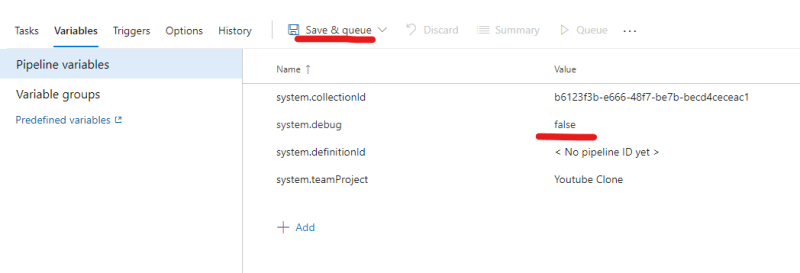
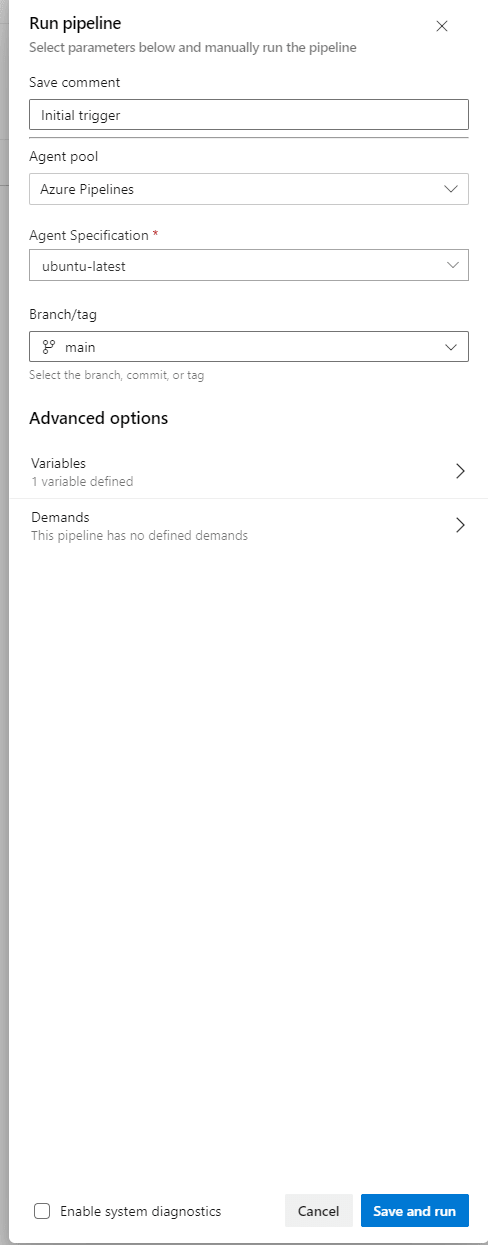
-> And that concludes the job configuration. We've successfully created the pipeline, added various stages, and defined tasks within those stages. Additionally, in the 'Variables' tab, you'll find the 'Debug log' option, which can be set to 'true' for more detailed logs during pipeline execution. However, I haven't enabled it. Don't forget to 'Save & Queue' the pipeline, saving your changes and triggering its execution.
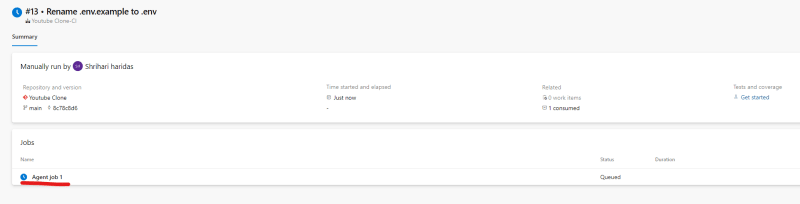
-> After saving and queuing the pipeline, you'll see it in the pipeline list. Click on 'Agent 1' to view the logs and monitor the execution progress.
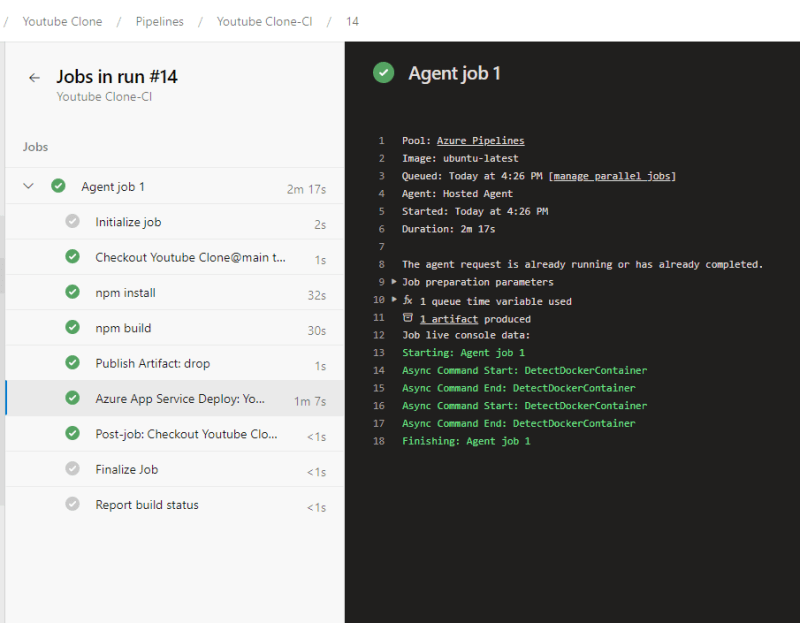
-> Now, you can observe that our pipeline has successfully completed.
=================================================================
Summary:
In conclusion, we successfully explored and implemented a classic editor pipeline in Azure DevOps. We created a custom pipeline with various stages and tasks, incorporating key steps such as npm install, npm build, and publishing artifacts. The pipeline was configured to deploy a Node.js application to an Azure App Service. With each step explained in detail, we now have a foundational understanding of CI/CD processes using Azure DevOps.
=================================================================
If you have any doubts, questions, or recommendations, feel free to drop a comment. Follow me for updates and happy learning! :)

Top comments (0)