Integrating push notifications can significantly enhance the user experience in your mobile app by keeping users engaged and informed. Recently, I had to integrate Firebase Cloud Messaging (FCM) push notifications into one of my React Native apps. However, I struggled to find a comprehensive resource that provided a clear, step-by-step guide for a bare React Native project—most tutorials focused on Expo. In this article, I'll share my experience and provide a detailed guide to help you seamlessly implement FCM push notifications in your bare React Native app.
This article is divided into two sections: the first covers setting up FCM, and the second focuses on integrating it into your code. Let's dive in and get started!
Section 1: Creating and setting up FCM Project.
Step 1: Go to Firebase Console and create a new project.
Step 2: Once the project is created then click on the android icon highlighted and follow along.

Step 3: Here you need to enter the package name which you can find at the following path: android/app/src/main/java/com/'your_project_name'/MainApplication.kt

Step 4: In the next step you need to download the google-services.json file and place it at the following path: android/app

Step 5: Now we need to make couple of modification in some files to add the firebaseSDK.
- First open the file in path:
android/build.gradleand add one more line in the dependencies ```
classpath("com.google.gms:google-services:4.4.2")
* Second open the file in path: `android/app/build.gradle` and the following line on the top where plugins are added
apply plugin: "com.google.gms.google-services"
, now scroll down to the end of that file where in the dependencies object you need to add these lines:
implementation platform('com.google.firebase:firebase-bom:33.1.1')
implementation 'com.google.firebase:firebase-analytics'
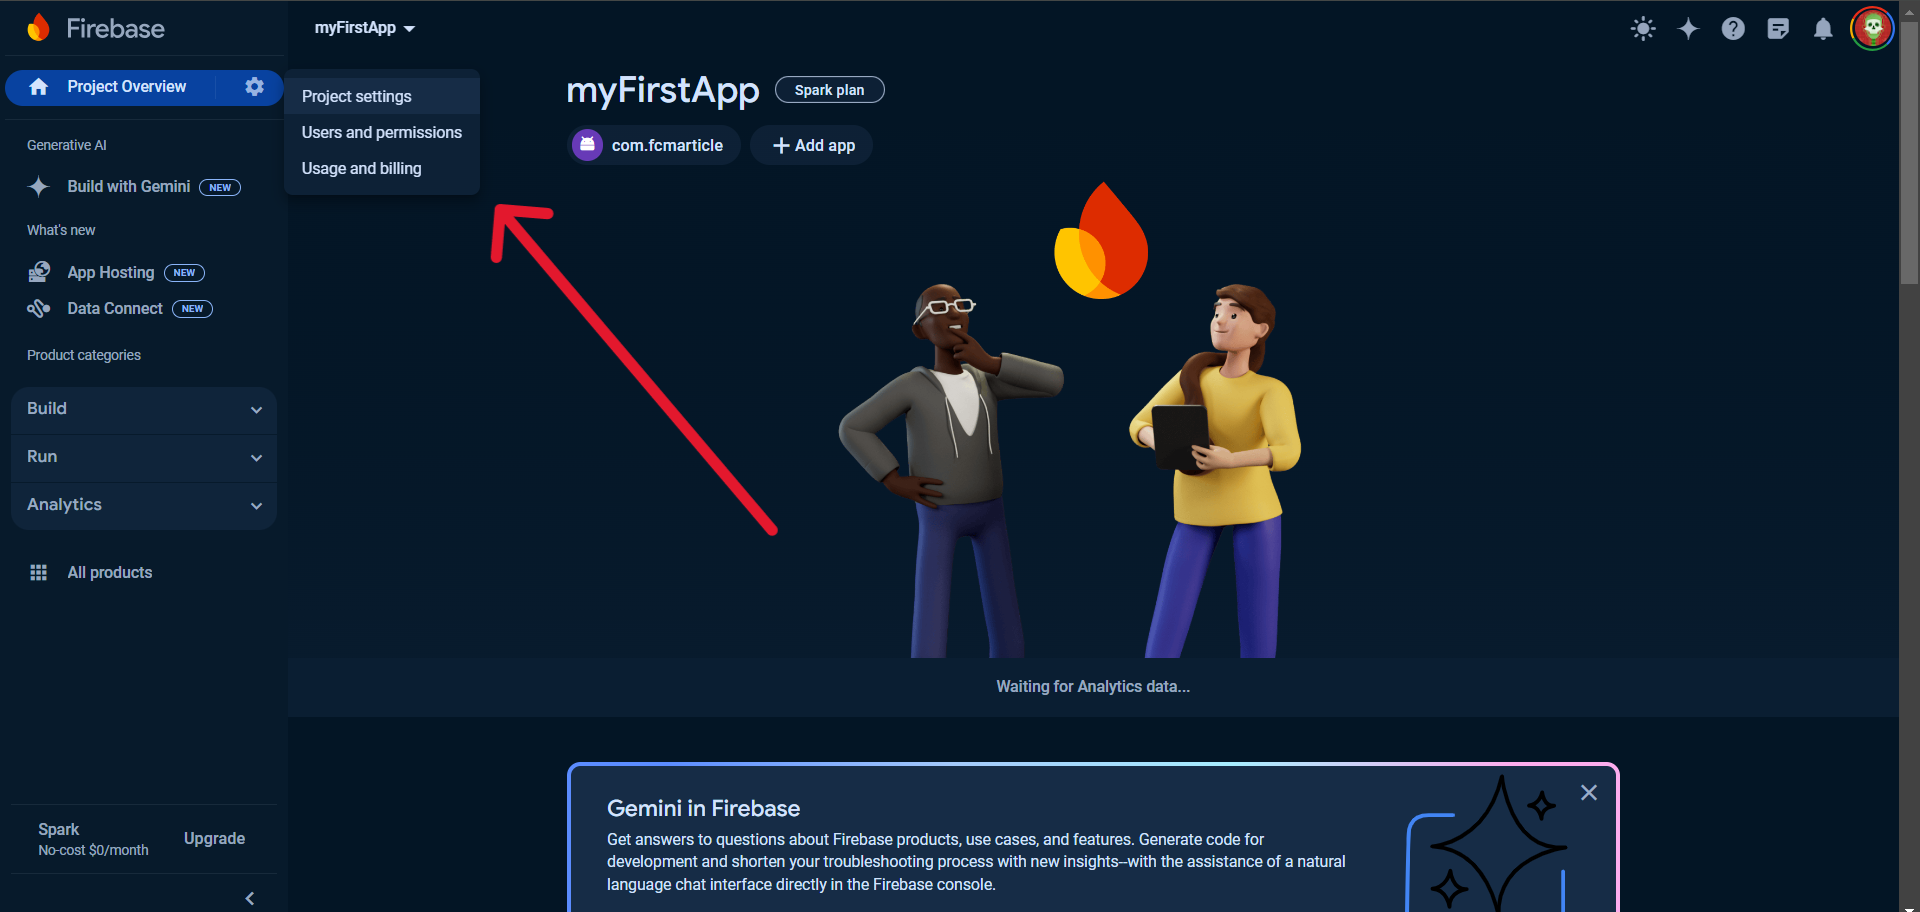
**Step 6:** After making these changes you can go back to the firebase console and finish the setup and then navigate to the project settings page

** Now we are done with the Firebase console setup and now we will learn how can we implement the functionality of how to handle background as well as foreground notifications**
## Section 2: Implementing the notification handling functionality in code.
**Step 1:** First we need to install the following packages:
npm install @react-native-firebase/app
npm install @react-native-firebase/messaging
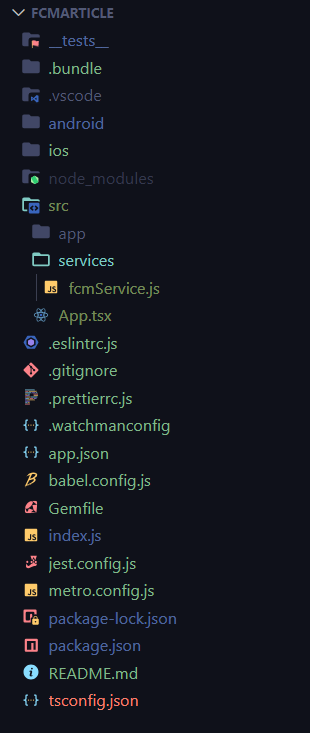
**Step 2:** Now we need to create a service file where we will be writing the code to handle notifications, I am following a folder structure so the way I have created it is by creating a new folder called src in root directory and then inside that I created another folder called service in which I have created a file called `fcmService.js` as you can see below:

**Step 3:** Copy and paste the code given below in `fcmService.js`:
```js
import messaging from '@react-native-firebase/messaging';
import {Alert} from 'react-native';
async function requestUserPermission() {
const authStatus = await messaging().requestPermission();
const enabled =
authStatus === messaging.AuthorizationStatus.AUTHORIZED ||
authStatus === messaging.AuthorizationStatus.PROVISIONAL;
if (enabled) {
console.log('Authorization status:', authStatus);
}
}
export async function getFCMToken() {
const fcmToken = await messaging().getToken();
if (fcmToken) {
console.log(fcmToken);
} else {
console.log('Failed', 'No token received');
}
}
// Foreground Notifications: When the application is opened and in view.
messaging().onMessage(async remoteMessage => {
Alert.alert('A new FCM Message arrived!!!', JSON.stringify(remoteMessage));
});
// Background Notifications: When the application is open, however in the background (minimised).
messaging().setBackgroundMessageHandler(async remoteMessage => {
console.log('Message handled in the background!!!', remoteMessage);
});
export default requestUserPermission;
Step 4: Import both the methods requestUserPermission & getFCMToken in App.tsx and call the methods in the useEffect along with the initialNotification method like shown below:
Step 5: Once all this setup is done you can run the command npxreact-native run-android` in your terminal which will launch the android emulator. Now we will see how can we test out the notification using FCM console.
Step 6: Go to All Products in Firebase console in your project

Step 7 Now scroll down to the Run section and click on Cloud Messaging

Step 8 Now click on Create your first campaign and then select
Firebase Notification messages

Step 9 Now we are at the final step where we need to define what notification we need to send and on which device. Now fill the info like Notification Title & Notification Text you can optionally also add the image url then the image will also appear in the notification. After filling up the info click on Send Test Message on the right, now it will ask for FCM registration token. If you check the code above in the getFCMToken method we are doing console.log() after fetching the token. So the token should already be logged in your terminal like shown below:

Step 10: Now copy the token from terminal and paste it in the FCM Token field and add it then click the test button. If your app is in the foreground then you should see a notification like below:

Step 11: If the app is minimized and you send a push notification then you should be able to see the notification on the top bar like shown below:

*Note: If the background notification is not showing up in your app then you just need to go to the settings and then apps and turn on the notification permission like shown below

Congratulations! You have successfully integrated Firebase Cloud Messaging (FCM) push notifications into your React Native app. By following the steps outlined in this guide, you should now be able to send and receive push notifications, keeping your users engaged and informed.*
Thank you for reading, and I hope you found this article helpful. This is my first article, so I apologize for any mistakes or oversights. If you have any questions or feedback, please feel free to reach out. Happy coding!


Top comments (0)