Introduction
There are many (official) AWS guides out there. I've browsed through some of them, but I'm still missing some details when it comes to using AWS. So, if you're looking for an easy (and thorough) way to build and manage APIs on AWS for your next projects, this article is for you!
You will learn how to:
- Use some AWS services (such as DynamoDB, Lambda, and API Gateway).
- Access data from a (DynamoDB) database using JavaScript (Node.js).
- Create a RESTful API using the AWS Management Console.
This article is NOT for people who are:
- AWS experts
- Attempting to build production APIs
Getting started with AWS services
- Create an AWS account. You can follow the instructions here.
- Navigate to the AWS Management Console.
- Learn the basics:
- DynamoDB: a NoSQL database
- Lambda: a serverless computing platform for running code without managing servers
- API Gateway: a service for creating (RESTful) APIs to make calls to Lambda
- The relationship between these services is as follows (HTTP API is created by API Gateway):

https://docs.aws.amazon.com/apigateway/latest/developerguide/http-api-dynamo-db.html
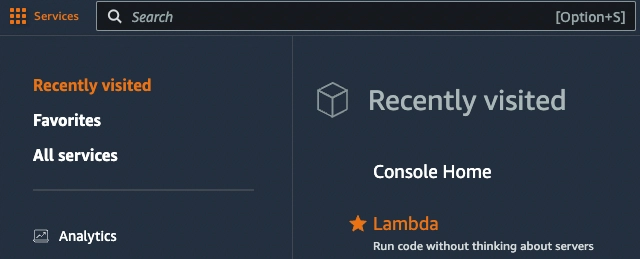
- (Optional) "Star" services for easy access. The starred services will then appear.
Step 1: Create a DynamoDB table
- Navigate to the DynamoDB service.
- Click Create table.
- Enter the Table name and Partition key (primary key).
- Click Create table at the bottom.
- Click Tables in the left sidebar to locate the table you created.
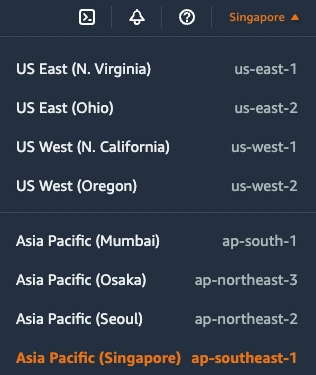
- (Optional) Check the regions in the top right corner if you cannot find a table.
- Click in the created table and click Explore table items.
- At the bottom, you can use Actions to edit/duplicate/delete items or Create item to add new attributes.
Step 2: Create a Lambda function
Create a function
- Navigate to the Lambda service.
- Make sure your region is the same as the one where your DynamoDB is created.
- Click Create function.
- Enter the Function name.
- Select a Runtime (I will use Node.js 18.x in the following steps).
- Under Change default execution role, select Create a new role from AWS policy templates.
- Enter the Role name and select Simple microservice permissions (to interact with DynamoDB).
- Click Create function at the bottom.
Write code in the function
- Under Code source, you can write code in
index.mjs. - Import and use AWS and DynamoDB utilities.
import { DynamoDBClient } from '@aws-sdk/client-dynamodb';
import {
  DynamoDBDocumentClient,
  GetCommand,
  PutCommand,
} from '@aws-sdk/lib-dynamodb';

const client = new DynamoDBClient({});
const dynamo = DynamoDBDocumentClient.from(client);

const tableName = 'your-table-name-in-dynamodb'
- GetCommand and PutCommand are methods to query and add/update DynamoDB items. More detailed methods can be found in this guide.
- Handle the event.
export const handler = async (event) => {
  // Extract values from the event:
  // const authToken = event.queryStringParameters?.authToken ?? null;
  // const requestBody = event.body ? JSON.parse(event.body) : null;

  try {
    // Do something
  } catch (error) {
    console.log(error);
  }
};
- Try to query and add/update DynamoDB items.
try {
    const data = await dynamo.send(
      new GetCommand({
        TableName: tableName,
        Key: { userId }, // Suppose your partition key is userId
      })
    );

    // Your code

    await dynamo.send(
      new PutCommand({
        TableName: tableName,
        Item: {
          userId,
          // Other attributes in the table,
        },
      })
    );

    // Return something
}
- Put it all together.
import { DynamoDBClient } from '@aws-sdk/client-dynamodb';
import {
  DynamoDBDocumentClient,
  GetCommand,
  PutCommand,
} from '@aws-sdk/lib-dynamodb';

const client = new DynamoDBClient({});
const dynamo = DynamoDBDocumentClient.from(client);

const tableName = 'your-table-name-in-dynamodb'

export const handler = async (event) => {
  // Extract values from the event:
  // const authToken = event.queryStringParameters?.authToken ?? null;
  // const requestBody = event.body ? JSON.parse(event.body) : null;

  try {
    const data = await dynamo.send(
      new GetCommand({
        TableName: tableName,
        Key: { userId }, // Suppose your partition key is userId
      })
    );

    // Your code

    await dynamo.send(
      new PutCommand({
        TableName: tableName,
        Item: {
          userId,
          // Other attributes in the table,
        },
      })
    );

    // Return something
  } catch (error) {
    console.log(error);
  }
};
- Add the required node_modules to your function folder. Or, you can create a Lambda layer so that your node modules can be shared between different Lambda functions. Learn more here.
- Click Deploy when you are finished writing the code.
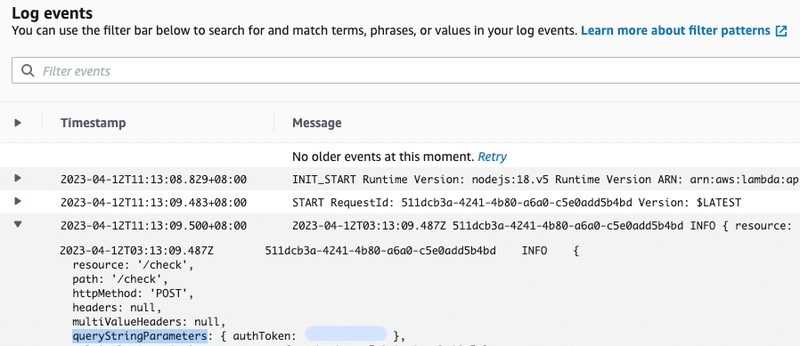
- (Optional) You might be wondering what's in an event and want to console.log it. In that case, you can see the console.logged event in CloudWatch after creating a RESTful API in API Gateway. In CloudWatch, go to Logs > Log groups > your function > Log streams > Click to open a Log stream:
Test your functions
- Click Test.
- Enter the Event name.
- Edit the JSON object in Event JSON and click Save at the bottom.
- Click Test again. The result will appear in the Execution results.
Step 3: Create a RESTful API
- Navigate to the API Gateway service.
- Make sure your region is the same as the one where DynamoDB/Lambda is created.
- Click Create API.
- Locate the REST API and click Build.
- Enter the API name and select Edge optimized in the Endpoint Type field. Leave others as the default and click Create API.
- Click Resources in the left sidebar (the "/" is selected).
- (Optional) From Actions, select Create Resource. Enter the Resource Name and Resource Path, then select Enable API Gateway CORS. Click Create Resource.
- From Actions, select Create Method.
- Select a method (e.g. POST) and select the checkmark.
- Select the Use Lambda Proxy integration checkbox.
- Ensure the Lambda Region is correct and enter the Lambda Function you created.
- Click Save and OK.
- Select Enable CORS from Actions for the method you created. Click Enable CORS and replace existing CORS headers and Yes, replace existing values.
- From Actions, select Deploy API.
- Select [New Stage] in the Deployment stage. Enter the Stage name. Click Deploy.
Step 4: Test your API
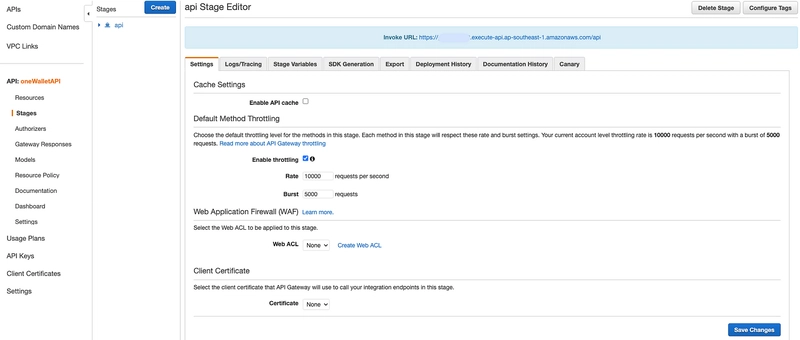
- In the API Gateway service, click the created API and click Stages in the left sidebar.
- Click on the stage created and you will see the Invoke URL.
- You can then use a tool like Postman to test your API.
- (Optional) Alternatively, you can test your API within API Gateway. Click Resources in the left sidebar, then click the API (method) you created. Click TEST (with a small blue lightning bolt). Enter the parameters and click Test again.
- (Optional) Clean up unnecessary tables, functions, and APIs. See Step 8 of this tutorial for more details.
Conclusion
I used the steps above to build my first API in AWS. AWS provides a robust set of tools that make it easy to build, deploy, and manage APIs. By following this guide and using the sample code provided, you can easily set up your own API using DynamoDB, Lambda, and API Gateway in AWS.
It's worth noting that this is just the beginning. There are many other AWS features and services that can be used to enhance your APIs, such as AWS Cognito for user authentication and authorization, AWS S3 for object storage, and AWS CloudFront for content delivery. With these tools and services, you can create a robust and scalable API that can handle millions of requests per day.
I hope this guide has helped you get started building an API in AWS. If you want to see more details about the API I built, you can check out this GitHub repository (each request is a Lambda function).
Resources
- Build a CRUD API with Lambda and DynamoDB: https://docs.aws.amazon.com/apigateway/latest/developerguide/http-api-dynamo-db.html
- How to access a DynamoDB table using the DynamoDB utilities: https://docs.aws.amazon.com/sdk-for-javascript/v3/developer-guide/dynamodb-example-dynamodb-utilities.html
- Deploy your serverless function using Amazon API Gateway: https://aws.amazon.com/getting-started/hands-on/build-web-app-s3-lambda-api-gateway-dynamodb/module-three/
Want to Connect?
If you find this article useful or have any questions,
connect me on LinkedIn (https://www.linkedin.com/in/tingchunw) for more articles.


Top comments (1)
Well put together. Nice work.