A Split Mechanical Keyboard, You Can Build Yourself! 🎅
In the world of Open-Source Ergo Split Keyboards
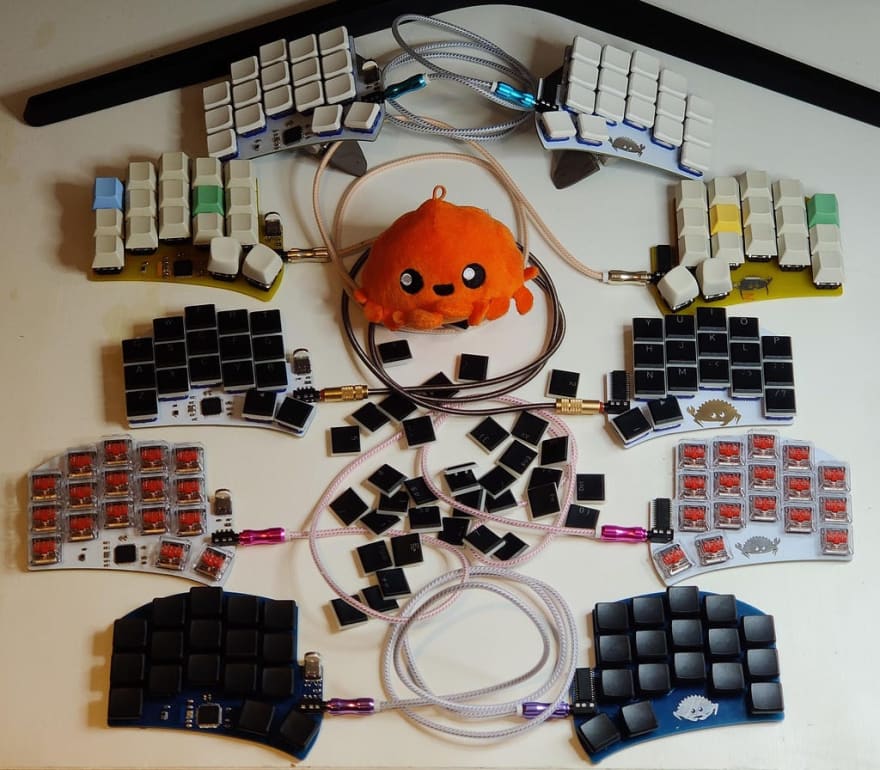
Ferris split keyboard courtesy of Pierre Viseu Chevalier
Since I started working from home, I have been obsessed with creating the most ergonomic workplace for myself. Standing desks, ergonomic stools, etc.
But up until now, nothing I could reasonably build myself. 😢
But a month ago, everything changed. I read about the benefit of split keyboards. A Keyboard cut halfway through in the middle prevents your wrists from tilting inward and relaxing your arms and shoulders.
I discovered a massive community of passionate makers: r/ErgoMechKeyboards , many videos ,and Github repositories with exciting designs to copy and do yourself. ✨
In this Story, I have summarized all the knowledge I have gathered so far and will walk you through creating your Keyboard.
What skills do you need to create one of these beauties?
Quite a lot, actually! It should range from electronic to 3D modeling to soldering and buying stuff. On top of that, it is not an expensive project; it should range from $50 to $150. But if you are passionate or curious about engineering in general, it is an excellent first project as it is accessible by anyone.
The main activities are:
- Designing and Printing a PCB (Printed Circuit Board)
- Buying and Assembling the electronic components
- Designing and manufacturing the casing to protect the electronic and look event cooler 😎.
I) Designing and Printing a PCB
This is what a PCB looks like.
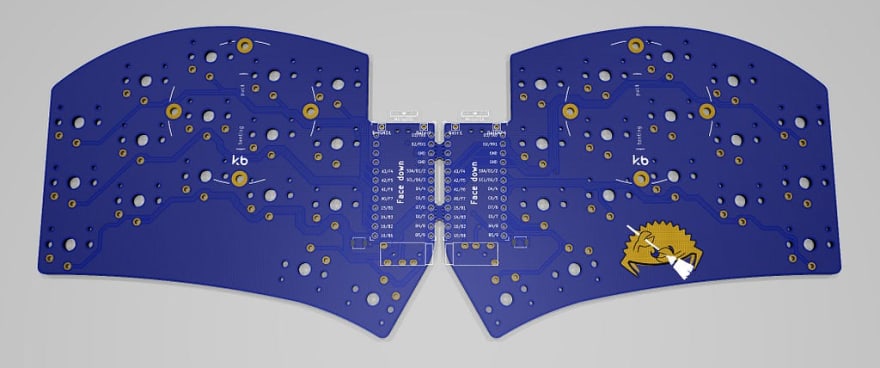
Ferries Sweep PCB courtesy of Pierre Viseu Chevalier, David Barr, Ibnu Daru Aji, Duccio
To create a keyboard, you essentially have two options:
- 1) You create a case and mechanically attach the key switches to the case and solder cables between the switches.
- 2) Print a PCB and solder the keys and other components.
There are several advantages to the second approach. First soldering is much easier; you just have to solder key switches in the sockets created on the board. The board itself is strong enough to hold the keys and make the Keyboard usable without a case. As a result, you can create an ultra-light keyboard and save you some effort in the process of making it for a few $.
I.1) Choosing the layout
The first step is choosing how your Keyboard will look like. How many keys? The spacing between the keys, etc.
Compare existing split keyboard layouts here. As a first step, see what is available and print the layout to get a real feel of the Keyboard.
☑️ Screen and Print keybord layouts from: https://jhelvy.shinyapps.io/splitkbcompare/
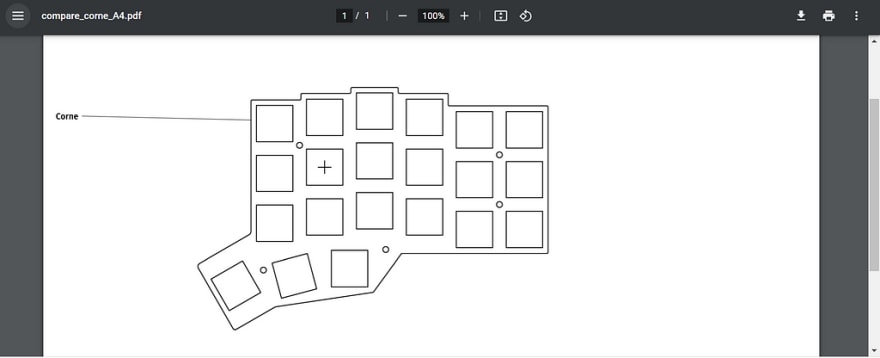
Me printing the layout of a Corne
I'd like you to reflect on the fact that you are most likely only frequently using half of the keys on your Keyboard. A standard keyboard usually has just above 100 keys. You may have noticed that most of those keyboards rarely have more than 50 keys, and this is perfectly fine.
People using split Keyboard type the same way you type on your phone keyboard: At first, you only have the letters, then you press the "?123" symbol so you can type number and some of the symbols; then, if you want more symbols you type the "=<" key.
Ultimately you will program the layout of your Keyboard so you will be able to do whatever you want.
⚠️Not all layout on https://jhelvy.shinyapps.io/splitkbcompare/ are open source, so you won’t be able to get the file for printing the PCB
I.2) Designing the PCB
Once you have set yourself to mind a layout, you can customize it. Search on Google or on Github for the source to get started. Theoretically, you could just download the file and send it to the PCB manufacturing. But why tunning your chance to have a genuinely unique keyboard?
I learned the basics about how to customize a PCB from this video. I highly recommend watching it. But here is a quick summary of what you need.
☑️ You will need a software to edit the PCB such as KiCad: https://www.kicad.org
For the sake of this example, I downloaded the PCB Gerber File for Sweepv2.1.

Sweepv2.1 in KiCad Gerber Viewer
❗️️️️❗️ ️️️️️If you want to have a quike look to a Gerber file archive you can use this Online Gerber Viewer (I found it much clearer to understand the different layers)
PCB manufacturers literally use Gerber Files to print your order layer bay layer. See the different layers on the right side. In the archive, you open containers with one file per layer.

- *.xln is the Drill layer, = Where to make holes.
- *.gm1 the board Edges = how to cut the PCB to detached from the mainboard.
- *B_Cu.gbl and *F_Cu.gtl are the front and back copper layer = where to print copper wire to create connectivity.
- *B_Mask.gts and *F_Mask.gbs are the back and front solder masks = was to print the protective layer on top of the copper layer. This layer is ofter green and gives there distinctive color to the PCB. Luckily more colors are available 😉.
- \ **B_Silk.gbo* and \ **F_Silk.gto* are the back and front silkscreen = the decorative prints on top of the solder masks, usually used to write references dor the component to solder.
Well, this is not entirely true. Once you understand each layer's use, nothing stops you from customizing a PCB to your heart content 👼. Before editing the board, you need to know what component you want to fit in, and this is the object of the next section 😈.
II) Choosing the components
II.1) Choosing the switches
The first thing you need to know is that there are essentially three types of mechanical switches.
- Clicky switches are the noisy ones. The typical switches you associate with a mechanical keyboard give you this satisfying click sound at the end of a stroke.
- Tactile switches are not as noisy but give you tactile feedback when you press the key.
- Linear switches are more and more common and provide no feedback or noise as you type, design for a smooth and soothing typing experience.

Types of mechanical switches
Second the nuance you can find high vs. low profile. This choice is often associated with choosing Cherry MX VS. Kailh Chocolate.
❗️️️️ ❗️️️️ T️here is more brand of key switches I invite you to read more about it here. Most manufacturer provided both type of profile, but i notice that in Open-source built Kailh was choosen for their low profile key and Cherry MX for their high profile key.

High Profile vs. Low Profile courtesy of u/songcq
The choice should be influenced by the feeling you are looking for in your Keyboard and whether you want your Keyboard to be compact or not. For a compact Keyboard, you need to go for low-profile switches.
☑️ You will need to select you switches and the download the specs (datasheet). This Github repository contains datasheets for most manufacturer: https://github.com/keyboardio/keyswitch_documentation
You need to validate that the key switches you are selecting are compatible with your PCB. Otherwise, you will need to do some edits to make sure they properly fit.

Circuit Board Layout for Keith Choc Blue
II.2) Choosing the keycaps
The only thing that matters is selecting key switches that match the brand you choose (Cherry MX VS. Kailh Chocolate). Aside from that, just have fun and explore the many options available on the market.

Fun Keycaps for Mechanical Keyboard from Etsy
If you want to push this project a bit further, you can decide to print your own keycap.
☑️ You can screen for existing 3D model with online libraries like : https://www.yeggi.com/
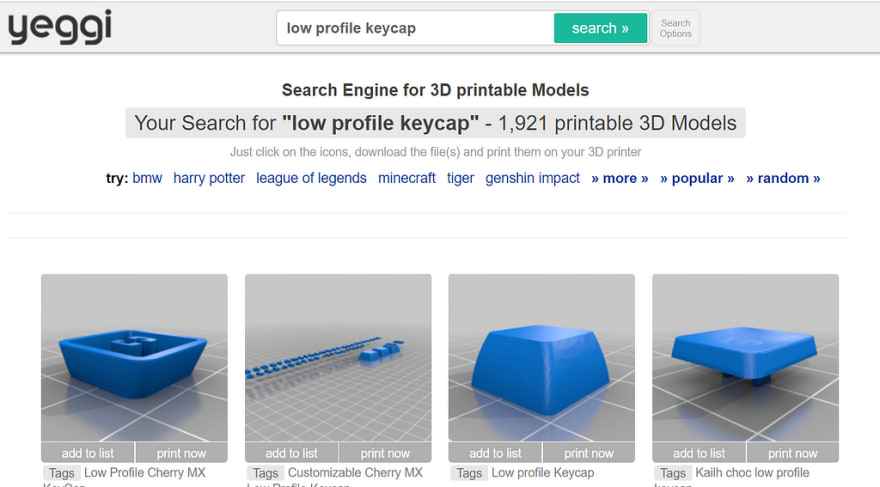
Me searching for 3D Models on Yeggi
II.3) Choosing the micro-controller
The microcontroller est the brain for your keyboard. It converts keystrokes into understandable code used by your PC by implementing the Keyboard Protocol.
Luckily you won’t have to code to much thanks to the community and the Open-source keyboard firmware QMK. With QMK you only need to define the keymap using an online configurator, for instance, then flash the microcontroller.
The most popular options are:
- Pro Micro most common microcontroller board, you are bringing Arduino’s power to your board.
- Elite-C higher-end microcontroller, ideal if you plan to add features over time.
- Nice!nano if you want to create a vluthouth keyboard
A microcontroller board might be the most expensive element of this build especially given that you need two of them so you could opt-in for onboard keyboards. The controller board I listed essentially relies on ATMEGA32U4. If you have the skills and knowledge you could consider going for SMT assembly and have your microcontroller solder on the board.
II.4) Extra designed feature you may want to consider
- Socket for the microcontroller board. Let's say you want to convert the keyboard into a wireless keyboard later socket would allow you to
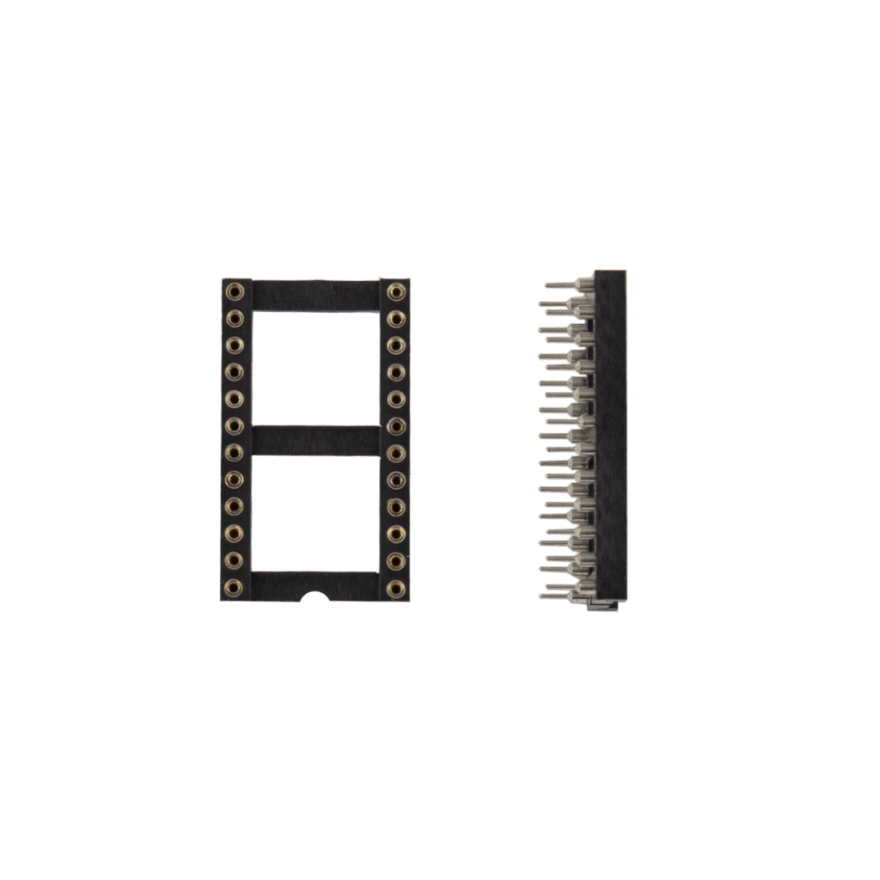
Socket for the microcontroller board
- Hot-swappable key switches socket. This would allow you to change the key switches at will and prevent you from having to solder the key switches to the board

Kailh Hot-Swap Sockets courtesy of u/davenelsondotcom
- RGB LEDs. Just to make things fancy

Corne Split Keyboard from crkbd
- OLED Arduino module. So you can have on the keyboard display

OLED Arduino module
- Tenting support. Tenting consist of adding some inclination to the keyboard so your wrists have a more natural position

Split keyboard with Tenting
I am sure the is a lot more feature we can add to a keyboard 😆.
☑️ Select your features, study the componenents, make adjustement to your PCB.
III) Designing the case
Last but not least the case, the protective and decorative envelope for your keyboard.
Some people like the look of the PCB and choose to simply have cut acrylic sheets. The process is simple and requires no machining so it is one of the best options. On top of that if you opted for the LED this would for sure look awesome.
Corne Technician Keyboard Case from littlekeyboards.com
The second option is to have a 3D-printed case. The best would be to start from an existing design and adapt it.
☑️ You can screen for existing 3D model with online libraries like : https://www.yeggi.com/
Where to get all the parts?
Once you have designed your keyboard you may be wondering: how do I get all the parts?
With your Gerber file you can get your PCB printed with:
For the components there is a bunch of dedicated stores online:
For the case and other 3D printed objects:
❗️️️️ ❗️️️️ Shipping fees seems to be the most expensive part of this build so try to find local manufacturer to reduce the costs.
Conclusion
I am about to order all the parts so I keep this section to share the build 😉.
Here is the follow-up article with the part I bought (about $40 per keyboard excluding shipping fees):
How to Build a Custom Split Mechanical Keyboard: Bill of material
References
Compare all split keyboard layouts: https://jhelvy.shinyapps.io/splitkbcompare/
More PCB editing tools: https://support.jlcpcb.com/article/22-how-to-generate-the-gerber-files
Opensource Keyboard — Corne lines
Opensource Keyboard — GergoPlex Line
Opensource Keyboard — Ferries Line
- Original Project: https://github.com/pierrechevalier83/ferris
- https://github.com/davidphilipbarr/Sweep
- https://www.youtube.com/watch?v=JqpBKuEVinw
- https://github.com/forrestbaer/roost
- https://github.com/MelindaBirkenstock/Ferris-Slip-On-Case
Opensource Keyboard— 3W6 Line
Opensource Keyboard — fifi line
Other articles:

Top comments (0)