Vue.js is an approachable, versatile, performant, and progressive framework to build user interfaces with. Its core library is focused on building the view layer only. It uses the goodies of Angular (such as template syntax) and React (such as Virtual DOM) and adds a few more enhancements on top.
Intro
There are many articles out there, but I thought to write this up since it showcases my logic around learning a new framework/library. Vue got popular very quick because it adapts to the needs of developers. Another bonus point of it is that migrating to it is really easy. You just need to add a script tag to your page and you're good to go.
You don't even need to know what is a bundler like webpack, or an advanced compiler like babel or use a package manager like npm to get started with Vue.
It does have a CLI though which can help you build a fully fledged SPA with a variety of configuration options, including Babel, TypeScript, ESLint, PostCSS, PWA, Unit testing and end-to-end testing.
The best thing about its CLI is that you don't need to eject like create-react-app to be able to customise your configuration.
Get started
OK, enough talking, let's get started on our first Vue application. I will start with a simplest approach. Let's create a simple HTML page:
<html>

<body>
    <div id="my-vue-app">
        <p>{{ hello }}</p>
    </div>
    <script src="https://unpkg.com/vue"></script>
    <script>
      new Vue({
        el: '#my-vue-app',
        data: {
          hello: 'Hello World!'
        }
      })
    </script>
</body>

</html>
And believe it or not, that's all you need to have your first Vue app up and running. Now let's break this down and see what's happening.
The first thing you see is a paragraph which has a template reference to a variable called hello, like Angular. This means that the value gets replaced by Vue. Then we import the script from UNPKG which is a CDN (content delivery network) on top of npm.
Then we in the second script tag, we create a new instance of Vue and tell it to use a DOM element with id of #my-vue-app. Vue will have control over this element and its children. Last we specify a data object with a hello property. Vue will replace this variable in the template for us. So you should see a page with Hello World! when you open this file in a browser.
Notice we didn't use this.data.hello to access the variable, that's because Vue will automatically make every property of data accessible like a high level variable.
You can see this example live in this CodePen 👇🏼:
Using CLI
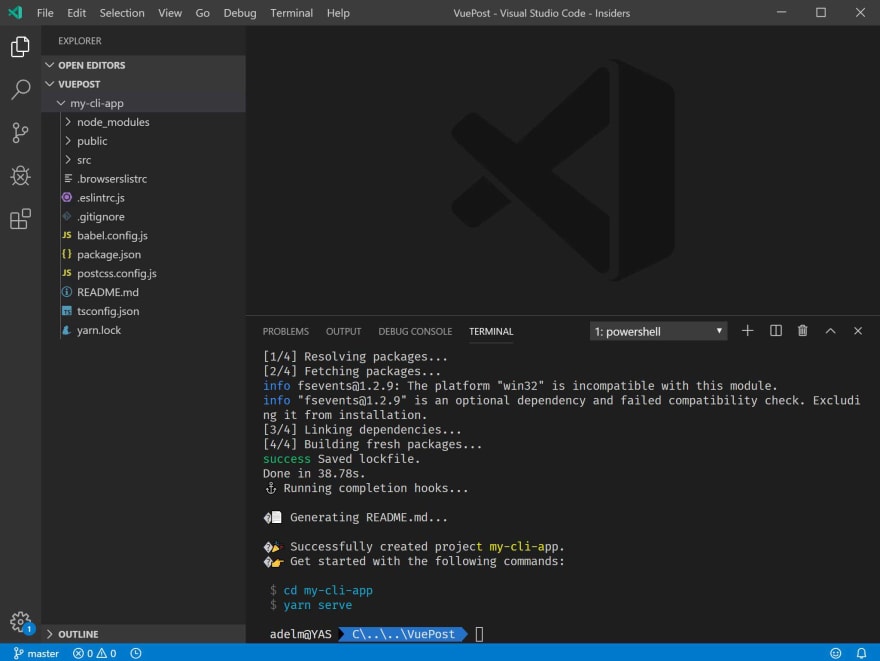
Now not all the applications are as simple as our hello world, so we need to get to know the Vue CLI which helps up build a complete application from scratch. Open the terminal in your VS Code, navigate to a folder of your choice and run this command:
npx @vue/cli create my-cli-app
Alternatively you can install it globally:
npm i -g @vue/cli

vue create create my-cli-app
When you run the command, you will be prompted to choose a preset. You can choose default which is based on Babel and ESList, or go custom in which case you have more freedom to choose from, like TypeScript, CSS pre-processor, etc.
Since the point of this intro is on Vue itself, I won't delve into details of CLI, please visit their official website for more info on how to use CLI.
When the creation of the new application is finished, you will end up with a folder structure like this:
You don't need to pay attention to all those files, suffice to know that index.html contains the div for Vue to handle, src/main.ts is where Vue is instantiated, and src/App.vue is a single file components (I will explain this later) which contains our default components.
Single File Component:
Single File Component is a file which contains everything a Vue component needs, HTML, CSS and JavaScript. You can even scope the style to the component to prevent any unwanted styling clash with other components. In a way it's similar to what you'll have with Shadow DOM.
If you have a look at the script tag in the App.vue file, you'll it's just defining a component which contains another component, HelloWorld referenced from another file. Hello world component is another single file component which has one props passed on to it which gets displayed in the template.
I will not go any further than this at this point, but you get the idea.
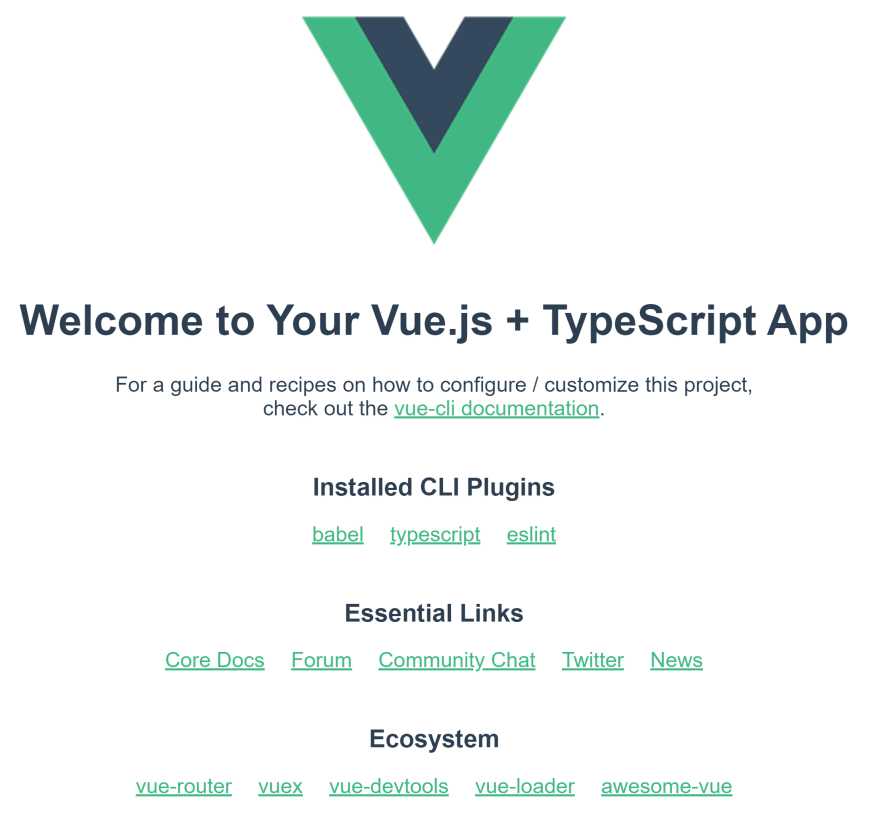
To run the app, simply open the type npm run serve. You should see a page like this:
Vue root component
For now it's enough about how to get started, let's deep dive into Vue's building blocks. We should start with its root instance.
new Vue({
  el: '#vue-app',
  data: {
    name: 'Yaser'
  },
  computed: {
    fullName: function() {
      return this.name + 'Adel';
    }
  },
  watch: {
    name: function(oldVal, newVal) {
      console.log(`Name changed from ${oldVal} to ${newVal}`)
    }
  },
  methods: {
    nickName: function() {
      return this.name === 'Yaser' ? 'Yashints' : 'NA';
    }
  },
  created: function() {
    console.log(`${this.name}`);
  }
  ...
})
OK, there is a lot going on here, so let's break them down one by one.
el
This is the id selector of the element we want Vue to use.
data
This object contains any property you want to maintain in your application. You can get their values in the template, by just using the property name. This just works because Vue will automatically make all of the properties accessible at high level this context.
computed
Sometimes you end up having too much logic in your template, take this fictional example:
<div id="my-component">
  {{ name.split('').reverse().join('') }}
</div>
In this case when you run the app you will see resaY, but having those function calls in the template is not a good practice. You can create a computed property to handle all these logics elsewhere outside of your templates.
var vm = new Vue({
  el: '#my-component',
  data: {
    name: 'Yaser'
  },
  computed: {
    // a computed getter
    reversedName: function () {
      // `this` points to the vm instance
      return this.name.split('').reverse().join('')
    }
  }
})
and in your template, you would just have:
<div id="my-component">
  {{ reversedName }}
</div>
Be careful with computed properties, these are cached based on the value of the their dependency, which means it will only gets re-evaluated if the value is changed.
This means the following code will not return what you think:
computed: {
  now: function () {
    return Date.now()
  }
}
That's because Date.now() is not a reactive dependency.
methods
Methods are simple functions which give you ability to handle events like clicks and input changes. In addition to those, you can use them for many other purposes as well, but the main use case is event handling.
You might say we could implement the previous computed property using a method:
<div id="my-component">
  {{ reversedName() }}
</div>
methods: {
  reverseName: function () {
    return this.name.split('').reverse().join('')
  }
}
The end result would be exactly the same, however, the difference is that computed properties are cached based on their corresponding dependency. It means that a computed property only gets re-evaluated when the dependency changes, whereas the method will be called regardless.
Methods are ideal to handle events:
<div id="app">
  <button @click="sayhi">Hi</button>
  <p>{{ message }}</p>
</div>
And your component will have:
new Vue({
  el: '#app',
  data() {
    return {
      message: null
    }
  },
  methods: {
    sayhi() {
      this.message = 'Hey you!'
    }
  }
})
What you haven't seen so far is the @click directive. I will go through directives later in this article, but this is a shorthand for v-on:click.
Lifecycle hooks
The created function I defined in the above snippet is just one of many lifecycle hooks you can have access to when working with Vue. Think of these as steps each component has to go through when it's instantiated. Things like data observation, compiling the template, mount the instance to the DOM, update the DOM when data changes, and more.
For example, the created hook can be used to run a piece of code when the instance is created.
⚠️ Notice I haven't used arrow functions with any of my examples so far. That's because if you use them you lose your access to the component's context, or
this. If you happened to face an error likeUncaught TypeError: Cannot read property of undefined, orUncaught TypeError: this.myMethod is not a function, it's because you've used an arrow function.
You can see the full list of available hooks in the official documentation.
Vue components
As you saw earlier, Vue lets you define components and reuse them much like React does. However, you should know that all of those are reusable instances of the Vue itself.
You can use the component method of Vue to define a component:
Vue.component('my-name', { /* options */ })
Since every component is an instance of Vue, you can use all of the above properties except for el.
The first argument is the name of the component, which you will use in your template to add this component to your page.
Refer to the W3C rules to find out what naming structure you should use to prevent conflicts with current and future HTML elements.
When you use Vue.component method, you're creating global components, which can be used in the template of any root Vue instance.
Local components
Sometimes you want to have a component which is only accessible within a certain area of your application (for isolation purposes). In this case you could use a local component:
var ComponentA = { /* `... */ }`
And then:
new Vue({
  el: '#app',
  components: {
    'component-a': ComponentA
  }
})
You can have as many local components as you want. The key of each property is the component's name, and the value will be the options object for that component.
💡 Local components are not available in sub-components. But you can make them available by adding them to sub-components explicitly.
If you want to make a local component available in a sub-component, just add them explicitly:
var ComponentA = { /* `... */ }`

var ComponentB = {
  components: {
    'component-a': ComponentA
  },
  // ...
}
Props
Like other frameworks, Vue supports passing props to a component to enable a one way communication from parent to child.
Vue.component('search', {
  // camelCase in JavaScript
  props: ['searchTerm'],
  template: `
    <span>{{ searchTerm }}</span>
    <div>
      ...
    </div>
  `
})
<search search-term="javascript"></search>
Note that HTML attributes are case-insensitive, this browsers will treat any upper case character as lowercase. So if you're using camelCased prop names, you need to use their kebab-cased equivalents like above.
You can also pass multiple props:
props: ['searchTerm', 'filter', 'sortOrder']
If you're using TypeScript, you may want to define the type of each prop, in which case you can use an object instead of an array, where the key is the prop name and the value would be the type:
props: {
  searchTerm: String,
  filter: Number,
  sortOrder: Boolean,
}
You can use non primitive types such as Array, Object, Function, Promise, etc.
Single file component
Alright, it's time to see what are single file components. As I mentioned earlier, they contain everything a component needs:
// component.vue

<template>
  <p>{{ greeting }} World!</p>
</template>

<script>
module.exports = {
  data: function () {
    return {
      greeting: 'Hello'
    }
  }
}
</script>

<style scoped>
p {
  font-size: 2em;
  text-align: center;
}
</style>
The most important benefits of using single file components are:
- Complete syntax highlighting (you will need an extension like
Veturfor VS Code) - CommonJS modules, which means you can import your components into other components using
require - Component scoped CSS
You can also use ES6 modules with Bug, and Babel which you can get setup using the CLI:
<template>
  <p>{{ greeting }} World!</p>
</template>


<script>
import OtherComponent from './OtherComponent.vue'
export default {
  components: {
    OtherComponent
  },
  data () {
    return {
      greeting: 'Hello'
    }
  }
}
</script>

<style scoped>
p {
  font-size: 2em;
  text-align: center;
}
</style>
Templates
So far we've just gone through the Vue instance and components. But one of the most important parts of any component is its template. Vue uses interpolations for data binding similar to Angular syntax.
<p>Message: {{ msg }}</p>
The value of the msg variable from the data object gets replaced at run time.
If you want the perform the interpolation just once, use v-once directive (we will review the directives shortly):
<p v-once>Message: {{ msg }}</p>
In this case if you change the value of the msg later, the template won't change.
Raw HTML
If you want to render raw HTML, you might know that using it in normal interpolation is not recommended mostly because of security reasons. In Angular you would use innerHTML attribute and secure it with a pipe with DomSanitizer. In React you would use <div dangerouslySetInnerHTML={createMarkup()} />. In Vue it's really simple using v-html directive:
<p>Using v-html directive: <span v-html="rawHtml"></span></p>
Attributes
You can't use interpolation inside HTML attributes, instead you need to use the v-bind directive:
<div v-bind:name="dynamicName"></div>
💡 If you're using
v-bindwith boolean attributes likedisabled,v-bindwill not include the attribute if the value isnull,undefined, orfalse.
JS expressions
You can use expressions inside data bindings:
<div>{{ number + 1 }}</div>

<div>{{ ok ? 'YES' : 'NO' }}</div>

<div>{{ message.split('').reverse().join('') }}</div>

<div v-bind:id="'list-' + id"></div>
As I mentioned earlier, don't use too much logic in your templates, instead use methods or computed properties.
Directives
We saw a couple of directives so far, but Vue offers way more. Directives start with v-, but some of the most used ones have short hands like @click which we saw earlier. Almost all directives' values are expected to be a single JavaScript expression except v-for.
<p v-if="error">📛 Something horrible happened!</p>
Arguments
Some directives take arguments, these are used with a colon after the name:
<a v-bind:href="url"> ... </a>
You can even use a dynamic expression as an argument to a directive. But this was only introduced in v2.6.0.
<a v-bind:[attributeName]="url"> ... </a>
Modifiers
Modifiers are postfixes which come after a directive name separated by a dot.
<form v-on:submit.prevent="onSubmit"> ... </form>
In above code snippet, .prevent is a modifier and will cause preventDefault() to be called on submit event.
CSS class and style binding
In some scenarios, you want to manipulate the class list of an HTML element, or add some inline style to them. You can use v-bind to do so.
<div v-bind:class="{ active: isActive }"></div>
You can also add multiple classes at the same time:
<div
  class="message"
  v-bind:class="{ active: isActive, 'text-danger': hasError }">
</div>
You can use an object instead of using inline expressions:
<div v-bind:class="classObject"></div>
And:
data: {
  classObject: {
    active: true,
    'text-danger': false
  }
}
For inline styles, a similar approach can be used, but instead of class, you will use style:
<div v-bind:style="{ color: activeColor, fontSize: fontSize + 'px' }"></div>
You can use object as well same as the previous example.
Conditional rendering
We used v-if in one of the previous examples. The HTML block will only get rendered if the expression returns truthy:
<h1 v-if="awesome">Vue is awesome!</h1>
But more importantly you can use an else block using v-else:
<h1 v-if="awesome">Vue is awesome!</h1>
<h1 v-else>Oh no 😢</h1>
If you want to use v-if on multiple elements which are not nested, you can use template element:
<template v-if="ok">
  <h1>Title</h1>
  <p>Paragraph 1</p>
  <p>Paragraph 2</p>
</template>
From version 2.1.0+ you can use a v-else-if directive to change a couple of conditions:
<div v-if="type === 'A'">
  A
</div>
<div v-else-if="type === 'B'">
  B
</div>
<div v-else-if="type === 'C'">
  C
</div>
<div v-else>
  Not A/B/C
</div>
v-if is not the only conditional directive in Vue, you can use a v-show as well:
<h1 v-show="ok">Hello!</h1>
The difference is exactly like their Angular counterpart, v-show will always render the element and plays with the display property.
Input binding
You can use v-model to create a two way data biding with an input, textarea, or select element:
<input v-model="message" placeholder="edit me">
For textarea you can use normal interpolation, you have to use v-model instead:
❌ This won't work:
<textarea>{{text}}</textarea>
✔️ Instead:
<textarea v-model="message" placeholder="add multiple lines"></textarea>
Note that v-model will ignore the initial value, checked, and selected attributes you may put on your elements. So use the properties on data object to initialise those.
<input type="checkbox" id="checkbox" v-model="checked">
And:
//...
data: {
  checked: true
}
For multiple check boxes you can use an array:
<div id='example-3'>
  <input type="checkbox" id="jack" value="Jack" v-model="checkedNames">
  <label for="jack">Jack</label>
  <input type="checkbox" id="john" value="John" v-model="checkedNames">
  <label for="john">John</label>
  <input type="checkbox" id="mike" value="Mike" v-model="checkedNames">
  <label for="mike">Mike</label>
  <br>
  <span>Checked names: {{ checkedNames }}</span>
</div>
And:
new Vue({
  el: '#example-3',
  data: {
    checkedNames: []
  }
})
For select, you can either use a single property (single select), or an array (multi select).
<select v-model="selected">
  <option disabled value="">Please select one</option>
  <option>A</option>
  <option>B</option>
  <option>C</option>
</select>
For array:
<select v-model="selected" multiple>
  <option>A</option>
  <option>B</option>
  <option>C</option>
</select>
And:
//...
data: {
  selected: []
}
And lastly, you can use v-for if you want to render custom options.
<select v-model="selected">
  <option v-for="option in options" v-bind:value="option.value">
    {{ option.text }}
  </option>
</select>
Rendering lists
You can use v-for directive to render a list of elements. The syntax is item in items where items is an array and item is the alias for each entry in the array:
<ul class="navbar">
  <li v-for="item in items">
    <a v-bind:href="item.href" >{{item.title}}</a>
  </li>
</ul>
You can event loop through an objects properties using v-for:
<ul id="v-for-object" class="demo">
  <li v-for="value in object">
    {{ value }}
  </li>
</ul>
And in your component:
new Vue({
  el: '#v-for-object',
  data: {
    object: {
      title: 'How to do lists in Vue',
      author: 'Jane Doe',
      publishedAt: '2016-04-10'
    }
  }
})
💡 Vue has a different way of handling updates in lists, when the array gets updated, Vue uses an in-place patch approach. This means instead of moving DOM nodes, Vue will update the items to reflects what should be rendered in place. Because of this, if you're relying on form input values, or child component state, you need to provide a unique key using
v-bind:keysimilar totrackByin Angular.
Event handling
Now that we've seen the use of directives, it's time to talk about event handling. This is the last section of this intro 😉.
You can use v-on to handle events that are happening on your elements.
<button v-on:click="counter += 1">Add 1</button>
You can also use methods for handling events:
<button v-on:click="greet">Greet</button>
And:
methods: {
  greet: function (event) {
    // `this` inside methods points to the Vue instance
    alert('Hello ' + this.name + '!')
    // `event` is the native DOM event
    if (event) {
      alert(event.target.tagName)
    }
  }
}
If you need to access the original event, simply use $event and pass it to the method:
<button v-on:click="warn('Form cannot be submitted yet.', $event)">
  Submit
</button>
And:
// ...
methods: {
  warn: function (message, event) {
    // now we have access to the native event
    if (event) event.preventDefault()
    alert(message)
  }
}
I mentioned modifiers briefly before. Below is the list of modifiers you can use:
.stop.prevent.capture.self.once.passive
But this is outside of scope of this intro. You can find our more here.
Summary
And that's all you need to know to get started with Vue. There are way more topics than I mentioned here, but I believe you need to start small and as you go on, move towards more advanced scenarios. I will promise I will go through some of those advanced topics like Router, state management, form handling, animation, etc later, so stay tuned.

Top comments (4)
My personal experience with learning Vue. When I started one of the tutorials, suddenly it came back to me that I had learnt the basic principles before. No, not angular or react. It was the humble little knockoutJs. For me, it was like learning what was missing in knockoutjs.
Good article. Thanks.
I get what you mean, happy coding
I use vue on my Gridsome blog. I got 100 on Lighthouse. But it's hard to get perfect score on observatory due to default Gridsome inline code that against content security policy. Any idea how to fix it?
I am so coming back to this when I get my hands on Vue