Introduction
Kernel Based Virtualization or KVM is an open-source virtualization solution for Linux on x86 hardware containing virtualization extensions. It lets you turn Linux into a type-1 hypervisor that allows a host machine to run many instances of Virtual Machines which are all isolated from each other.
KVM is a feature built right into the Linux Kernel and we can run Virtual Machines without any third-party solution. Many third-party solutions let us do the same but KVM offers a high-speed interface to the Linux Kernel to run VMs at near-native speeds
Prerequisites
- To run KVM, your CPU must support virtualization technology. Most CPUs nowadays support this technology but often it is disabled in the BIOS section so you need to find out a way to enable this by yourself as this varies with every manufacturer.
-
To check whether your CPU supports virtualization:
egrep -c '(vmx|svm)' /proc/cpuinfo
A result of _1 or more_ means that the CPU support    virtualization extensions. A result of _0_ means it does not.
* Alternatively, you can also check whether your CPU supports KVM by:
kvm-ok
In my case the output of this command is:

The output clearly indicates that my CPU supports KVM.
* The default directory for KVM Virtual Machine images is **/var/lib/libvirt/images**.
* Your root file system should have at least **10G** of free space to create a single VM.
**Setting up KVM Server**
KVM is built-in into the Linux Kernel but we still need to install some dependencies. We’ll need to install **libvirt** and **QEMU**. Libvirt gives us access to the virtualization platforms while QEMU emulates the machine’s processor.
So let’s begin installing them
sudo apt install bridge-utils libvirt-clients libvirt-daemon-system qemu-
system-x86
To verify if everything installed as expected check if the **libvirtd** service is running.
sudo systemctl status libvirtd
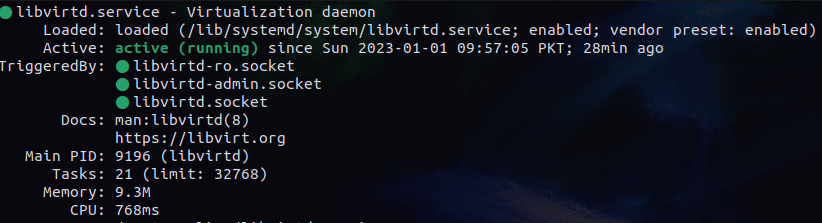
As you can see libvirt service is currently running but for now, we need to stop this as there is some configuration left.
sudo systemctl stop libvirtd
Now we need to add two required groups on our machine which are **kvm** and **libvirt**. It might be possible that these groups have already been created by the packages we have just installed. To verify if the groups already exist:
cat /etc/group | grep 'kvm|libbvirt'

In my case, both of the groups already exist so I don’t need to create them again.
If the output of the command is empty then this means the groups were not created and you have to now manually create them by running the following commands.
sudo groupadd kvm
sudo groupadd libvirt
The primary user of the system should be the part of these groups. If not, then you can add your user to the required groups. If you don’t know your username, you can use the output of the `whoami` command.
sudo usermod -aG kvm
sudo usermod -aG libvirt
To let the changes take effect log out and then log in again.

We need to ensure that the users of the kvm group have access to the **/var/lib/libvirt/images** directory. First we’ll add kvm group to this directory.
sudo chown :kvm /var/lib/libvirt/images
Now, we’ll set the permissions so that anyone in the kvm group will be able to modify its contents.
sudo chmod g+rw /var/lib/libvirt/images
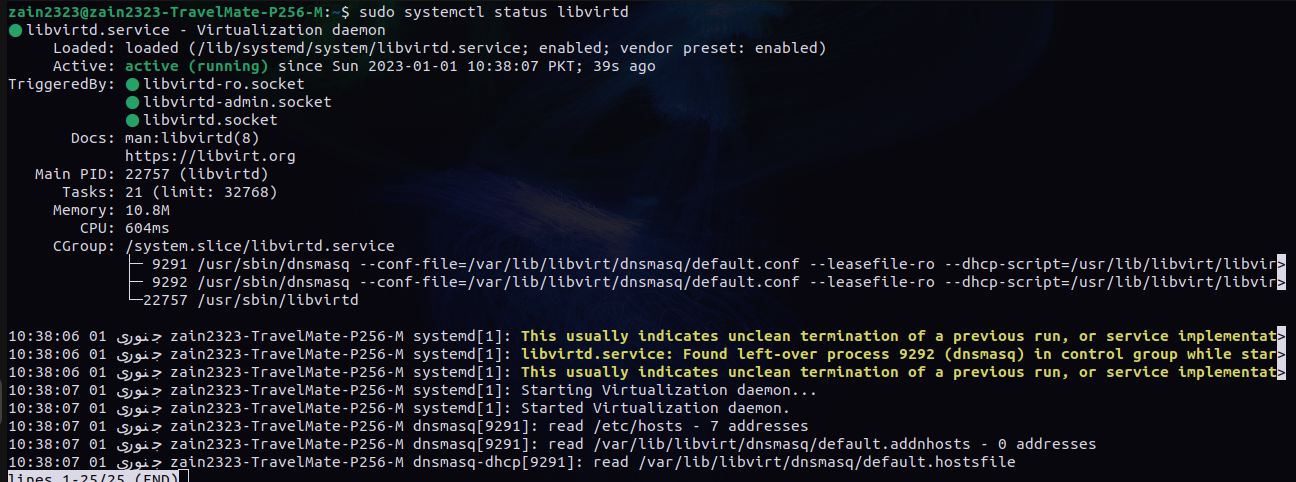
Now we can start the libvirtd service again.
sudo systemctl start libvirtd
To verify if the service is running as expected check the status of the libvirtd service.
sudo systemctl status libvirtd
## Setting up Virt-Manager
Virtual Machine Manager is a GUI-based utility program that lets us manage our KVM Virtual Machines running either locally or on some remote server.
To install this utility run the following command:
sudo apt install ssh-askpass virt-manager
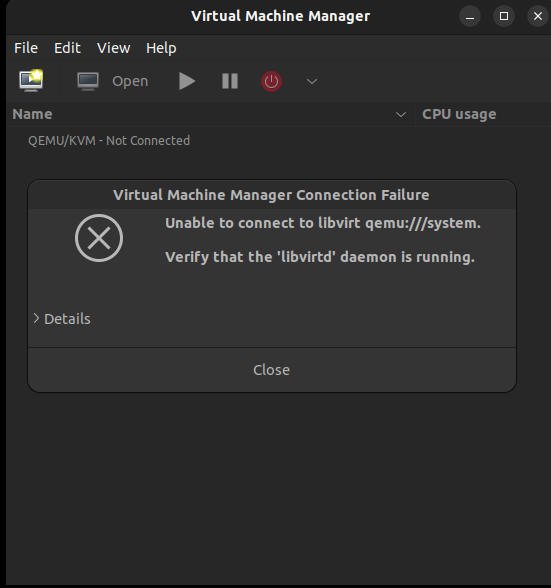
Next open **virt-manager** either through the application windows or simply run `virt-manager` in your shell.
If there is some error while opening virt-manager you can simply ignore it.
## Connect to VM on a remote machine over SSH
> If you are not making a VM on some remote server and using your own local machine then you can skip steps 1–6 and you can directly start by adding ISO in the storage group. If you have configured all of the above steps to set up VM on your local machine then in virt-manager the first connection “QEMU/KVM” is your local host and you can add the ISO in the same way as for the remote connection.
1\. To create a new connection, click on File and then **Add connection**.
2\. A new window will appear where you can add your connection details.
3\. Select the checkbox _Connect to a remote host over SSH_ and fill in the required fields.
4\. You will need to make sure that you are able to SSH into the server correctly otherwise this will not work.
5\. You will also be prompted to enter your server machine password.
6\. After this, you will have a new connection in your virt-manager application.
7\. Now we need to add an ISO image in the storage group so we can install the Operating System.
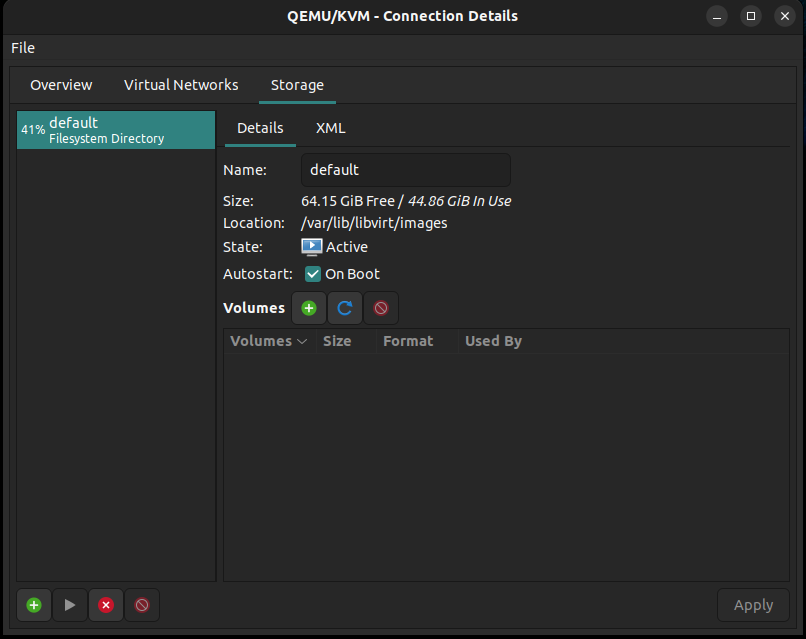
8\. To create _storage_ group, double-click on your server connection and go to the storage tab.
9\. To add ISO to our storage pool click the _plus_ symbol in the bottom left corner.
10\. In the Name field type _ISO_.
11\. In the _Target Path_ field type /**var/lib/libvirt/images/ISO**.
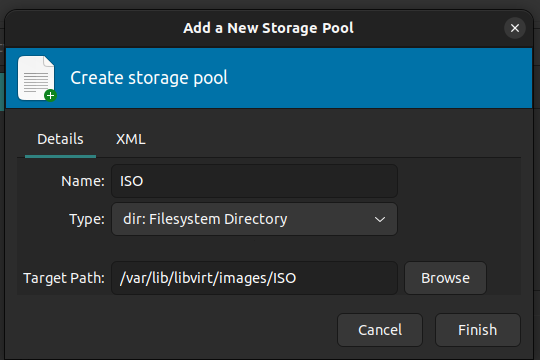
12\. Click **Finish** to save all the changes.
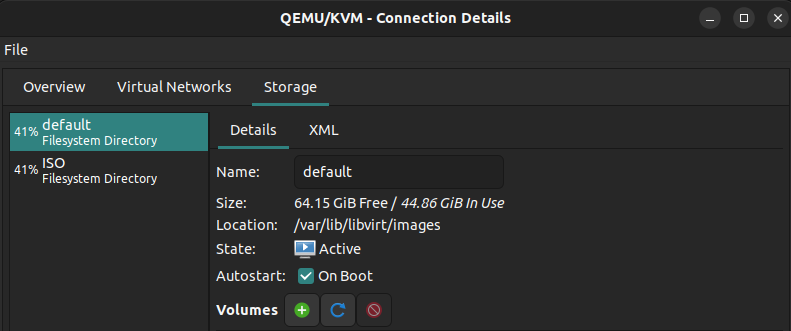
13\. If you followed all the steps correctly, you will see the storage pool that we just created in the left window pane.
14\. Now we need to update the permissions in the **/var/lib/libvirt/images/ISO** directory.
sudo chown root:kvm /var/lib/libvirt/images/ISO
sudo chmod g+rw /var/lib/libvirt/images/ISO
15\. One last thing we need to do is just copy the ISO image we need to install in the **/var/lib/libvirt/images/ISO** directory. You can use the `scp` command to copy the ISO image from your local machine to some remote server. If you are following this article on your local machine then you can use the `cp` command to copy the ISO file.
## Creating a virtual machine
1\. In virt-manager, right click on your server connection and click on New to create a new VM.
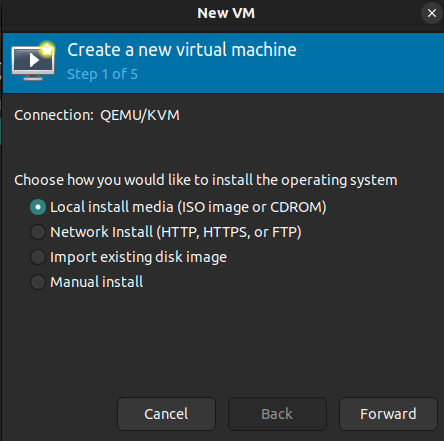
2\. The default selection will be **Local install media (ISO image or CDROM)**, leave this as is and click on **Forward**.
3\. In the next step, you can select your ISO image from the storage pool. Click on **browse** and on the new window select the **ISO** storage pool in the left pane and you should be able to see your ISO image. If you still are unable to see your ISO images, click on the **refresh** button.
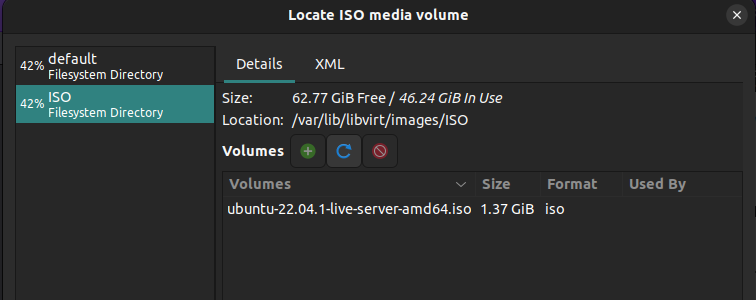
4\. Select the ISO image you wish to install and then click on **Choose Volume**. After this click on **Forward**.
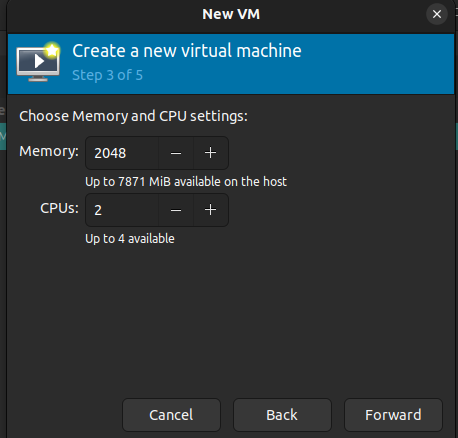
5\. In the next window you can configure the amount of **RAM** you want to allocate to the VM and the number of **CPU** cores. At a minimum, _allocate at least 1GB of RAM and 1 CPU core_.
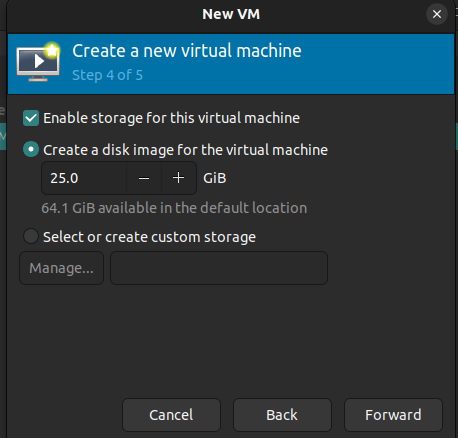
6\. In the next step you have to allocate the _amount of storage_. You can change this according to your requirements.
7\. In the next step you have to give a _name_ to your VM.

8\. Finally, click on **Finish**. After this, your VM will automatically boot into the installation menu of the Operating System. You can then follow the installation process of your VM’s operating system.
This is it for now. I hope you have found the article useful and if so please give it a like. If you have any confusion then feel free to ask.

Top comments (1)
Amazing thank you !