
Manually deploying my web application wasn’t difficult, but it quickly became annoying. Every update meant SSH-ing into my EC2 instance, copying files, installing dependencies, and restarting the server. I knew it was time to shift to a better, automated way —so I explored AWS CI/CD tools to make my life easier.
At least that was what I thought…
My first few attempts were filled with with failed builds, missing permissions and unexpected deployment failures. It took me time to get it up and running but once it was up, the advantages were clear. CodePipeline handled the entire workflow from getting the latest changes from GitHub to deploying it. CodeBuild ensured that the dependencies were installed correctly while CodeDeploy made sure the deployment on EC2 was a success!
Then came security! Out of curiosity, I tested my site using Gobuster to check for exposed directories and files. And behold—my whole logic was , up for the taking🤯! That was the moment I realized—security🔐 and deployment🚀 need to go hand in hand.
Here’s how I did it, the mistakes I made, and the steps I took to secure my site !
Why automate with AWS CodePipeline?
The next question after deciding to integrate CI/CD into my project was: Which tool to use? . There were plenty of options —GitHub actions, Jenkins, GitLab CI/CD—but AWS CodePipeline was the bestfit for my need. It checked all the right boxes:
🔐Security? Covered. IAM roles, encrypted SSM parameters.
🗄No CI/CD server. Unlike Jenkins, there’s no need to manage the underlying infrastructure.
☁️Seamless AWS Integration. Works effortlessly with EC2, SSM, DocumentDB, and more.
Prerequisites
Before we begin, ensure you have the following:
✅ Access to AWS Management Console
✅ A GitHub repository containing your application
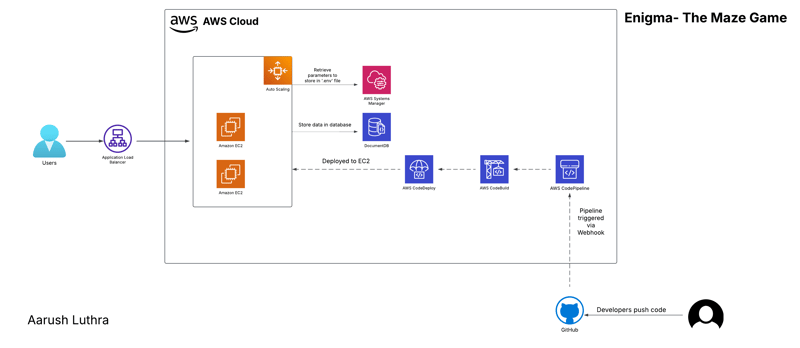
Besides this you’ll need appropriate permissions to allow services to interact seamlessly. The diagram below gives an overview of how everything connects.
Setting up the Pipeline
It's time to build the CI/CD pipeline step by step.
Step1: Connect GitHub to CodePipeline
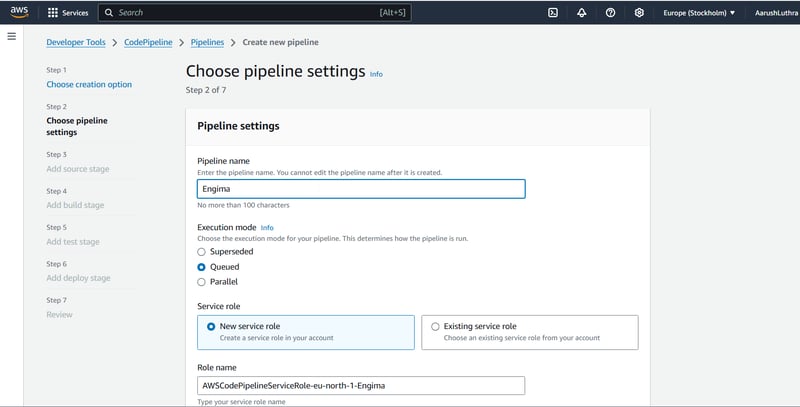
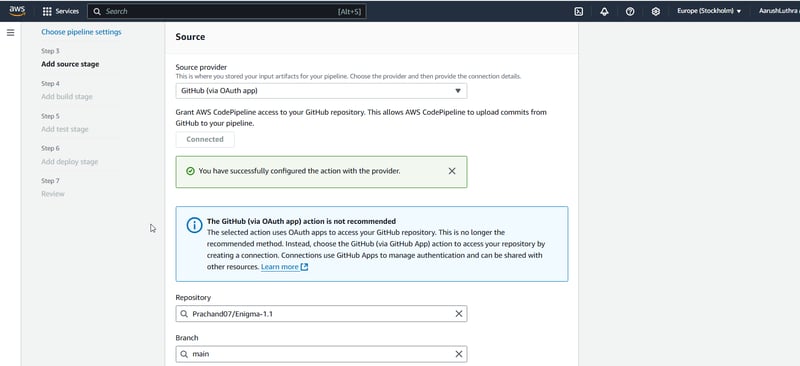
We create a pipeline from AWS Management console and select GitHub as source. We authorize AWS to access the repository and choose the branch. And let the magic begin 🪄
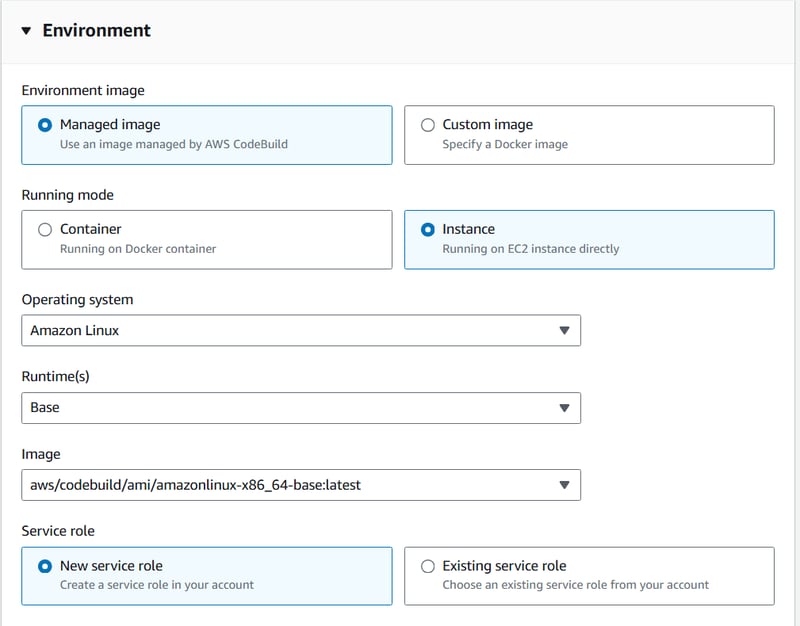
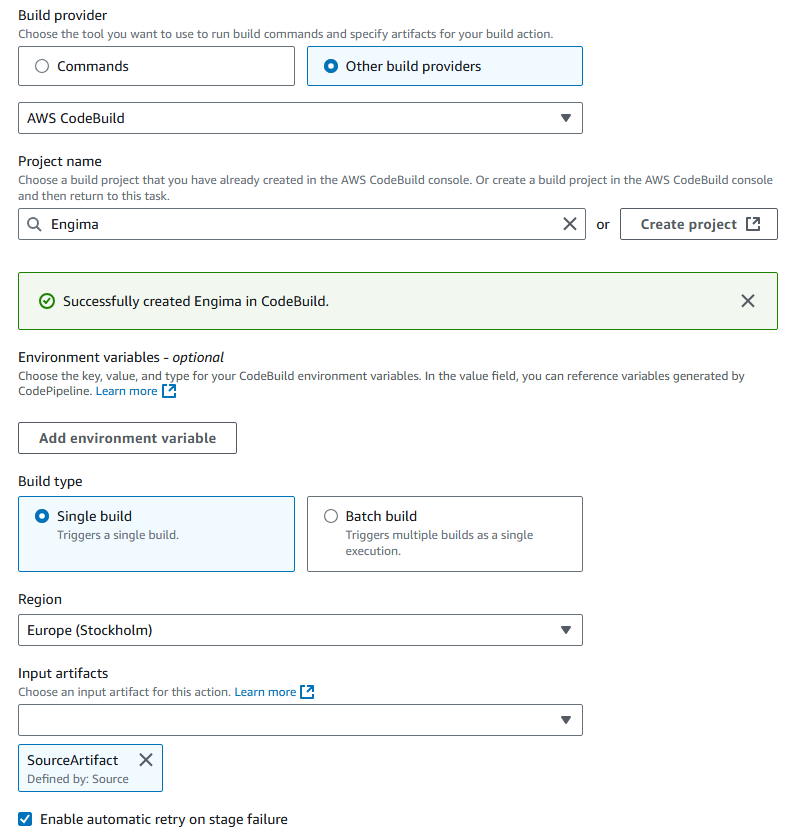
Step2: Configuring AWS CodeBuild
AWS CodeBuild compiles and packages the code before deployment. It ensures that every change is built and tested before moving to the deployment stage. To configure CodeBuild, firstly setup the environment and then define build steps in a buildspec.yml file. This file defines how to install dependencies, prepare artifacts.
My buildspec.yml
version: 0.2
phases:
  install:
    runtime-versions:
      nodejs: 16   #Nodejs version
  build:
    commands:
      - cd Backend      #navigate to your directory
      - npm install     #install the dependencies
artifacts:
  files:
    - '**/*'
Make sure to integrate it with CodePipeline
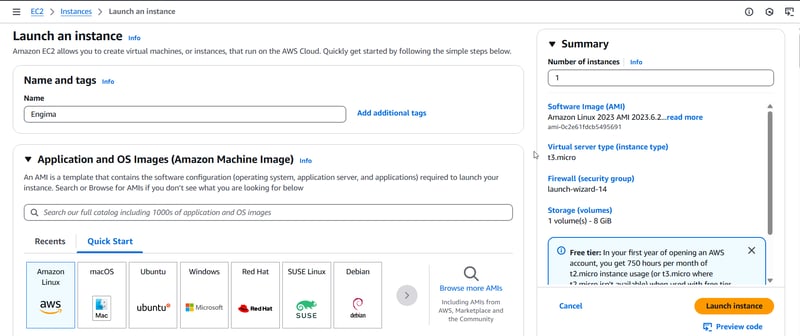
Step3: Creating an EC2 instance and integrating it with CodeDeploy
Next, we setup an EC2 instance. AWS CodeDeploy automates the complete deployment process ensuring updates are rolled out efficiently and seamlessly
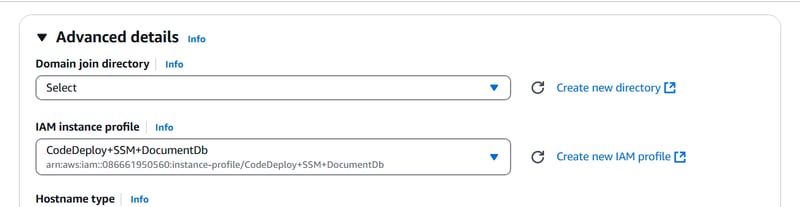
In this setup, I have choose Amazon Linux instance with permissions to access Systems Manager (Parameter Store), CodeDeploy and DocumentDB. Systems Manager allows us to securely retrieve environment variables while DocumentDB serves as our database.
Additionally, it is important to ensure that appspec.yml and configure.sh are placed in the root directory of the repository. appspec.yml defines the entire deployment lifecycle while configure.sh gets executed to configure the instance with necessary dependencies such as Apache server.
My appspec.yml file:
version: 0.0
os: linux
files:
  - source: /
    destination: /var/www/html
permissions:
  - object: /var/www/html
    pattern: "**"
    owner: ec2-user
    group: ec2-user
hooks:
  AfterInstall:
    - location: configure.sh
      runas: root
Myconfigure.sh file:
#!/bin/bash
sudo yum update -y
sudo yum install -y httpd
sudo systemctl start httpd
sudo systemctl enable httpd
cd /var/www/html/Frontend
sudo echo "CONFIG = { PUBLIC_IP: '$(curl -s ifconfig.me)' };" > config.js
cd /var/www/html/backend
wget https://truststore.pki.rds.amazonaws.com/global/global-bundle.pem
aws ssm get-parameters --names "MONGO_URL" "PORT" --with-decryption --query "Parameters[*].[Name,Value]" --output text | awk '{print $1 "=" $2}'
sudo yum install -y nodejs
sudo npm install -g pm2
sudo pm2 start index.js
echo "Deployment complete and server restarted successfully."
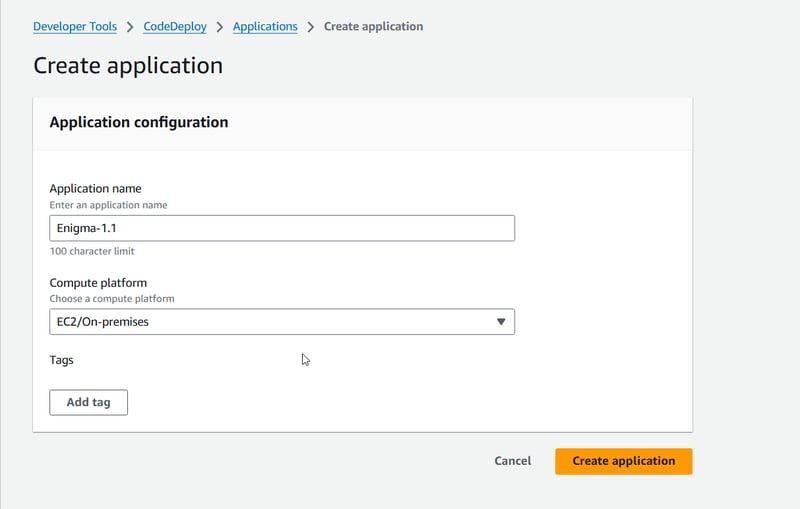
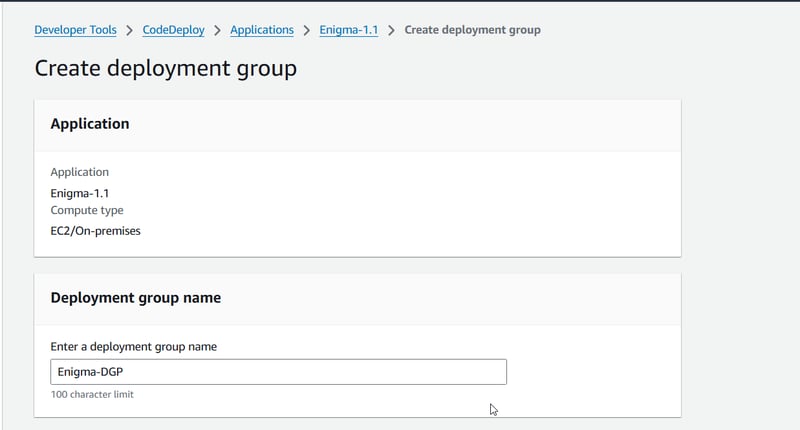
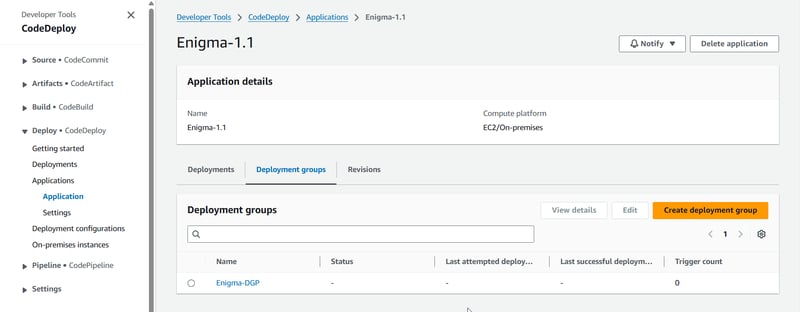
Make sure to create an application in AWS CodeDeploy and set up a deployment group. I chose the In-Place deployment type for now and used a single instance (the one we created earlier). Don't forget to associate an IAM role with the deployment group —it is crucial for CodeDeploy to manage deployment on your instance.
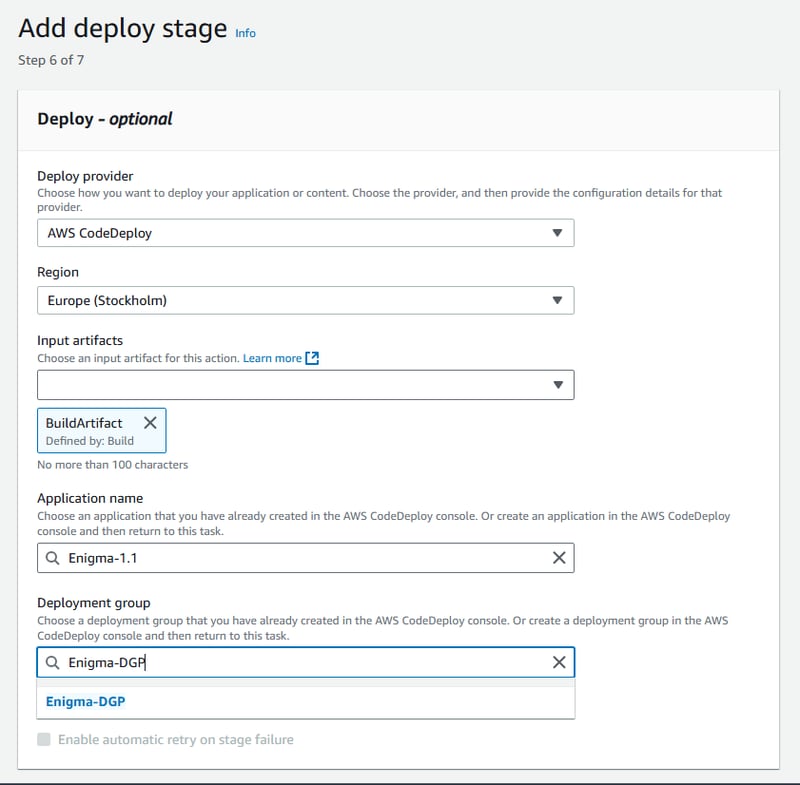
Navigate back to CodePipeline page and ensure that you have correctly added the the CodeDeploy application name and the deployment group. This ensures that the deployment stage knows where to deploy the application
Step4: Testing the pipeline
Everything is configured and ready to be run !! Push a commit to your repository and see the magic happen🪄🪄
AWS CodePipeline executes the following steps to deploy your application with zero manual efforts
1️⃣Detect the change and trigger the pipeline
2️⃣Use CodeBuild to compile and package the code
3️⃣Deploy it to EC2 via CodeDeploy
Pro Tip📝
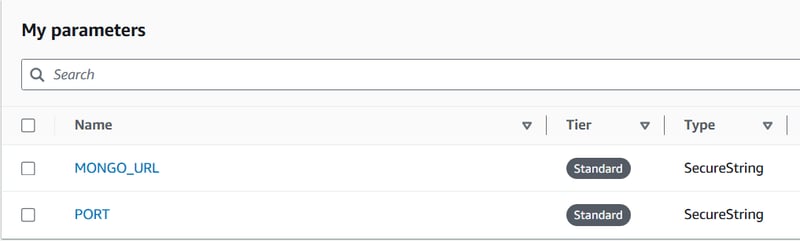
Don't tell me you pushed your .env file to GitHub… 😬 Make sure to store your DocumentDB credentials in SSM Parameter Store. It keep your secrets safe 🔏 and ensures your application retrieves it at runtime.
Here’s how mine looks
Troubleshooting Errors
If you do run into some failed builds, deployment issues don’t worry, we have all been there ! My Pipeline at one point my pipeline looked like this

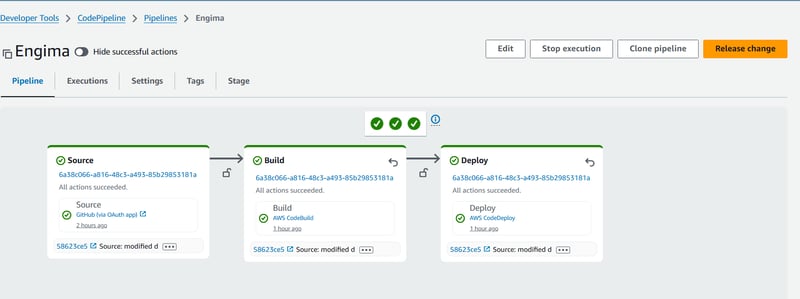
And here’s how it looks once everything works

One trick to debug your errors is to check logs from the CodeDeploy Agent on EC2. It will provide you insights into potential misconfigurations. Check it out by running:
sudo tail -f /var/log/aws/codedeploy-agent/codedeploy-agent.log
If BeforeInstall, AfterInstall, or ApplicationStart fail check the logs by running the following command:
sudo tail -n 50 /opt/codedeploy-agent/deployment-root/deployment-logs/codedeploy-agent-deployments.log
GoBuster vs My Deployment: Exposing My Own Mistakes
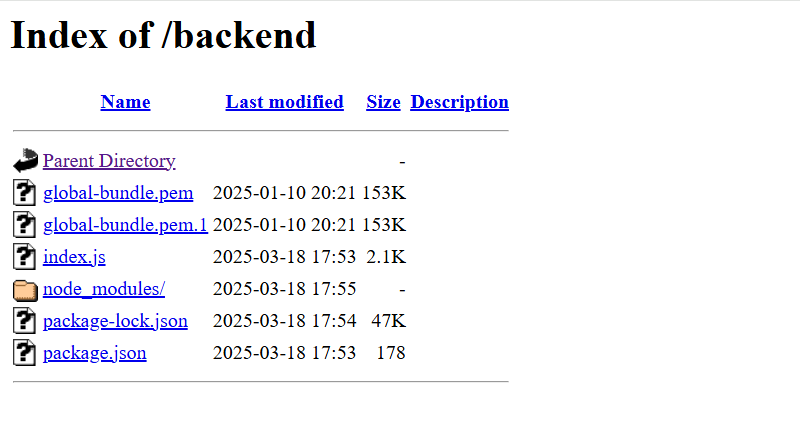
After deploying my application and feeling I ran Gobuster against the IP… and let’s just say, it was an eye-opener.
Directories and all my files were sitting there in plain sight!
I ran the following command:
gobuster dir -u http://<ip> -w lists/directory-list-2.3-medium.txt
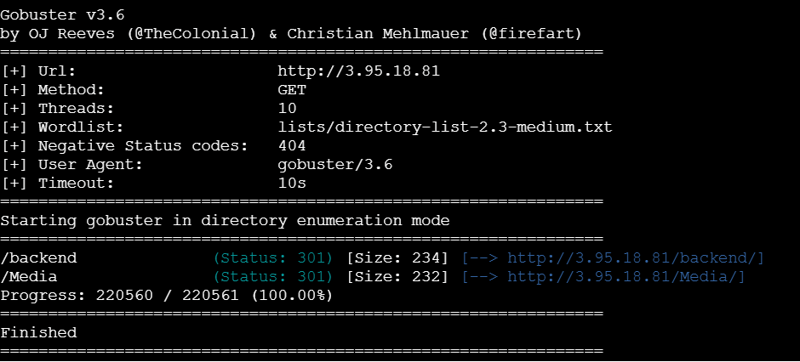
And this is how one can easily see my code files present
Mitigation Steps:
It was time to make things secure. I SSH-ed into my EC2 instance and modified the apache configuration files. Check the commands below:
sudo nano /etc/httpd/conf/httpd.conf
Now, replace the directory block (for the root directory) with the following
<Directory /var/www/html>
    Options -Indexes
    AllowOverride All
    Require all granted
</Directory>
To secure your other files (if there) use the following code block
<FilesMatch "^(\.env|\.git|config\.php|\.htaccess)">
    Order allow,deny
    Deny from all
</FilesMatch>
Wrapping It Up 🎯
This journey was a mix of automation and a little bit of shock (thanks to Gobuster!). The biggest lesson? Ensuring that the application is SECURE🔐 is as important as getting it running.
A small misconfiguration exposes more than what you anticipate! Keep it secure, keep it running !!🚀☁️
Thank your for reading !!

Top comments (0)