
👋 Hey there, tech enthusiasts!
I'm Sarvar, a Cloud Architect with a passion for transforming complex technological challenges into elegant solutions. With extensive experience spanning Cloud Operations (AWS & Azure), Data Operations, Analytics, DevOps, and Generative AI, I've had the privilege of architecting solutions for global enterprises that drive real business impact. Through this article series, I'm excited to share practical insights, best practices, and hands-on experiences from my journey in the tech world. Whether you're a seasoned professional or just starting out, I aim to break down complex concepts into digestible pieces that you can apply in your projects.
"A single server is a single point of failure. A load balancer is your insurance policy."
🎯 Welcome Back!
Remember in Article 6 when you built your first VPC with public and private subnets? You created the network foundation, but it was empty—no servers, no applications, nothing running.
Here's the reality: A VPC without compute resources is like building a highway with no cars. You need:
- Web servers to run your applications
- A way to handle traffic spikes
- Protection against server failures
- Zero-downtime deployments
That's where EC2 instances and Load Balancers come in.
By the end of this article, you'll:
- ✅ Deploy EC2 instances with Terraform
- ✅ Configure security groups for web servers
- ✅ Use user data to automate server setup
- ✅ Create an Application Load Balancer (ALB)
- ✅ Implement health checks and target groups
- ✅ Build high-availability web infrastructure
Time Required: 45 minutes (20 min read + 25 min practice)
Cost: ~$33/month (~$16 with free tier for ALB)
Difficulty: Intermediate
Let's deploy some real infrastructure! 🚀
💔 The Problem: Single Server Syndrome
The Nightmare Scenario
It's 2 AM. Your phone rings.
Monitoring Alert: Website Down
Status: 503 Service Unavailable
Cause: EC2 instance crashed
Impact: 100% of users affected
Revenue Loss: $500/minute
You scramble to:
- SSH into the server (if you can)
- Restart the application
- Hope it comes back up
- Watch users leave your site
The root cause? You had one server running everything.
Common Single-Server Problems:
❌ Traffic Spike: Black Friday hits, server crashes from load
❌ Hardware Failure: AWS instance dies, site goes down
❌ Deployment Risk: Update breaks something, entire site offline
❌ No Redundancy: One point of failure = business risk
❌ Manual Recovery: You're the human load balancer at 2 AM
❌ Poor User Experience: Slow response times, timeouts, errors
Sound familiar? Let's fix this with load balancing.
🌟 What is a Load Balancer? (Quick Theory)
Simple Definition
Load Balancer = Traffic cop for your servers. It:
- Distributes incoming requests across multiple servers
- Monitors server health automatically
- Routes traffic only to healthy servers
- Enables zero-downtime deployments
Think of it like this:
Without Load Balancer:
All Users → Single Server → 💥 Overloaded/Crashed
With Load Balancer:
Users → Load Balancer → Server 1 (healthy) ✅
                     → Server 2 (healthy) ✅
                     → Server 3 (unhealthy) ❌ (no traffic)
Why You Need This
Scenario 1: Traffic Spike
- Normal: 100 requests/sec → 2 servers handle it easily
- Black Friday: 10,000 requests/sec → Load balancer distributes across all servers
- Result: Site stays up, users happy
Scenario 2: Server Failure
- Server 1 crashes at 2 AM
- Load balancer detects failure in 30 seconds
- Automatically stops sending traffic to Server 1
- Server 2 handles all traffic
- Result: You sleep through the night
Scenario 3: Deployment
- Deploy new code to Server 1
- Load balancer keeps sending traffic to Server 2
- Test Server 1, then switch traffic
- Result: Zero downtime deployment
📋 Prerequisites
Before starting, make sure you have:
- ✅ Completed Article 6: Building Your First AWS VPC
- ✅ Terraform installed (v1.0+)
- ✅ AWS CLI configured
- ✅ Basic understanding of VPC and networking
- ✅ An SSH key pair in AWS (or we'll create one)
🏗️ What We're Building
Internet
    ↓
Application Load Balancer (ALB)
    ↓
    ├─→ EC2 Instance 1 (Apache)
    └─→ EC2 Instance 2 (Apache)
Architecture Components:
- VPC - Our isolated network
- Public Subnet - Where our resources live
- Internet Gateway - Internet access
- Security Groups - Firewall rules
- EC2 Instances - Web servers running Apache
- Application Load Balancer - Traffic distributor
- Target Group - Manages server health
📁 Project Structure
Create this folder structure:
07-ec2-load-balancer/
├── main.tf           # Main infrastructure code
├── variables.tf      # Input variables
├── outputs.tf        # Output values
└── terraform.tfvars  # Variable values

Source Code
The complete source code and Terraform configuration used in this article can be found on GitHub:
 simplynadaf
/
terraform-by-sarvar
simplynadaf
/
terraform-by-sarvar
Terraform Series
🚀 Terraform By Sarvar
Complete Terraform tutorial series from basics to advanced concepts
📚 Series Overview
This repository contains ONLY Terraform code examples for the Terraform By Sarvar tutorial series.
⚠️ IMPORTANT: This repo contains only.tffiles and infrastructure code. Articles are published on dev.to, not stored here.
📖 Read the series on dev.to: https://dev.to/sarvar_04/series/36963
🎯 What You'll Learn
- ✅ Infrastructure as Code (IaC) fundamentals
- ✅ Terraform basics to advanced concepts
- ✅ AWS resource provisioning
- ✅ Best practices and real-world patterns
- ✅ Production-ready configurations
📊 Series Progress
📖 Article Series
📘 Foundation (Articles 1-5) ✅ Complete
- Introduction to Terraform & IaC - ✅ Published
- Installation & Setup - ✅ Published
- Your First AWS Resource - ✅ Published
- Understanding Terraform State - ✅ Published
- Variables and Outputs - ✅ Published
📗 Real Infrastructure (Articles 6-10) ✅ Complete
Getting Started
Follow these steps to run the project on your local machine:
- Clone the repository:
git clone https://github.com/simplynadaf/terraform-by-sarvar.git
- Navigate to the project directory:
cd terraform-by-sarvar/articles/08-lambda-serverless
🔧 Step 1: Define Variables
Create variables.tf:
# AWS Region
variable "aws_region" {
  description = "AWS region where resources will be created"
  type        = string
  default     = "us-east-1"
}

# Project Name
variable "project_name" {
  description = "Project name for resource naming"
  type        = string
  default     = "terraform-web"
}

# Environment
variable "environment" {
  description = "Environment name"
  type        = string
  default     = "dev"
}

# VPC CIDR
variable "vpc_cidr" {
  description = "CIDR block for VPC"
  type        = string
  default     = "10.0.0.0/16"
}

# Public Subnet CIDR
variable "public_subnet_cidr" {
  description = "CIDR block for public subnet"
  type        = string
  default     = "10.0.1.0/24"
}

# Instance Type
variable "instance_type" {
  description = "EC2 instance type"
  type        = string
  default     = "t2.micro"
}

# Instance Count
variable "instance_count" {
  description = "Number of EC2 instances"
  type        = number
  default     = 2
}

# SSH Key Name
variable "key_name" {
  description = "SSH key pair name"
  type        = string
  default     = "my-key"
}

# My IP for SSH Access
variable "my_ip" {
  description = "Your IP address for SSH access (CIDR format)"
  type        = string
  default     = "0.0.0.0/0"  # Change this to your IP for security
}

Key Points:
-
instance_count = 2- We'll create 2 web servers -
instance_type = "t2.micro"- Free tier eligible -
my_ip- Restrict SSH access (change from 0.0.0.0/0 in production!)
🌐 Step 2: Create VPC and Networking
Add to main.tf:
# Terraform Configuration
terraform {
  required_version = ">= 1.0"
  required_providers {
    aws = {
      source  = "hashicorp/aws"
      version = "~> 5.0"
    }
  }
}

# Provider Configuration
provider "aws" {
  region = var.aws_region
}

# Data source: Get latest Amazon Linux 2023 AMI
data "aws_ami" "amazon_linux" {
  most_recent = true
  owners      = ["amazon"]

  filter {
    name   = "name"
    values = ["al2023-ami-*-x86_64"]
  }

  filter {
    name   = "virtualization-type"
    values = ["hvm"]
  }
}

# Data source: Get available availability zones
data "aws_availability_zones" "available" {
  state = "available"
}

# VPC
resource "aws_vpc" "main" {
  cidr_block           = var.vpc_cidr
  enable_dns_hostnames = true
  enable_dns_support   = true

  tags = {
    Name        = "${var.project_name}-vpc"
    Environment = var.environment
    ManagedBy   = "Terraform"
  }
}

# Internet Gateway
resource "aws_internet_gateway" "main" {
  vpc_id = aws_vpc.main.id

  tags = {
    Name        = "${var.project_name}-igw"
    Environment = var.environment
    ManagedBy   = "Terraform"
  }
}

# Public Subnet
resource "aws_subnet" "public" {
  vpc_id                  = aws_vpc.main.id
  cidr_block              = var.public_subnet_cidr
  availability_zone       = data.aws_availability_zones.available.names[0]
  map_public_ip_on_launch = true

  tags = {
    Name        = "${var.project_name}-public-subnet"
    Environment = var.environment
    Type        = "Public"
    ManagedBy   = "Terraform"
  }
}

# Public Route Table

# Public Subnet 2 (Different AZ for ALB)
resource "aws_subnet" "public_2" {
  vpc_id                  = aws_vpc.main.id
  cidr_block              = "10.0.2.0/24"
  availability_zone       = data.aws_availability_zones.available.names[1]
  map_public_ip_on_launch = true

  tags = {
    Name        = "${var.project_name}-public-subnet-2"
    Environment = var.environment
    Type        = "Public"
    ManagedBy   = "Terraform"
  }
}
resource "aws_route_table" "public" {
  vpc_id = aws_vpc.main.id

  route {
    cidr_block = "0.0.0.0/0"
    gateway_id = aws_internet_gateway.main.id
  }

  tags = {
    Name        = "${var.project_name}-public-rt"
    Environment = var.environment
    Type        = "Public"
    ManagedBy   = "Terraform"
  }
}

# Route Table Association
resource "aws_route_table_association" "public" {
  subnet_id      = aws_subnet.public.id
  route_table_id = aws_route_table.public.id
}

# Route Table Association for Public Subnet 2
resource "aws_route_table_association" "public_2" {
  subnet_id      = aws_subnet.public_2.id
  route_table_id = aws_route_table.public.id
}
New Concept: Data Sources
data "aws_ami" "amazon_linux" {
  most_recent = true
  owners      = ["amazon"]
  # ...
}

Data sources query existing AWS resources. Here we're finding the latest Amazon Linux AMI automatically - no need to hardcode AMI IDs!
🔒 Step 3: Configure Security Groups
Security groups are like firewalls. Add to main.tf:
# Security Group for ALB
resource "aws_security_group" "alb" {
  name        = "${var.project_name}-alb-sg"
  description = "Security group for Application Load Balancer"
  vpc_id      = aws_vpc.main.id

  ingress {
    description = "HTTP from anywhere"
    from_port   = 80
    to_port     = 80
    protocol    = "tcp"
    cidr_blocks = ["0.0.0.0/0"]
  }

  egress {
    description = "Allow all outbound traffic"
    from_port   = 0
    to_port     = 0
    protocol    = "-1"
    cidr_blocks = ["0.0.0.0/0"]
  }

  tags = {
    Name        = "${var.project_name}-alb-sg"
    Environment = var.environment
    ManagedBy   = "Terraform"
  }
}

# Security Group for EC2 Instances
resource "aws_security_group" "instance" {
  name        = "${var.project_name}-instance-sg"
  description = "Security group for EC2 instances"
  vpc_id      = aws_vpc.main.id

  ingress {
    description     = "HTTP from ALB"
    from_port       = 80
    to_port         = 80
    protocol        = "tcp"
    security_groups = [aws_security_group.alb.id]
  }

  ingress {
    description = "SSH from my IP"
    from_port   = 22
    to_port     = 22
    protocol    = "tcp"
    cidr_blocks = [var.my_ip]
  }

  egress {
    description = "Allow all outbound traffic"
    from_port   = 0
    to_port     = 0
    protocol    = "-1"
    cidr_blocks = ["0.0.0.0/0"]
  }

  tags = {
    Name        = "${var.project_name}-instance-sg"
    Environment = var.environment
    ManagedBy   = "Terraform"
  }
}

Security Architecture:
Internet → ALB (Port 80) → EC2 Instances (Port 80)
                            EC2 Instances (Port 22 from your IP)
Key Security Practices:
- ALB accepts HTTP (80) from anywhere
- EC2 instances only accept HTTP from ALB (not directly from internet!)
- SSH (22) only from your IP address
- This is called "defense in depth"
🖥️ Step 4: Deploy EC2 Instances
Now for the exciting part - creating web servers! Add to main.tf:
# EC2 Instances
resource "aws_instance" "web" {
  count = var.instance_count

  ami           = data.aws_ami.amazon_linux.id
  instance_type = var.instance_type
  key_name      = var.key_name
  subnet_id     = aws_subnet.public.id

  vpc_security_group_ids = [aws_security_group.instance.id]

  user_data = base64encode(<<-EOF
    #!/bin/bash
    dnf update -y
    dnf install -y httpd
    systemctl start httpd
    systemctl enable httpd
    echo "<h1>Terraform Web Server - Instance: $(ec2-metadata --instance-id | cut -d' ' -f2)</h1><p>AZ: $(ec2-metadata --availability-zone | cut -d' ' -f2)</p>" > /var/www/html/index.html
    EOF
  )

  tags = {
    Name        = "${var.project_name}-web-${count.index + 1}"
    Environment = var.environment
    ManagedBy   = "Terraform"
    Server      = "web-${count.index + 1}"
  }
}

Breaking Down the Code:
1. Count Meta-Argument:
count = var.instance_count
Creates multiple instances. With instance_count = 2, we get 2 servers!
2. User Data - The Magic:
user_data = <<-EOF
  #!/bin/bash
  yum update -y
  yum install -y httpd
  # ...
EOF
User data runs automatically when the instance starts. It:
- Updates the system
- Installs Apache web server
- Starts Apache
- Creates a custom HTML page
3. Dynamic Naming:
Name = "${var.project_name}-web-${count.index + 1}"
- First instance:
terraform-web-web-1 - Second instance:
terraform-web-web-2
⚖️ Step 5: Create Application Load Balancer
The load balancer distributes traffic. Add to main.tf:
# Application Load Balancer
resource "aws_lb" "main" {
  name               = "${var.project_name}-alb"
  internal           = false
  load_balancer_type = "application"
  security_groups    = [aws_security_group.alb.id]
  subnets            = [aws_subnet.public.id, aws_subnet.public_2.id]

  enable_deletion_protection = false

  tags = {
    Name        = "${var.project_name}-alb"
    Environment = var.environment
    ManagedBy   = "Terraform"
  }
}

# Target Group
resource "aws_lb_target_group" "main" {
  name     = "${var.project_name}-tg"
  port     = 80
  protocol = "HTTP"
  vpc_id   = aws_vpc.main.id

  health_check {
    enabled             = true
    healthy_threshold   = 2
    unhealthy_threshold = 2
    timeout             = 5
    interval            = 30
    path                = "/"
    protocol            = "HTTP"
    matcher             = "200"
  }

  tags = {
    Name        = "${var.project_name}-tg"
    Environment = var.environment
    ManagedBy   = "Terraform"
  }
}

# Target Group Attachment
resource "aws_lb_target_group_attachment" "main" {
  count = var.instance_count

  target_group_arn = aws_lb_target_group.main.arn
  target_id        = aws_instance.web[count.index].id
  port             = 80
}

# ALB Listener
resource "aws_lb_listener" "main" {
  load_balancer_arn = aws_lb.main.arn
  port              = "80"
  protocol          = "HTTP"

  default_action {
    type             = "forward"
    target_group_arn = aws_lb_target_group.main.arn
  }

  tags = {
    Name        = "${var.project_name}-listener"
    Environment = var.environment
    ManagedBy   = "Terraform"
  }
}

Understanding Load Balancer Components:
1. Application Load Balancer (ALB):
- The main load balancer resource
-
internal = false- Internet-facing -
load_balancer_type = "application"- Layer 7 (HTTP/HTTPS)
2. Target Group:
- Manages the backend servers
- Performs health checks every 30 seconds
- Marks servers healthy after 2 successful checks
- Marks servers unhealthy after 2 failed checks
3. Target Group Attachment:
count = var.instance_count
target_id = aws_instance.web[count.index].id
Registers each EC2 instance with the target group.
4. Listener:
- Listens on port 80
- Forwards traffic to the target group
Health Check Flow:
ALB → Checks "/" every 30s → Expects HTTP 200 →
  ✅ Healthy (2 successes) → Receives traffic
  ❌ Unhealthy (2 failures) → No traffic
📤 Step 6: Define Outputs
Create outputs.tf:
# VPC Outputs
output "vpc_id" {
  description = "ID of the VPC"
  value       = aws_vpc.main.id
}

# Subnet Output
output "public_subnet_id" {
  description = "ID of public subnet"
  value       = aws_subnet.public.id
}

# EC2 Instance Outputs
output "instance_ids" {
  description = "IDs of EC2 instances"
  value       = aws_instance.web[*].id
}

output "instance_public_ips" {
  description = "Public IPs of EC2 instances"
  value       = aws_instance.web[*].public_ip
}

# Load Balancer Outputs
output "alb_dns_name" {
  description = "DNS name of the Application Load Balancer"
  value       = aws_lb.main.dns_name
}

output "alb_url" {
  description = "URL to access the load balancer"
  value       = "http://${aws_lb.main.dns_name}"
}

# Security Group Outputs
output "alb_security_group_id" {
  description = "ID of ALB security group"
  value       = aws_security_group.alb.id
}

output "instance_security_group_id" {
  description = "ID of instance security group"
  value       = aws_security_group.instance.id
}

Splat Expression:
aws_instance.web[*].id
The [*] gets ALL instance IDs as a list. Super useful with count!
⚙️ Step 7: Set Variable Values
Create terraform.tfvars:
aws_region = "us-east-1"
project_name = "terraform-web"
environment = "dev"

# Network Configuration
vpc_cidr = "10.0.0.0/16"
public_subnet_cidr = "10.0.1.0/24"

# EC2 Configuration
instance_type = "t2.micro"
instance_count = 2
key_name = "my-key"

# Security - Change this to your IP address
my_ip = "0.0.0.0/0"

⚠️ Important: Change my_ip to your actual IP address for security!
Find your IP:
curl ifconfig.me
Then update:
my_ip = "203.0.113.0/32" # Your IP
🚀 Step 8: Deploy the Infrastructure
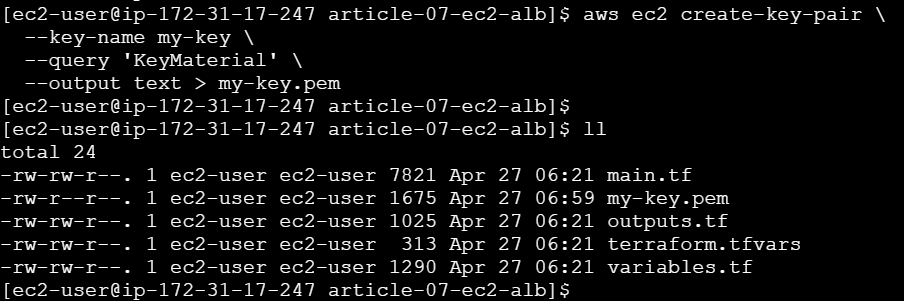
1. Create SSH Key Pair (if you don't have one)
# Create key pair in AWS
aws ec2 create-key-pair \
--key-name my-key \
--query 'KeyMaterial' \
--output text > my-key.pem
# Set permissions
chmod 400 my-key.pem

2. Initialize Terraform
terraform init
Expected output:
Initializing the backend...
Initializing provider plugins...
- Finding hashicorp/aws versions matching "~> 5.0"...
- Installing hashicorp/aws v5.100.0...

Terraform has been successfully initialized!

3. Review the Plan
terraform plan
You should see:
Plan: 14 to add, 0 to change, 0 to destroy.
Resources being created:
- 1 VPC
- 1 Internet Gateway
- 1 Subnet
- 1 Route Table + Association
- 2 Security Groups
- 2 EC2 Instances
- 1 Application Load Balancer
- 1 Target Group
- 2 Target Group Attachments
- 1 ALB Listener

4. Apply the Configuration
terraform apply
Type yes when prompted.

This will take 3-5 minutes because:
- EC2 instances need to boot
- User data script runs
- ALB needs to provision
- Health checks need to pass

✅ Step 9: Test Your Infrastructure
1. Get the Load Balancer URL
terraform output alb_url
Output:
http://terraform-web-alb-1740709428.us-east-1.elb.amazonaws.com

2. Test in Browser
Open the URL in your browser. You should see:
🚀 Terraform Web Server
Deployed with Infrastructure as Code

Instance ID: i-09305fc7d4638360a
Availability Zone: us-east-1a
Server: 1

3. Test Load Balancing
Refresh the page multiple times. You'll see the Instance ID and Server number change - that's the load balancer distributing traffic!
First request  → Server: 1
Second request → Server: 2
Third request  → Server: 1

4. Test Individual Instances
# Get instance IPs
terraform output instance_public_ips

# Test directly (should work)
curl http://<instance-ip>
🔍 Understanding What Happened
Traffic Flow
User Request
    ↓
ALB DNS (terraform-web-alb-xxx.elb.amazonaws.com)
    ↓
ALB Listener (Port 80)
    ↓
Target Group (Health Check: ✅)
    ↓
Round-Robin Distribution
    ├─→ EC2 Instance 1 (Apache) → Response
    └─→ EC2 Instance 2 (Apache) → Response
Health Check Process
Every 30 seconds:
ALB → GET / → EC2 Instance
    ↓
HTTP 200 OK?
    ├─ Yes (2 times) → Mark Healthy → Send Traffic
    └─ No (2 times)  → Mark Unhealthy → Stop Traffic
🧪 Advanced Testing
Test High Availability
Scenario: What if one server fails?
# Get instance IDs
terraform output instance_ids

# Stop one instance
aws ec2 stop-instances --instance-ids i-xxxxx

# Wait 1 minute for health check to fail

# Test the ALB URL - still works!
curl http://<alb-dns>
The ALB automatically stops sending traffic to the unhealthy instance!
Monitor Health Status
# Check target health
aws elbv2 describe-target-health \
  --target-group-arn <target-group-arn>
Output:
{
  "TargetHealthDescriptions": [
    {
      "Target": {
        "Id": "i-xxxxx",
        "Port": 80
      },
      "HealthCheckPort": "80",
      "TargetHealth": {
        "State": "healthy"
      }
    }
  ]
}
🐛 Troubleshooting Common Issues
Issue 1: "InvalidKeyPair.NotFound"
Error:
Error: creating EC2 Instance: InvalidKeyPair.NotFound
Solution:
# List your key pairs
aws ec2 describe-key-pairs

# Create if missing
aws ec2 create-key-pair --key-name my-key \
  --query 'KeyMaterial' --output text > my-key.pem
chmod 400 my-key.pem

# Update terraform.tfvars with correct key name
Issue 2: ALB Shows "503 Service Unavailable"
Cause: Instances are unhealthy or still booting.
Solution:
# Wait 2-3 minutes for:
# 1. Instances to boot
# 2. User data to complete
# 3. Health checks to pass

# Check target health
aws elbv2 describe-target-health \
  --target-group-arn $(terraform output -raw target_group_arn)
Issue 3: Can't SSH to Instances
Cause: Security group blocks your IP.
Solution:
# Get your current IP
curl ifconfig.me

# Update terraform.tfvars
my_ip = "YOUR_IP/32"

# Apply changes
terraform apply
Issue 4: "Subnet must have at least 2 availability zones"
Error with ALB:
Error: creating ELBv2 Load Balancer: ValidationError
Solution: ALBs require at least 2 subnets in different AZs. Update main.tf:
# Add second subnet
resource "aws_subnet" "public_2" {
  vpc_id                  = aws_vpc.main.id
  cidr_block              = "10.0.2.0/24"
  availability_zone       = data.aws_availability_zones.available.names[1]
  map_public_ip_on_launch = true

  tags = {
    Name = "${var.project_name}-public-subnet-2"
  }
}

# Update ALB subnets
resource "aws_lb" "main" {
  # ...
  subnets = [aws_subnet.public.id, aws_subnet.public_2.id]
}
💰 Cost Breakdown
Monthly Costs (us-east-1):
| Resource | Quantity | Cost/Month | Total |
|---|---|---|---|
| t2.micro EC2 | 2 | $8.50 | $17.00 |
| Application Load Balancer | 1 | $16.20 | $16.20 |
| Data Transfer (1GB) | - | $0.09 | $0.09 |
| Total | ~$33.29 |
Free Tier Benefits:
- First 750 hours/month of t2.micro (covers both instances!)
- First 15 GB data transfer out
- Actual cost with free tier: ~$16.20/month (just the ALB)
Cost Optimization Tips:
- Use t2.micro (free tier eligible)
- Delete resources when not in use
- Use Network Load Balancer ($10.95/month) if you don't need Layer 7 features
- Consider using Auto Scaling (covered in future articles)
🧹 Cleanup
Important: Don't forget to destroy resources to avoid charges!
# Destroy everything
terraform destroy

# Type 'yes' when prompted

This will delete:
- ✅ Load Balancer
- ✅ Target Group
- ✅ EC2 Instances
- ✅ Security Groups
- ✅ VPC and networking
Verify deletion:
# Check EC2 instances
aws ec2 describe-instances --filters "Name=tag:ManagedBy,Values=Terraform"

# Check load balancers
aws elbv2 describe-load-balancers
📚 Key Concepts Learned
1. Count Meta-Argument
count = 2
Creates multiple identical resources. Access with [count.index].
2. Data Sources
data "aws_ami" "amazon_linux" { }
Query existing AWS resources instead of hardcoding values.
3. User Data
user_data = <<-EOF
  #!/bin/bash
  # Bootstrap script
EOF
Automate instance configuration at launch.
4. Security Group References
security_groups = [aws_security_group.alb.id]
Reference one security group from another for layered security.
5. Splat Expressions
aws_instance.web[*].id
Get all values from resources created with count.
6. Health Checks
health_check {
  path     = "/"
  interval = 30
}
Automatic monitoring and traffic routing.
🎯 Real-World Applications
This architecture is used for:
1. Web Applications
- WordPress sites
- E-commerce platforms
- SaaS applications
2. API Backends
- REST APIs
- GraphQL servers
- Microservices
3. Content Delivery
- Static websites
- Media streaming
- File downloads
4. Development Environments
- Staging servers
- Testing environments
- Demo applications
🚀 What's Next?
In the next article, we'll add:
- RDS Database - Persistent data storage
- AWS Secrets Manager - Secure credential management
- Private Subnets - Enhanced security
- Database Connection - Connect EC2 to RDS
Coming Up: Article 8: Secure Database Deployment: RDS + Secrets Manager with Terraform
📖 Additional Resources
Official Documentation:
Related Articles:
- Article 6: Building Your First AWS VPC with Terraform
- Article 5: Variables and Outputs
- AWS Well-Architected Framework
💬 Questions?
Common Questions:
Q: Can I use different instance types for each server?
A: Yes! Use for_each instead of count for more flexibility (covered in Article 13).
Q: How do I add HTTPS/SSL?
A: You'll need an ACM certificate and update the listener to port 443. We'll cover this in a future article.
Q: Can I deploy to multiple regions?
A: Yes! Use Terraform workspaces or separate state files per region.
Q: How do I add auto-scaling?
A: Replace EC2 instances with an Auto Scaling Group. We'll cover this in Article 15.
✅ Summary
Today you learned how to:
- ✅ Deploy multiple EC2 instances with Terraform
- ✅ Use
countto create multiple resources - ✅ Configure security groups for layered security
- ✅ Automate server setup with user data
- ✅ Create an Application Load Balancer
- ✅ Implement health checks and high availability
- ✅ Test load balancing in action
You now have production-ready web infrastructure! 🎉
📌 Wrapping Up
Thank you for reading. I hope this article provided practical insights and a clearer understanding of the topic.
If you found this useful:
- ❤️ Like if it added value
- 🦄 Unicorn if you’re applying it today
- 💾 Save it for your next optimization session
- 🔄 Share it with your team
💡 What’s Next
More deep dives are coming soon on:
- Cloud Operations
- GenAI & Agentic AI
- DevOps Automation
- Data & Platform Engineering
Follow along for weekly insights and hands-on guides.
🌐 Portfolio & Work
You can explore my full body of work, certifications, architecture projects, and technical articles here:
🛠️ Services I Offer
If you're looking for hands-on guidance or collaboration, I provide:
- Cloud Architecture Consulting (AWS / Azure)
- DevSecOps & Automation Design
- FinOps Optimization Reviews
- Technical Writing (Cloud, DevOps, GenAI)
- Product & Architecture Reviews
- Mentorship & 1:1 Technical Guidance
🤝 Let’s Connect
I’d love to hear your thoughts. Feel free to drop a comment or connect with me on:
For collaborations, consulting, or technical discussions, reach out at:
Found this helpful? Share it with your team.
⭐ Star the repo • 📖 Follow the series • 💬 Ask questions
Made by Sarvar Nadaf
🌐 https://sarvarnadaf.com

Top comments (6)
Re: Q3, check out enhanced region support, introduced in June, 2025 with v6 of the Terraform AWS provider. If we begin accepting and propagating a region value, there's no longer a need for workspaces or separate state files, just for the sake of multi-region deployment within a single AWS account. Attention to physical resources names for non-regional resources is still required, as has always been true in Terraform (whereas CloudFormation supplies unique names by default).
Thanks for pointing out Paul. The enhanced region support in v6 is significant improvement and simplifies multiregion deployments. I'll keep the naming considerations for global resources in mind as well. Once again thanks you so much 😊🙏🏻
Some comments may only be visible to logged-in visitors. Sign in to view all comments.