
Welcome to the Beginners Guide to Polkadot API series!
This tutorial will focus on learning how to build and compose decentralized applications (dApps) on the Polkadot network. We will also define what that means exactly and explain how to create your first light client-powered app on Polkadot.
If you're new to Polkadot (and blockchain development in general), keep reading; otherwise, you can skip to the tutorial below.
Quick Introduction: What is Polkadot?
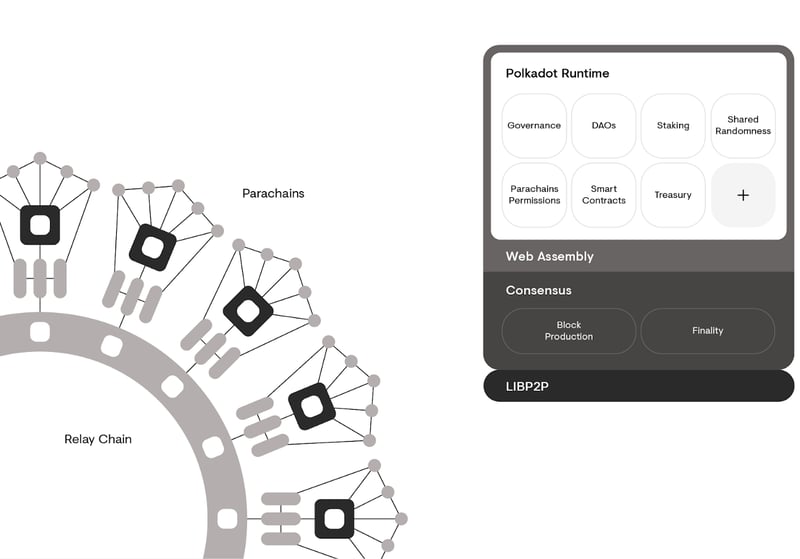
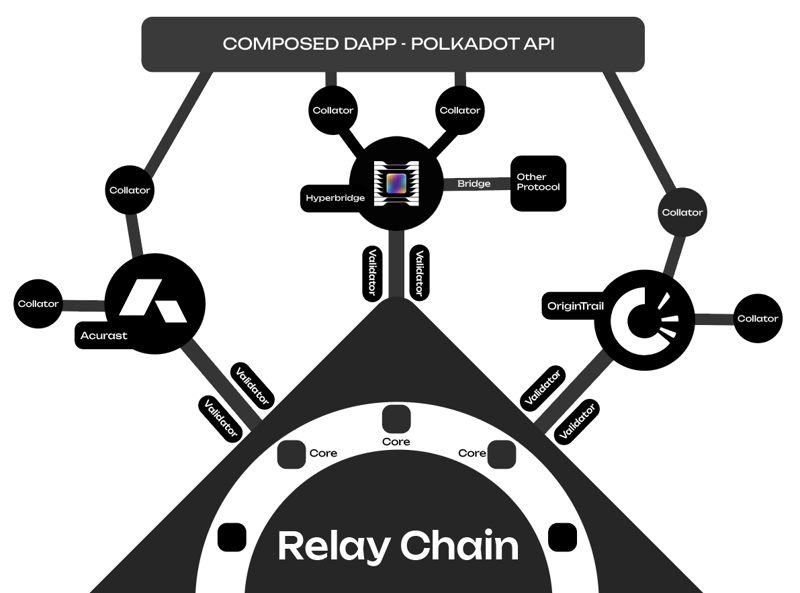
Polkadot's is a protocol that coordinates and secures different rollups (often called parachains) allowing for a horizontally scaling, heterogeneously sharded, multi-chain approach to Web3. One of the keywords here is heterogeneously sharded, meaning that each shard, or blockchain (or state machine, if you want to get more technical), contains its unique domain-specific logic. Anyone can build a rollup and inherit security from the Polkadot relay chain using the Polkadot SDK. A rollup can be quite literally anything from a bridge to Ethereum and other protocols (Hyperbridge), a decentralized knowledge graph️ (OriginTrail), or even a cloud computing and oracle platform that is powered by old smartphones (Acurast)
Once deployed, rollups can use cross-consensus messaging (XCM) to communicate with one another. This is not limited to just rollups within Polkadot, but even to other protocols, such as Ethereum.
Composing Applications Using the Polkadot Stack
As Polkadot has a wide range of different application-specific rollups at our creative disposal, the concept of composing apps should not be a foreign one. Similar to how a traditional, web2 application may use different services, APIs, and technologies to build a full-stack application, we can utilize the different parts of the Polkadot stack to build a web3 native application. You even go as far as to host your application on a web3 service to bypass the conventional means of deployment completely.
The Composer - The Polkadot API (PAPI)
Although you can use a number of languages to build apps on Polkadot, such as Rust, Python, or Typescript/Javascript, we'll be using Polkadot API, or PAPI, which is a Typescript library for interacting with Polkadot (and its rollups). The main differentiator with PAPI is its light-client-first approach, in which it has native support for communicating to Polkadot via a light client.
The light client implementation, called smoldot, runs in the background and ensures that we have the latest, verified chain state. Using PAPI, you can even interact with multiple rollups on Polkadot at once.
Why Are Light Clients Important?
Light clients are one of the two options for connecting to a blockchain, with the other usually depending on a single RPC provider (which often runs on a centralized server). They are typically a more secure, trust-minimized, efficient way of communicating to a blockchain. Light clients verify the state of the blockchain using Merkle proofs, ensuring it has not only the latest but correct state. As it just verifies the headers of the blocks, it has no need to download the whole state, making it ideal for resource-constrained environments.
Unlike RPC connections, they do not depend on a single RPC provider and can be embedded in both the browser and natively.
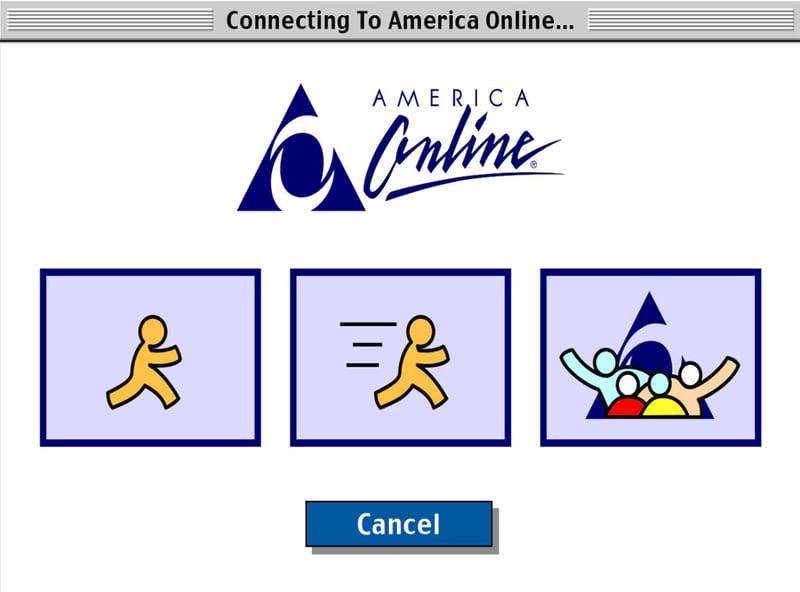
"You've Got Mail!" - Polkadot API Boilerplate and Example
With the explanation out of the way, let's get our hands dirty with some code.
Project Introduction
Our project will be quite simple - it will be a CLI application that runs in the terminal, which watches the relay chain for a certain extrinsic (a transaction). This extrinsic will be the system.remarkWithEvent extrinsic, meaning it is coming from the system pallet (module) on the Westend test network.
The system.remarkWithEvent extrinsic allows us to send any arbitrary data on-chain, with the end result being a hash that is the address and the word "email" combined (address+email). We'll hash this combination and watch for remarks on a chain that are addressed to us. The system.remarkWithEvent extrinsic emits an event that we can use PAPI to watch the chain for.
Once we receive a remark addressed to us, we will play the infamous "You've Got Mail!" sound byte.
Prerequisites
You should have the following installed as a prerequisite:
-
npm(or other package manager) nodegit- Polkadot.js Browser Extension (wallet)
You will also need an account with Westend tokens. Below you can find guides for both Polkadot.js and the faucet:
Cloning the repository
For this tutorial, you can choose to run the example directly by cloning the main branch of the repository, or to use a boilerplate/template and follow the tutorial.
We need to clone the template, which has everything we need to get started with the Polkadot API and Typescript. Be sure you clone the correct branch (empty-cli) which already provides all dependencies:
git clone https://github.com/CrackTheCode016/polkadot-api-example-cli --branch empty-cli
Once cloned, run the following to ensure npm dependencies are installed:
cd polkadot-api-example-cli
npm install
Exploring the Template (Light Clients!)
When we open the repository, we should see the following code (excluding imports):
async function withLightClient(): Promise<PolkadotClient> {
    // Start the light client
    const smoldot = start();
    // The Westend Relay Chain
    const relayChain = await smoldot.addChain({ chainSpec: westEndChainSpec })
    return createClient(
        getSmProvider(relayChain)
    );
}

async function main() {
    // CLI Code goes here...
}

main()
The notable function to pay attention to is the withLightClient function. This function uses the built in light client functionality (powered by smoldot) to actually create a light client that syncs and interacts with Polkadot right there in our application.
Creating the CLI
Next, let's create our CLI, which is to be done within the confines of the main function. We will include an option (-a / --account), which will be the account we will watch for our "mail":
const program = new Command();
console.log(chalk.white.dim(figlet.textSync("Web3 Mail Watcher")));
program.version('0.0.1').description('Web3 Mail Watcher - A simple CLI tool to watch for remarks on Polkadot network');
    .option('-a, --account <account>', 'Account to watch')
    .parse(process.argv);

// CLI Arguments from commander
const options = program.opts();
Watching for Remarks
Next, we need to start watching the Westend network for remarks sent to our account. As was done before, all code should be within the main function:
    // We check for the --account flag, if its not provided we exit
    if (options.account) {
        console.log(chalk.black.bgRed("Watching account:"), chalk.bold.whiteBright(options.account));
        // We create a light client to connect to the Polkadot (Westend) network
        const lightClient = await withLightClient();
        // We get the typed API to interact with the network
        const dotApi = lightClient.getTypedApi(wnd);
        // We subscribe to the System.Remarked event and watch for remarks from our account
        dotApi.event.System.Remarked.watch().subscribe((event) => {
            // We look for a specific hash, indicating that its our address + an email
            const { sender, hash } = event.payload;
            // We calculate the hash of our account + email
            const calculatedHash = bytesToHex(blake2b(`${options.account}+email`, { dkLen: 32 }));
            // If the hash matches, we play a sound and log the message - You got mail!
            if (`0x${calculatedHash}` == hash.asHex()) {
                sound.play("youve-got-mail-sound.mp3")
                console.log(chalk.black.bgRed(`You got mail!`));
                console.log(chalk.black.bgCyan("From:"), chalk.bold.whiteBright(sender.toString()));
                console.log(chalk.black.bgBlue("Hash:"), chalk.bold.whiteBright(hash.asHex()));
            }
        });
    } else {
        // If the account is not provided, we exit
        console.error('Account is required');
        return;
    }
This code is doing quite a bit, so let's break it down:
- First, we check for the existance of the
--accountargument, and log that we are watching that account, else we exit. We are using thechalkpackage to add color to ourconsole.logstatements. - Next, we create our light client.
- We use a light client and the Westend chain specification (
wnd) to access a typed API. - Once we have our API, we then begin to reactively watch the account for the event that corresponds to the remark. We analyze the payload, looking for a hash which is calculated as follows:
- hash of:
account_address+email
- hash of:
- When an event containing this hash is identified, it then plays the "You've Got Mail!" soundbite.
Compiling and running
Once we have all of our code in place, we should compile and run the repository:
npm start -- --account <account-address>
Upon running, we should have the following output:
❯ npm start -- --account 5GrwvaEF5zXb26Fz9rcQpDWS57CtERHpNehXCPcNoHGKutQY

> youve-got-mail-web3@1.0.0 start
> tsc && node ./dist/index.js --account 5GrwvaEF5zXb26Fz9rcQpDWS57CtERHpNehXCPcNoHGKutQY

 __        __   _    _____   __  __       _ _  __        __    _       _
 \ \      / /__| |__|___ /  |  \/  | __ _(_) | \ \      / /_ _| |_ ___| |__   ___ _ __
  \ \ /\ / / _ \ '_ \ |_ \  | |\/| |/ _` | | |  \ \ /\ / / _` | __/ __| '_ \ / _ \ '__|
   \ V  V /  __/ |_) |__) | | |  | | (_| | | |   \ V  V / (_| | || (__| | | |  __/ |
    \_/\_/ \___|_.__/____/  |_|  |_|\__,_|_|_|    \_/\_/ \__,_|\__\___|_| |_|\___|_|

Watching account: 5GrwvaEF5zXb26Fz9rcQpDWS57CtERHpNehXCPcNoHGKutQY
[smoldot] Smoldot v2.0.34
[smoldot] Chain initialization complete for westend2. Name: "Westend". Genesis hash: 0xe143…423e. Chain specification starting at: 0x10cf…b908 (#23920337)
Testing the CLI
Now that our application is actively watching for remark events on-chain, we can move to testing to see if it works!
As mentioned previously, you will need a Westend account with some tokens to pay for fees.
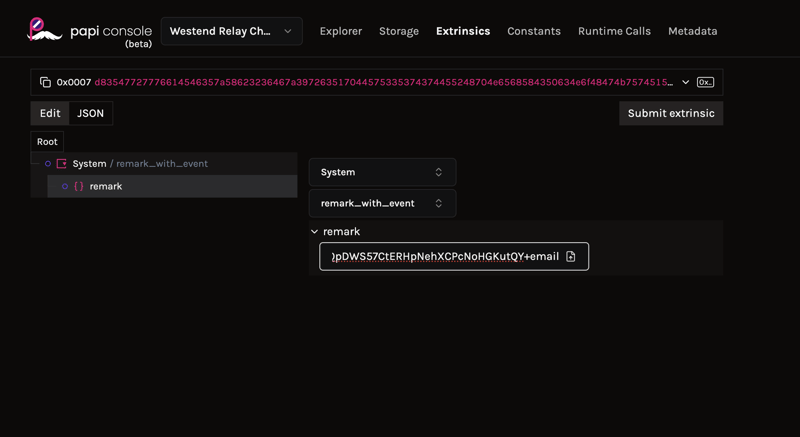
Navigate to the PAPI Dev Console > Extrinsics. You then want to select the System pallet, and the remark_with_event call:
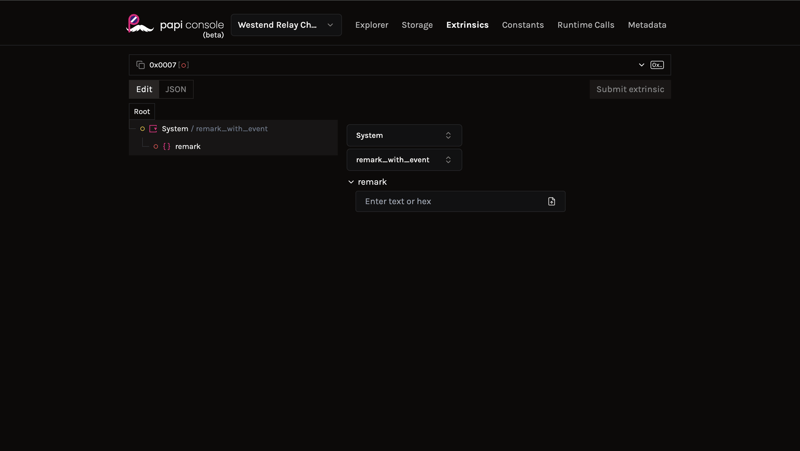
Next, we want to be sure we get the correct input for the text field. We want to be sure we are following the convention we set forth in our application:
address+email
If for example, we are watching 5GrwvaEF5zXb26Fz9rcQpDWS57CtERHpNehXCPcNoHGKutQY, then the field should look like the following:
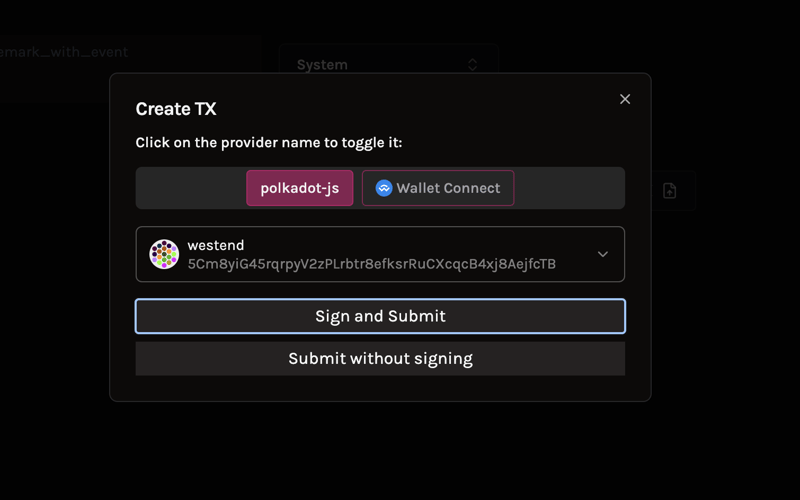
Once this input is in place, you may click the Submit extrinsic button, where you can sign using the Polkadot.js browser wallet:
Heading back to our CLI, we should soon see the following, along with the fact that "YOU'VE GOT MAIL!" (as in the sound should play):
 __        __   _    _____   __  __       _ _  __        __    _       _
 \ \      / /__| |__|___ /  |  \/  | __ _(_) | \ \      / /_ _| |_ ___| |__   ___ _ __
  \ \ /\ / / _ \ '_ \ |_ \  | |\/| |/ _` | | |  \ \ /\ / / _` | __/ __| '_ \ / _ \ '__|
   \ V  V /  __/ |_) |__) | | |  | | (_| | | |   \ V  V / (_| | || (__| | | |  __/ |
    \_/\_/ \___|_.__/____/  |_|  |_|\__,_|_|_|    \_/\_/ \__,_|\__\___|_| |_|\___|_|

Watching account: 5Cm8yiG45rqrpyV2zPLrbtr8efksrRuCXcqcB4xj8AejfcTB
You've got mail!
From: 5Cm8yiG45rqrpyV2zPLrbtr8efksrRuCXcqcB4xj8AejfcTB
Hash: 0xb6999c9082f5b1dede08b387404c9eb4eb2deee4781415dfa7edf08b87472050
Conclusion
This application can be expanded in a number of ways, whether that is by adding a chatroom through remarks, or by using some of the rollups on Polkadot to expand the functionality.

Top comments (4)
Such a good article! Excited to see that blockchain development is trending on Dev.to
Thank you Vadym! Trying to get more out there ASAP. Anything you'd like to see?
It's a pleasure to meet you. To be honest, I'd be happy to see everything. I'm from Info-Polus, you can read about us here. Shortly speaking, we provide end-to-end Web3 development and consulting services, including staff augmentation.
I've been registered here since last year, but wasn't really active, because I was looking for more Web3 and blockchain discussions. Now, I can see more and more posts and topics related to the field.
Do you know any communities here related to blockchain development? Thanks in advance!
Unfortunately, I do not know of any communities that cater to web3 here. I am new to this site as well - let me know if there are any!
Feel free to connect with me on X, and shoot me a message there: x.com/baderyo_o