Series
Part 1 - dotnet vs python vs node - temperature emission - who is cooler?
Part 2 - Developing modules
Part 3 - Custom Containers using Apache Nifi
Part 4 - Custom Module using TimescaleDB
Part 5 - Custom Module using Grafana
Intro
This is part 2 in a series starting here that runs through an Azure IOT Edge solution located at: https://github.com/chrismckelt/edgy
This part will cover developing and running custom modules written in C#, Python and NodeJS.
It will focus on commands available in the VS Code interface rather than command line arguments as seen at: https://aka.ms/iotedgedev
Azure IoT SDKs
Azure IoT Edge has a number of SDKs for module development in your favourite language. The SDK code will handle setting up environment variables and provide the boiler plate code necessary to send and receive messages using multiple protocols & channels (e.g. MQTT, AMQP)
Setting up VS Code to run the local simulator
Given the solution is cloned locally and Azure is setup with our IOT Hub we can configure a device to act as a local simulator.
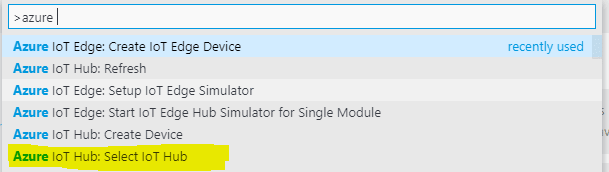
- Select IOT Hub & choose your IOT Hub
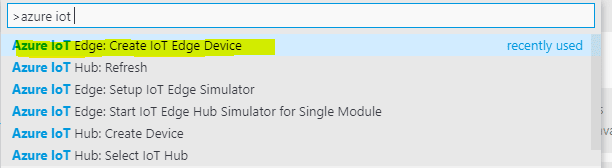
- Create IOT Edge Device - I have named my local device ‘LocalSimulator ‘
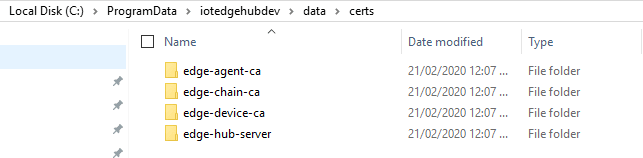
- Setup IOT Edge Simulator – this will create you edge certs

This will generate and install certificates for local development in the following folder & also install the for you note://run VS Code as admin for this
Creating a module for our solution
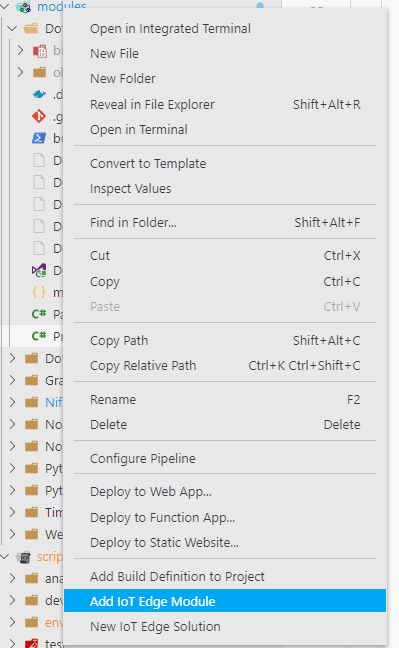
Right click on the modules folder and select ‘Add IoT Edge Module’.
This will then ask a module name & language (C,C#,Java,Node.js, Python)
This post will focus on the data generator/recorder modules below:
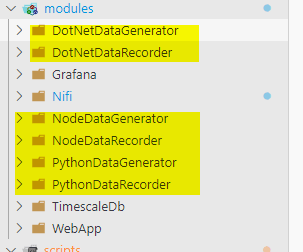
Data Generators
The demo code shows 3 ‘data generator’ modules written in C#, Python & Node JS.
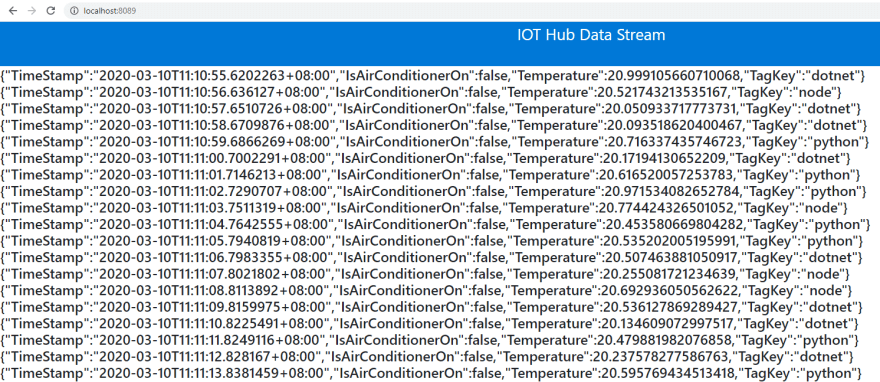
Each module publishes a message every second simulating temperature capture. Properties of the sent message are:
In C# connecting to the Edge Hub and sending messages can be seen in the following code:
Data Recorders
3 modules in matching languages subscribe to their respective modules published messages
Messages received are deserialized from JSON format to a POCO and then saved in a database.
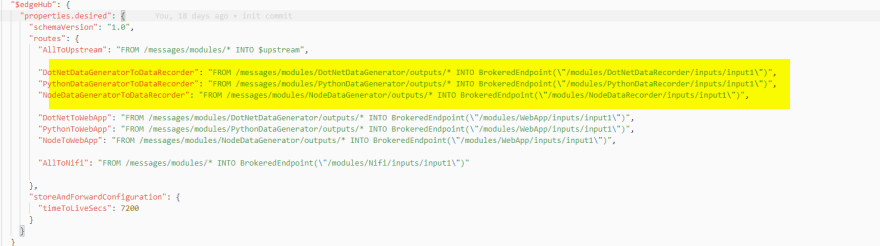
Routes
In order to route messages between modules we use the inbuilt route system in our deployment template file.
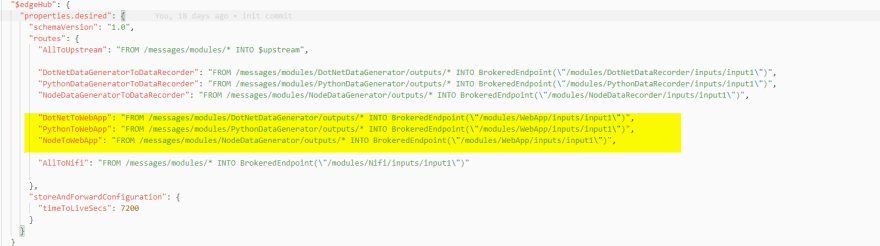
Web App – Viewer module
Finally to view the messages from a web page I have modified an existing demo to that uses SignalR view all messages sent to it from the below routes:
When running the solution you can view all published messages on the web page below
Outro
Here was a basic overview of an demo solution to create and build your own custom IoT Edge modules.
Next we will introduce an existing docker container (Apache Nifi) to act as a data orchestrator. This will subscribe to all 'Payload' messages and publish a message to ‘turn off’ the air conditioner when the temperature is too high.

Top comments (0)