
With everyone and their cat creating a "2023 Wrapped" for their apps, I could not hold back and had to build a small open-source one for this awesome dev.to community 🥰
Visit devto-wrapped.sliplane.app, enter your username and see what you achieved as an author on dev.to in 2023! No API key or login required!
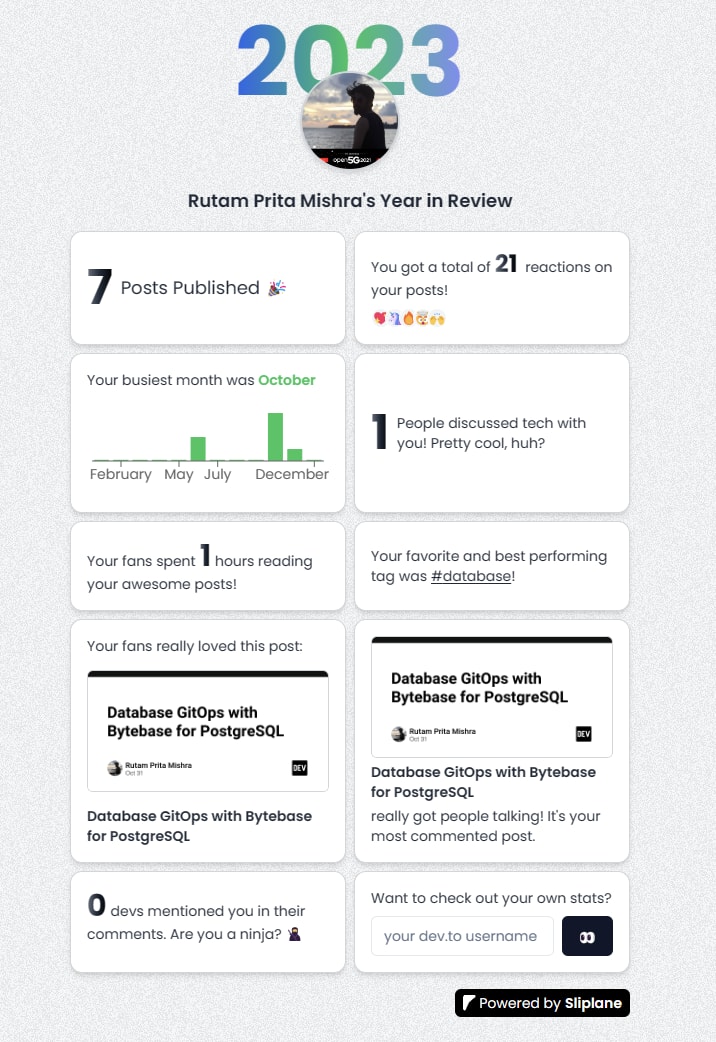
This is how my first year on dev.to went:

PS: Share a screenshot of your wrapped in the comments and I will randomly pick one person and send them some free developer stickers as an early christmas gift 🎅🎁
Anyway, you are here to learn something, so lets dive into the code!
Tutorial
The speed of building this small app was crucial for me, so I decided to use my own Hackathon Starter Template that I recently wrote about. I stripped some functionality away that I didnt need, resulting in a very lean monorepo with:
- Next.js + Tailwind
- ShadcnUI
You can see everything in this Github repository
Setup
If you want to follow a long and try it out yourself follow these steps:
# Clone repository
git clone https://github.com/Code42Cate/devto-wrapped.git
# Install dependencies
pnpm install
# Start app
pnpm run dev --filter web
The app should now start at http://localhost:3000. If it didnt work let me know in the comments!
Accessing dev.to data
The most interesting part of this small app is probably how we can access the dev.to data. While there are a few ways to go about this, I had a few requirements that helped me decide a way forward:
- No scraping - takes too long, I want the data to be available <1 second
- Only public data - I do not want to ask the user for an API key or use my own
- No database needed - I am lazy and want to avoid useless complexity
This gives us 2 possible ways to get to data:
- Documented and unauthenticated API calls
- Undocumented and public API calls that the dev.to website is making even if you are not logged in
Considering these two ways of getting data, there are basically 3 categories of data we can get:
- Public user information using the API:
dev.to/api/users/by_username - Published posts using the
dev.to/search/feed_contentAPI withclass_name=Article - Comments that include a search query with
dev.to/search/feed_contentandclass_name=Comment&search_fields=xyz
These API calls are all made server-side to speed up the requests and can be found in /apps/web/actions/api.ts. Since this is just hacked together, the functions are rather simple with very minimal error handling:
export async function getUserdata(username: string): Promise<User | undefined> {
  const res = await fetch(
    `https://dev.to/api/users/by_username?url=${username}`,
  );
  if (!res.ok) {
    return undefined;
  }

  const data = await res.json();

  return data as User;
}
For this usecase its fine, but remember to correctly catch exceptions and validate your types if you don't want your user to have unexpected crashes 😵
Calulating stats
Calculating the stats was surprisingly easy, mostly just because our data is very small. Even if you post everyday, we would still only have 365 posts to go through. Iterating through an array of 365 items takes virtually no time, giving us a lot of headroom to just get the job done without needing to care about performance! Every stat that you see on the page is calculated in a single function. Take the "Total reactions" for example:
  const reactionsCount = posts?.reduce(
    (acc: number, post: Article) => acc + post.public_reactions_count,
    0,
  );
All we need to do is go over the array of posts and sum up the public_reactions_count number on each post. Tada, done!
Even for the more complicated ones, its not more than a nested loop:
  const postsPerTag: Record<string, number> = posts?.reduce(
    (acc: Record<string, number>, post: Article) => {
      post.tag_list.forEach((tag) => {
        acc[tag] = acc[tag] ? acc[tag] + 1 : 1;
      });
      return acc;
    },
    {} as Record<string, number>,
  );
Frontend
Since this is build with Next.js, everything can be found in the /apps/web/app/page.tsx file.
At the top of the component you can first see how we fetch our data and check if the user even exists or if there is enough data to show anything at all:
  const user = await getUserdata(username);
  if (!user) {
    return <EmptyUser message="This user could not be found 🫠" />;
  }

  const stats = await getStats(user.id.toString());
  const mentionsCount = await getMentionedCommentCount(user.username);

  if (stats.postCount === 0) {
    return <EmptyUser message="This user has no posts 🫠" />;
  }
The different stats are all their own components which are part of a CSS grid, which looks something like this (shortened)
<div className="grid grid-cols-2 gap-2 w-full text-sm text-gray-800">
        <PublishedPostsCard count={stats.postCount} />

        <ReactionsCard count={stats.reactionsCount} />

        <BusiestMonthCard
          busiestMonth={stats.busiestMonth}
          postsPerMonth={stats.postsPerMonth}
        />

        <CommentsCard count={stats.commentsCount} />

        <ReadingTimeCard
          readingTime={stats.readingTime}
          totalEstimatedReadingTime={stats.totalEstimatedReadingTime}
        />

</div>
The components are all "dumb", meaning that they are only responsible for displaying their data. They do not fetch or calculate anything. Most of them are pretty simple like this "Best Post" card:
import Image from "next/image";
import { Article } from "@/actions/api";

export default function BestPostCard({
  post,
  coverImage,
}: {
  post: Article;
  coverImage: string;
}) {
  return (
    <div className="flex w-full flex-col justify-between gap-2 rounded-xl border border-gray-300 bg-white p-4 shadow-md">
      Your fans really loved this post: <br />
      <Image
        src={coverImage}
        alt={post.title}
        width={500}
        height={500}
        className="rounded-md border border-gray-300"
      />
      <a
        className="font-semibold underline-offset-2"
        href={`https://dev.to${post.path}`}
      >
        {post.title}
      </a>
    </div>
  );
}
Deployment
To deploy our app we are going to dockerize it and then use Sliplane (slightly biased, I am the co-founder!) to host it on our own Hetzner Cloud server. I covered how dockerizing a Next.js app works in a previous blog post, this is basically the same just with some small changes to adapt to my Turborepo setup :)
# src Dockerfile: https://github.com/vercel/turbo/blob/main/examples/with-docker/apps/web/Dockerfile
FROM node:18-alpine AS alpine

# setup pnpm on the alpine base
FROM alpine as base
ENV PNPM_HOME="/pnpm"
ENV PATH="$PNPM_HOME:$PATH"
RUN corepack enable
RUN pnpm install turbo --global

FROM base AS builder
# Check https://github.com/nodejs/docker-node/tree/b4117f9333da4138b03a546ec926ef50a31506c3#nodealpine to understand why libc6-compat might be needed.
RUN apk add --no-cache libc6-compat
RUN apk update
# Set working directory
WORKDIR /app
COPY . .
RUN turbo prune --scope=web --docker

# Add lockfile and package.json's of isolated subworkspace
FROM base AS installer
RUN apk add --no-cache libc6-compat
RUN apk update
WORKDIR /app

# First install the dependencies (as they change less often)
COPY .gitignore .gitignore
COPY --from=builder /app/out/json/ .
COPY --from=builder /app/out/pnpm-lock.yaml ./pnpm-lock.yaml
COPY --from=builder /app/out/pnpm-workspace.yaml ./pnpm-workspace.yaml
RUN pnpm install

# Build the project
COPY --from=builder /app/out/full/ .
COPY turbo.json turbo.json

RUN turbo run build --filter=web

# use alpine as the thinest image
FROM alpine AS runner
WORKDIR /app

# Don't run production as root
RUN addgroup --system --gid 1001 nodejs
RUN adduser --system --uid 1001 nextjs
USER nextjs

COPY --from=installer /app/apps/web/next.config.js .
COPY --from=installer /app/apps/web/package.json .

# Automatically leverage output traces to reduce image size
# https://nextjs.org/docs/advanced-features/output-file-tracing
COPY --from=installer --chown=nextjs:nodejs /app/apps/web/.next/standalone ./
COPY --from=installer --chown=nextjs:nodejs /app/apps/web/.next/static ./apps/web/.next/static
COPY --from=installer --chown=nextjs:nodejs /app/apps/web/public ./apps/web/public

CMD node apps/web/server.js
After dockerizing and pushing to a Github repository, all we need to do is create a new service in Sliplane and select a server that we want to host on. I already have a server that I run some small side projects on, so I am just using that one:

After clicking deploy it takes a few minutes to build and start our Docker image. The progress can be monitored in the log viewer:

After the first successfull deploy we get a free subdomain where our app is reachable, or we can add our own custom domain:

And that's it! Our app is online and reachable by everyone in the world and without surprising serverless bills 🤑
Thank you for reading until now and don't forget to comment with your wrapped screenshot to potentially win some stickers 😊
Cheers, Jonas

Top comments (68)
🤠
Wow, very well done.
means a lot coming from you, thanks 🥺
Wow, nice work! and I like it much better than other app's wrapped reviews. Here it is:

79 posts is amazing!
It's a kind of habits for me right now. They should be more but I stopped to do my weekly recap a few week ago :(
Nice - So far u have the most Posts Published - In comparison to all the others who were using this tool from Jonas ;)
This is so very cool!
Thank you!!
This is awesome and I love it!!!!
Thanks for building this
Great app and concept, good job! Here is mine, it didn't all fit into a single screen, I hope I'm still legible for the stickers 😜
Oi JorensM! I just did a raffle and your name popped up. I'd love to send you the stickers, please check your gmail:)
Oh that's amazing! Thanks!
Thanks, and of course :)
Great Stuff! Loved creating mine.
a ninja 🥷👀
Love this 😍 Such a fun idea! Well done!
Thank you:))