TL;DR
In this article, you will learn how to build a full-stack restaurant finder AI agent that combines human-in-the-loop capabilities using CrewAI, CopilotKit, and Serper.
Before we jump in, here is what we will cover:
What are CrewAI agents?
Building, running, and deploying a CrewAI agent
Adding frontend UI to a CrewAI agent using Copilot Cloud and CopilotKit
Here’s a preview of the application we’ll be building.
What are CrewAI agents?
Imagine you’re working on a big group project, like building an app or a game. You’ve got a team, and each person has a specific job.
One is great at coding the backend, another designs the UI, someone else handles testing, and so on.
Instead, people picture CrewAI agents as a team of smart, automated helpers—each with its own role—working together to solve a problem or complete a task.
You can learn more about CrewAI agents here on CrewAI docs
What is CopilotKit
CopilotKit is an open-source, full-stack framework for building user-interactive agents and copilots. It enables your agents to take control of your application, communicate what it's doing, and generate a completely custom UI.

Check out CopilotKit's GitHub ⭐️
Prerequisites
To fully understand this tutorial, you need to have a basic understanding of React or Next.js.
We'll also make use of the following:
Python - a popular programming language for building AI agents with LangGraph; make sure it is installed on your computer.
OpenAI API - to enable us to perform various tasks using the GPT models; for this tutorial, ensure you have access to the GPT-4 model.
CopilotKit - an open-source copilot framework for building custom AI chatbots, in-app AI agents, and text areas.
CrewAI - a Python framework that enables developers to create autonomous AI agents with high-level simplicity and precise low-level control.
SerperTool - a tool that utilizes the serper.dev API to fetch and display the most relevant search results based on the query provided by the user.
Building, Running, and Deploying a CrewAI Agent
In this section, you will learn how to build and run a CrewAI agent using the CrewAI package. Then you will learn how to deploy the AI agent to the CrewAI enterprise platform using GitHub.
Let’s jump in.
Step 1: Building a CrewAI Crew Agent
First, start by cloning the restaurant finder crew repository, which contains code for a Python-based CrewAI Crew agent:
git clone https://github.com/TheGreatBonnie/restaurant-finder.git
The repository contains a CrewAI Crew agent with the following structure:
restaurant-finder/
├── .gitignore
├── pyproject.toml
├── README.md
├── .env
└── src/
       └── restaurant_finder_agent/
              ├── init.py
              ├── main.py
              ├── crew.py
              ├── tools/
              │   ├── custom_tool.py
              │   └── init.py
              └── config/
                     ├── agents.yaml
                     └── tasks.yaml
Below are the essential files in the research finder CrewAI Crew:
agents.yaml - Define your AI agents and their roles
tasks.yaml - Set up agent tasks and workflows
.env - Store API keys and environment variables
main.py - Project entry point and execution flow
crew.py - Crew orchestration and coordination
tools/ - Directory for custom agent tools
Next, create a .env file in the root directory. Then add OpenAI and Serper API keys into the environment variables.
OPENAI_API_KEY=your-openai-api-key
SERPER_API_KEY=your-serper-api-key
Then install all the research finder CrewAI Crew dependencies using CrewAI. If you don’t have the CrewAI package installed, follow this installation guide on CrewAI docs.
crewai install
Step 2: Running a CrewAI Crew Agent
To run the restaurant CrewAI crew agent, execute the following command in the command line.
crewai run
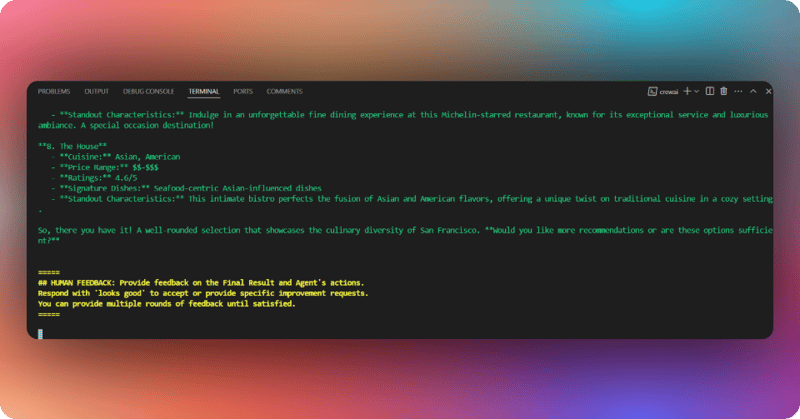
Once the crew has started, it will use the Serper web search tool to find restaurants in San Francisco. Then it will curate a list of restaurants and ask for your feedback, as shown below.
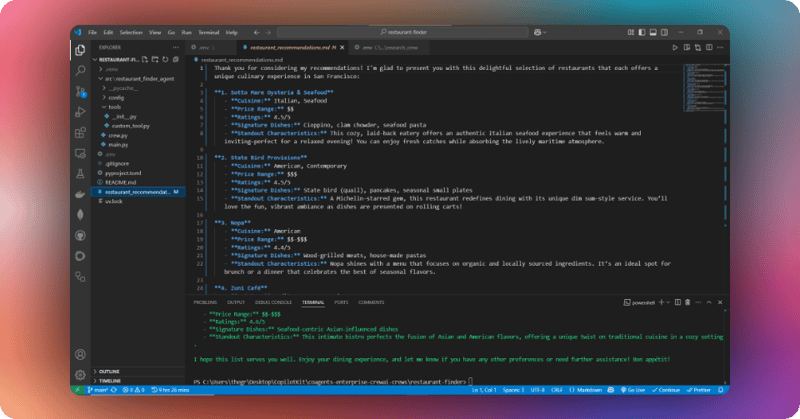
Reply with a “Looks good” message in the terminal and press enter. A file with restaurant recommendations in San Francisco should be saved in the project folder, as shown below.
Step 3: Deploying a CrewAI Crew Agent
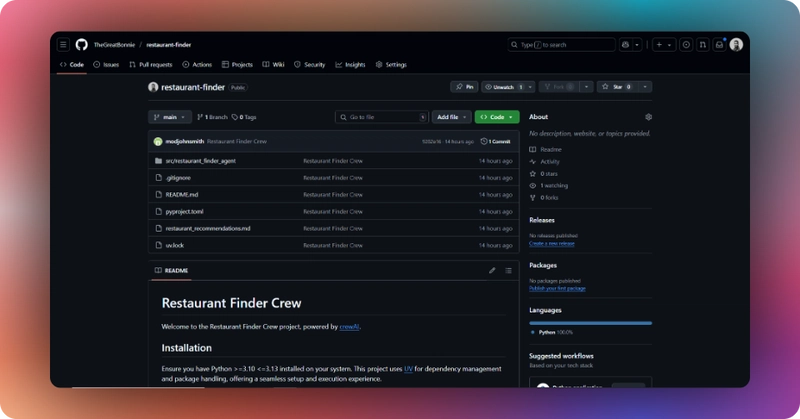
To deploy the restaurant crew, push the restaurant finder crew code to a GitHub repository, as shown below.
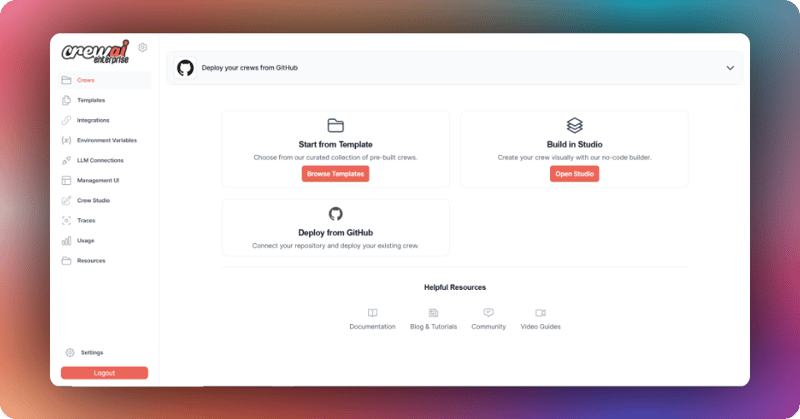
Then log in to CrewAI. On your dashboard, configure your GitHub account with CrewAI to access the restaurant finder repository.
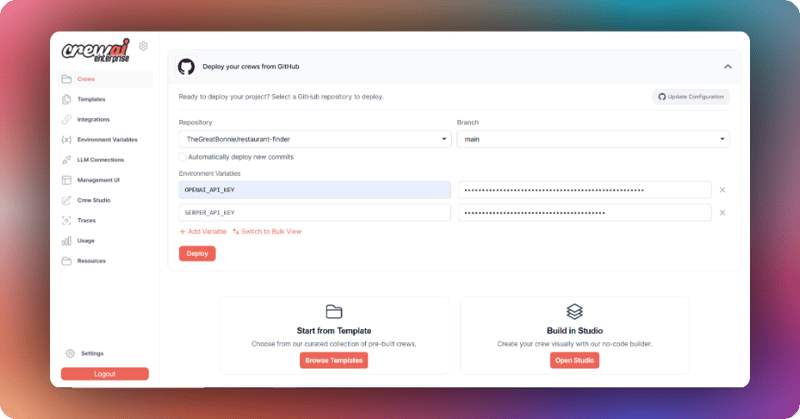
Next, select the restaurant finder repository. Then add OpenAI and Serper API keys to the environment variables, as shown below, and click the Deploy button.
The restaurant finder crew should start deploying immediately, as shown below. Note that the first crew deployment can take as long as 10 minutes.
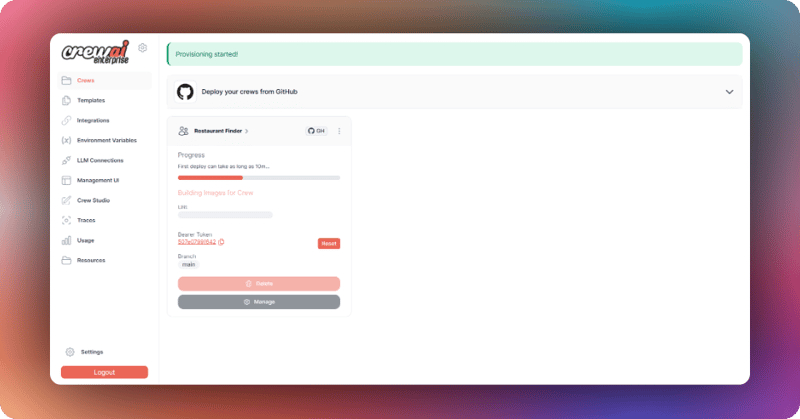
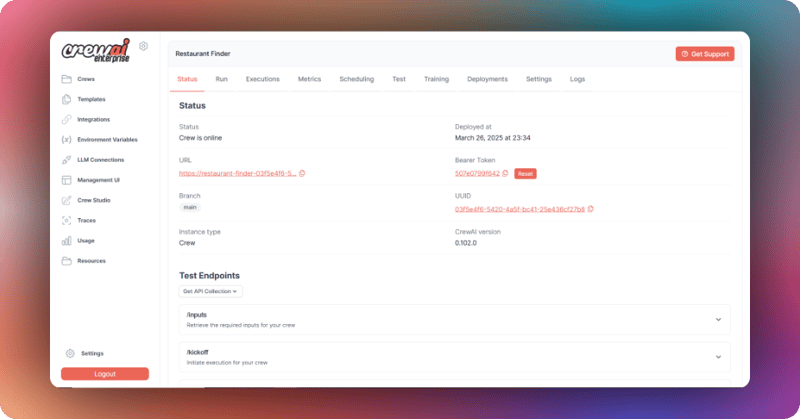
Once the crew has been deployed, open it, then grab its URL and bearer token. The crew’s URL and bearer token will be used to register the crew with Copilot Cloud.
Now that we have learned how to build, run, and deploy a CrewAI crew agent, let’s see how we can add a frontend UI to chat with it.
Adding frontend UI to a CrewAI crew agent using Copilot Cloud and CopilotKit
In this section, you will learn how to add a frontend UI to a CrewAI crew agent using Copilot Cloud and CopilotKit.
Let’s get started.
Step 1: Register a CrewAI agent with Copilot Cloud
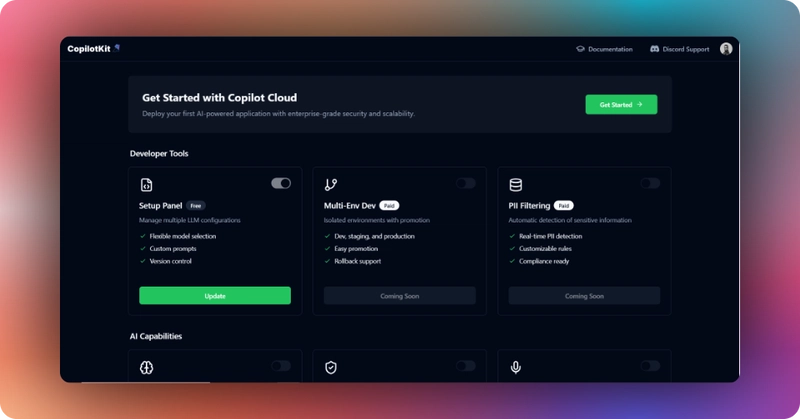
To register a CrewAI crew agent, go to Copilot Cloud, sign in, and click the Get Started button.
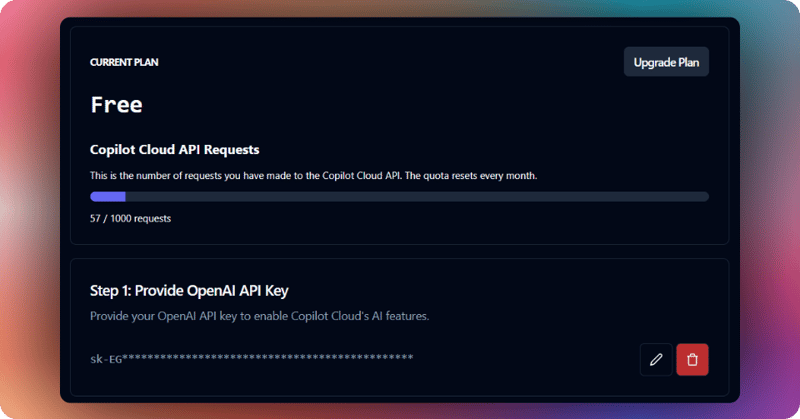
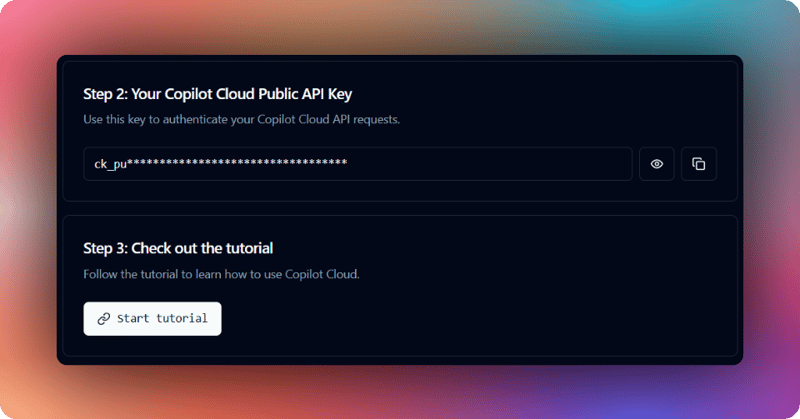
Then add your OpenAI API key to the "Provide OpenAI API Key" section, as shown below.
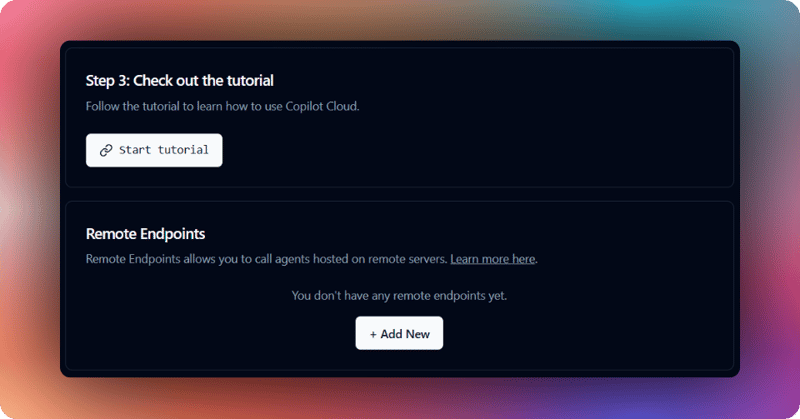
Next, scroll down to the remote endpoints section and click the Add New button.
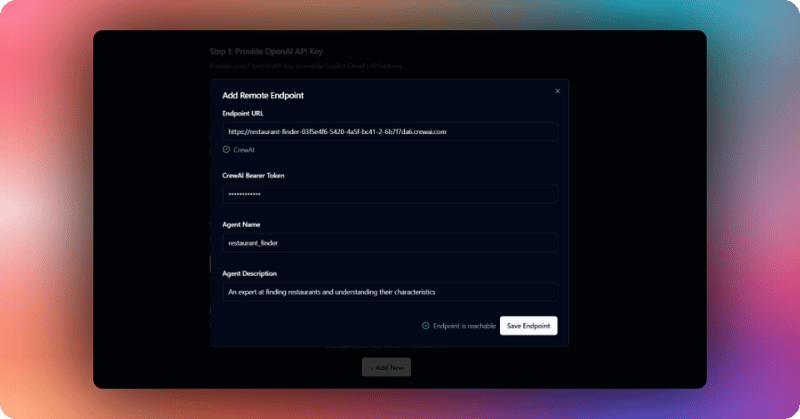
Then select the remote endpoint from the modal that pops up. After that, add your CrewAI agent endpoint URL, bearer token, name, and description, as shown below. Then click the Save Endpoint button.
Once the crew endpoint is saved, copy the Copilot Cloud Public API Key, as shown below.
Step 2: Building a CrewAI agent frontend UI
To build a CrewAI agent frontend UI, start by cloning the restaurant finder UI repository, which contains code for a Next.js project:
git clone https://github.com/TheGreatBonnie/restaurant-finder-ui.git
Next, create a .env file in the root directory. Then add your CrewAI agent name and Copilot Cloud Public API Key into the environment variables.
NEXT_PUBLIC_AGENT_NAME=restaurant_finder
NEXT_PUBLIC_CPK_PUBLIC_API_KEY=your-copilot-cloud-api-key
After that, install the frontend dependencies using pnpm.
pnpm install
Then start the app using the command below.
pnpm run dev
Navigate to http://localhost:3000/ and you should see the restaurant finder CrewAI agent frontend up and running.
Let’s now see how to build the frontend UI for the CrewAI agent using CopilotKit.
Step 3: Set up the CopilotKit Provider
To set up the CopilotKit Provider, the <CopilotKit> component must wrap the Copilot-aware parts of your application. For most use cases, it's appropriate to wrap the CopilotKit provider around the entire app, e.g., in your layout.tsx, as shown below in the src/app/layout.tsx file.
// Import CopilotKit React UI specific styles
import "@copilotkit/react-ui/styles.css";

// Import the CopilotKit component for AI integration
import { CopilotKit } from "@copilotkit/react-core";

// Define metadata for the application
export const metadata: Metadata = {
  // Set the page title
  title: "CopilotKit Crew Demo",
  // Set the page description for SEO and previews
  description: "Talk to your Crew",
};

export default function RootLayout({
  children,
}: Readonly<{
  children: React.ReactNode;
}>) {
  return (
    <html lang="en" className="h-full">
      <body className={` antialiased h-full`}>
        {/* CopilotKit wrapper for AI functionality */}
        <CopilotKit
          // Hide the development console in production
          showDevConsole={false}
          // Set the agent name from environment variables
          agent={process.env.NEXT_PUBLIC_AGENT_NAME}
          // Set the public API key from environment variables
          publicApiKey={process.env.NEXT_PUBLIC_CPK_PUBLIC_API_KEY}>
          {children}
        </CopilotKit>
      </body>
    </html>
  );
}
Step 4: Create a Crew-Quickstart Component
To start a CrewAI agent, render crew state and progress, handle human feedback, and stream the agent’s response, you need to create a CrewQuickstart component, as shown in the src/components/CrewQuickstart.tsx file.
"use client";

// Import necessary hooks and types from CopilotKit for crew and chat functionality
import {
  CrewsAgentState,
  useCoAgent,
  useCopilotChat,
  useCopilotAdditionalInstructions,
} from "@copilotkit/react-core";
// Import React hooks for state and side effects
import { useEffect, useState } from "react";
// Import message types for chat functionality
import { MessageRole, TextMessage } from "@copilotkit/runtime-client-gql";
// Import UI components for resizable panels
import {
  ResizablePanelGroup,
  ResizablePanel,
  ResizableHandle,
} from "./ui/resizable";
// Import custom hook for window size detection
import { useWindowSize } from "@/hooks/useWindowSize";

// Define props interface for the component
interface CrewQuickstartProps {
  crewName: string; // Name of the crew/agent
  inputs: Array<string>; // Array of input field names to collect from user
}

// Export the main component with typed props
export const CrewQuickstart: React.FC<CrewQuickstartProps> = ({
  crewName,
  inputs,
}: {
  crewName: string;
  inputs: Array<string>;
}) => {
  // State to track if initial chat message has been sent
  const [initialMessageSent, setInitialMessageSent] = useState(false);
  // Get mobile detection from custom hook
  const { isMobile } = useWindowSize();
  // State for panel layout direction (horizontal for desktop, vertical for mobile)
  const [direction, setDirection] = useState<"horizontal" | "vertical">(
    "horizontal"
  );

  // Effect to update layout direction based on mobile status
  useEffect(() => {
    setDirection(isMobile ? "vertical" : "horizontal");
  }, [isMobile]);

  // Setup crew/agent with custom state using CopilotKit's useCoAgent hook
  const { state, setState, run } = useCoAgent<
    CrewsAgentState & {
      result: string; // Final result of crew execution
      inputs: Record<string, string>; // Object storing user inputs
    }
  >({
    name: crewName, // Name of the crew
    initialState: {
      inputs: {}, // Initial empty inputs object
      result: "Crew result will appear here...", // Default result message
    },
  });

  // Clean crewName for display by removing non-alphanumeric characters
  const agentName = crewName.replace(/[^a-zA-Z0-9]/g, " ");

  // Render the component UI
  return (
    // Container div taking full width and height
    <div className="w-full h-full relative">
      {/* Resizable panel group for layout */}
      <ResizablePanelGroup direction={direction} className="w-full h-full">
        {/* Left/main panel for chat (empty in this version) */}
        <ResizablePanel defaultSize={60} minSize={30}>
          {/* Placeholder for chat component */}
        </ResizablePanel>

        {/* Handle for resizing panels */}
        <ResizableHandle withHandle />

        {/* Right panel for crew state/results */}
        <ResizablePanel defaultSize={40} minSize={25}>
          {/* Scrollable container with styling */}
          <div className="h-full overflow-y-auto bg-gray-50 dark:bg-gray-900 p-3">
            <div className="flex flex-col h-full">
              {/* Header with crew name */}
              <div className="flex items-center justify-between mb-2">
                <h1 className="text-lg font-medium text-gray-800 dark:text-gray-200">
                  {agentName}
                </h1>
              </div>

              {/* Content area */}
              <div className="h-full">
                {/* Styled container for results */}
                <div className="text-sm text-gray-700 dark:text-gray-300 bg-white dark:bg-gray-800 rounded-md shadow-sm p-4 h-full overflow-y-auto prose dark:prose-invert max-w-none">
                  {/* Placeholder for result content */}
                </div>
              </div>
            </div>
          </div>
        </ResizablePanel>
      </ResizablePanelGroup>
    </div>
  );
};
After creating the CrewQuickstart component, you need to import it to your main page as shown below in the src/app/page.tsx file.
"use client";

import React from "react";

// Import the custom CrewQuickstart component from components directory
import { CrewQuickstart } from "@/components/CrewQuickstart";

export default function Home() {
  return (
    <div className="w-full h-full relative">
      {/* Render the CrewQuickstart component with specific props */}
      <CrewQuickstart
        crewName="Restaurant Finder" // Name of the crew/agent
        inputs={["location"]} // Array specifying required user input
      />
    </div>
  );
Step 5: Choose a Copilot UI
To set up your Copilot UI, first import the default styles in your root component (typically layout.tsx).
import "@copilotkit/react-ui/styles.css";
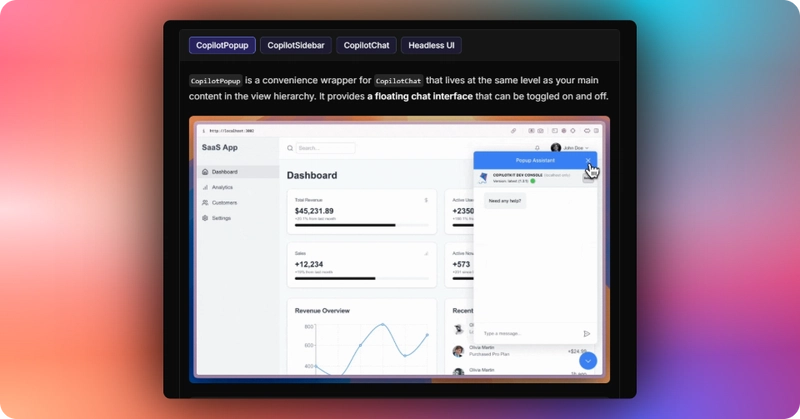
Copilot UI ships with a number of built-in UI patterns; choose whichever one you like from CopilotPopup, CopilotSidebar, CopilotChat, or Headless UI.
In this case, we will use CopilotChat defined in the src/components/Chat.tsx file.
// Declare this component as a client-side component in Next.js
"use client";
import React from "react";
// Import specific types and components from CopilotKit's React UI package
import { CopilotKitCSSProperties, CopilotChat } from "@copilotkit/react-ui";
function Chat() {
return (
<div
className="h-full relative overflow-y-auto"
style={
{
// Define custom CSS variable for CopilotKit's primary color
"--copilot-kit-primary-color": "#4F4F4F",
} as CopilotKitCSSProperties // Type assertion for CopilotKit-specific CSS properties
}>
{/* CopilotChat component for the chat interface */}
<CopilotChat
// Instructions prop provides guidance to the AI assistant
instructions={
"You are assisting the user as best as you can. Answer in the best way possible given the data you have."
}
// Custom labels for the chat interface
labels={{
// Title displayed in the chat header
title: "Your Assistant",
// Initial message shown when chat starts
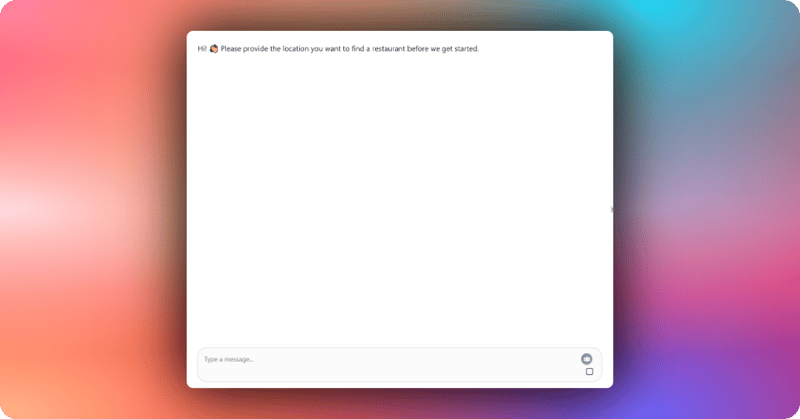
initial:
"Hi! 👋 Please provide the location you want to find a restaurant before we get started.",
}}
// Styling classes for the chat component using Tailwind CSS
className="h-full flex flex-col"
// Custom icons configuration
icons={{
// Custom spinner icon shown during loading states
spinnerIcon: (
// Span element with animated pulsing dots
<span className="h-5 w-5 text-gray-500 animate-pulse">...</span>
),
}}
/>
</div>
);
}
export default Chat;
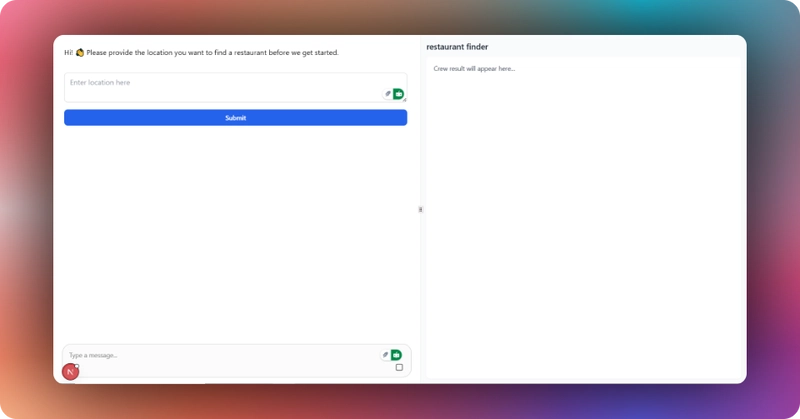
The chat component is then imported and used in the src/components/CrewQuickstart.tsx file. The chat is then rendered on the frontend UI, as shown below.
Step 6: Start the CrewAI agent
To start your CrewAI agent, you need to send an initial welcome message, define an action that collects user inputs, define an effect to confirm user inputs, and define instructions that ensure user inputs are added before the agent runs, as shown below in the src/components/CrewQuickstart.tsx file.
"use client";

// Import CopilotKit hooks and types for crew and chat functionality
import {
  CrewsAgentState,
  useCoAgent, // Hook for managing crew state and execution
  useCopilotChat, // Hook for chat functionality
  useCopilotAdditionalInstructions, // Hook for adding crew instructions
  useCopilotAction, // Hook for defining crew actions
} from "@copilotkit/react-core";
// Import React hooks for state and side effects
import { useEffect, useState } from "react";
// Import message types for chat
import { MessageRole, TextMessage } from "@copilotkit/runtime-client-gql";

// Define props interface for the component
interface CrewQuickstartProps {
  crewName: string; // Name of the crew/agent
  inputs: Array<string>; // Array of input field names required from user
}

// Export the CrewQuickstart component with typed props
export const CrewQuickstart: React.FC<CrewQuickstartProps> = ({
  crewName,
  inputs,
}: {
  crewName: string;
  inputs: Array<string>;
}) => {
  // State to track if initial welcome message has been sent
  const [initialMessageSent, setInitialMessageSent] = useState(false);

  // Setup crew with custom state using useCoAgent hook
  const { state, setState, run } = useCoAgent<
    CrewsAgentState & {
      result: string; // Stores the final crew execution result
      inputs: Record<string, string>; // Stores user-provided inputs as key-value pairs
    }
  >({
    name: crewName, // Set crew name from props
    initialState: {
      inputs: {}, // Initially empty inputs object
      result: "Crew result will appear here...", // Default result placeholder
    },
  });

  // Get chat functionality from useCopilotChat hook
  const { appendMessage, isLoading } = useCopilotChat();

  // Define instructions requiring inputs before crew execution
  const instructions =
    "INPUTS ARE ABSOLUTELY REQUIRED. Please call getInputs before proceeding with anything else.";

  // Effect to send initial welcome message when component mounts
  useEffect(() => {
    if (initialMessageSent || isLoading) return; // Skip if already sent or loading

    setTimeout(async () => {
      // Append welcome message to chat
      await appendMessage(
        new TextMessage({
          content: "Hi, Please provide your inputs before we get started.",
          role: MessageRole.Developer, // Attributed to developer role
        })
      );
      setInitialMessageSent(true); // Mark message as sent
    }, 0);
    // eslint-disable-next-line react-hooks/exhaustive-deps
  }, []); // Empty dependency array: runs once on mount

  // Effect to confirm inputs in chat once provided
  useEffect(() => {
    if (!initialMessageSent && Object.values(state?.inputs || {}).length > 0) {
      // If inputs exist and initial message not sent, show them in chat
      appendMessage(
        new TextMessage({
          role: MessageRole.Developer,
          content: "My inputs are: " + JSON.stringify(state?.inputs),
        })
      ).then(() => {
        setInitialMessageSent(true); // Mark as sent after appending
      });
    }
    // eslint-disable-next-line react-hooks/exhaustive-deps
  }, [initialMessageSent, state?.inputs]); // Depends on message state and inputs

  // Add instructions with conditional availability
  useCopilotAdditionalInstructions({
    instructions, // Instructions defined above
    available:
      Object.values(state?.inputs || {}).length > 0 ? "enabled" : "disabled", // Enable only when inputs are provided
  });

  // Define action to collect inputs from user
  useCopilotAction({
    name: "getInputs", // Action name
    followUp: false, // No follow-up action
    description:
      "This action allows Crew to get required inputs from the user before starting the Crew.",
    renderAndWaitForResponse({ status }) {
      // Render form and wait for submission
      if (status === "inProgress" || status === "executing") {
        return (
          // Form to collect inputs
          <form
            className="flex flex-col gap-4" // Styling for vertical layout with spacing
            onSubmit={async (e: React.FormEvent<HTMLFormElement>) => {
              e.preventDefault(); // Prevent default form submission
              const form = e.currentTarget; // Get form element
              const input = form.elements.namedItem(
                "input"
              ) as HTMLTextAreaElement; // Get input element
              const inputValue = input.value; // Get input value
              const inputKey = input.id; // Get input ID (matches input name from props)

              // Update crew state with new input
              setState({
                ...state,
                inputs: {
                  ...state.inputs,
                  [inputKey]: inputValue,
                },
              });
              // Run crew after state update
              setTimeout(async () => {
                console.log("running crew"); // Log start of crew execution
                await run(); // Execute the crew
                console.log("crew run complete"); // Log completion
              }, 0);
            }}>
            <div className="flex flex-col gap-4">
              {/* Map through required inputs to create textareas */}
              {inputs.map((input) => (
                <div key={input} className="flex flex-col gap-2">
                  <textarea
                    id={input} // Unique ID matching input name
                    autoFocus // Automatically focus first input
                    name="input" // Form element name
                    placeholder={`Enter ${input} here`} // Placeholder text
                    required // Input is mandatory
                    className="w-full px-3 py-2 border border-gray-300 rounded-md shadow-sm focus:outline-none focus:ring-2 focus:ring-blue-500 focus:border-blue-500" // Styling
                  />
                </div>
              ))}
              {/* Submit button */}
              <button
                type="submit"
                className="w-full px-4 py-2 text-sm font-medium text-white bg-blue-600 rounded-md hover:bg-blue-700 focus:outline-none focus:ring-2 focus:ring-offset-2 focus:ring-blue-500 transition-colors duration-200">
                Submit
              </button>
            </div>
          </form>
        );
      }
      return <>Inputs submitted</>; // Message shown after submission
    },
  });

  // Return basic container (UI incomplete in this snippet)
  return (
    <div className="w-full h-full relative">
      {/* Placeholder for additional UI */}
    </div>
  );
};
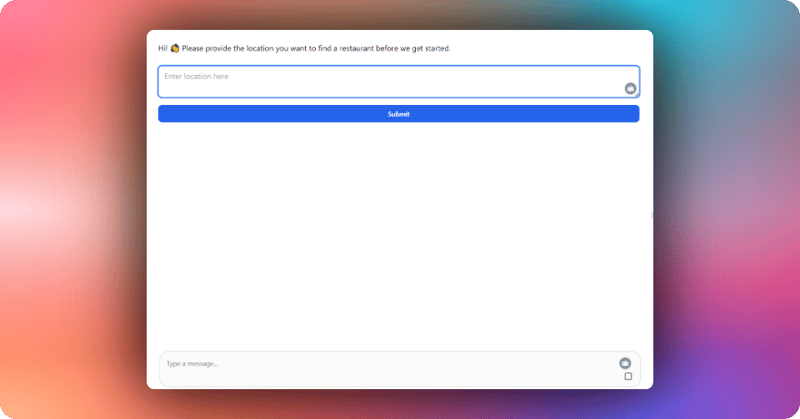
An initial message and a form component for collecting user inputs are rendered in the frontend UI, as shown below.
Step 7: Render CrewAI Agent State and Progress
To render your CrewAI agent state and progress, you need to define a CrewStateRenderer component that visualizes the real-time state of the agent’s steps and tasks, as shown below in the src/components/CrewStateRenderer.tsx file.
"use client";

// Import CopilotKit types for crew state management
import {
  CrewsAgentState, // Type for overall crew state
  CrewsResponseStatus, // Type for crew execution status
  CrewsTaskStateItem, // Type for task items
  CrewsToolStateItem, // Type for tool items
} from "@copilotkit/react-core";
// Import React hooks and utilities
import { useEffect, useMemo, useRef, useState } from "react";
// Import ReactMarkdown for rendering markdown content
import ReactMarkdown from "react-markdown";

/**
 * Renders your Crew's steps & tasks in real-time.
 * @param state - The current state of the crew
 * @param status - The current execution status of the crew
 */
function CrewStateRenderer({
  state,
  status,
}: {
  state: CrewsAgentState; // Crew state containing steps and tasks
  status: CrewsResponseStatus; // Status like "inProgress" or "complete"
}) {
  // State to track if the renderer is collapsed or expanded
  const [isCollapsed, setIsCollapsed] = useState(true);
  // Ref to access the content div for scrolling
  const contentRef = useRef<HTMLDivElement>(null);
  // Ref to track previous item count for detecting new items
  const prevItemsLengthRef = useRef<number>(0);
  // State to track which item to highlight (newly added)
  const [highlightId, setHighlightId] = useState<string | null>(null);

  // Memoized computation to combine and sort steps and tasks
  const items = useMemo(() => {
    if (!state) return []; // Return empty array if no state
    // Combine steps and tasks, sort by timestamp
    return [...(state.steps || []), ...(state.tasks || [])].sort(
      (a, b) =>
        new Date(a.timestamp).getTime() - new Date(b.timestamp).getTime() // Sort ascending by timestamp
    );
  }, [state]); // Recompute when state changes

  // Effect to highlight new items and auto-scroll
  useEffect(() => {
    if (!state) return; // Skip if no state
    if (items.length > prevItemsLengthRef.current) {
      // Check if new item added
      const newestItem = items[items.length - 1]; // Get latest item
      setHighlightId(newestItem.id); // Highlight it
      setTimeout(() => setHighlightId(null), 1500); // Clear highlight after 1.5s

      // Auto-scroll to bottom if expanded
      if (contentRef.current && !isCollapsed) {
        contentRef.current.scrollTop = contentRef.current.scrollHeight;
      }
    }
    prevItemsLengthRef.current = items.length; // Update previous length
  }, [items, isCollapsed, state]); // Depends on items, collapse state, and crew state

  // Loading state if no state provided
  if (!state) {
    return <div>Loading crew state...</div>;
  }

  // Hide component if collapsed, empty, and not in progress
  if (isCollapsed && items.length === 0 && status !== "inProgress") return null;

  // Render the UI
  return (
    <div className="mt-2 text-sm">
      {/* Toggle header */}
      <div
        className="flex items-center cursor-pointer" // Flex layout with pointer cursor
        onClick={() => setIsCollapsed(!isCollapsed)} // Toggle collapse state
      >
        <span className="mr-1">{isCollapsed ? "▶" : "▼"}</span>{" "}
        {/* Arrow indicator */}
        <span className="text-gray-700">
          {status === "inProgress" ? "Crew is analyzing..." : "Crew analysis"}{" "}
          {/* Status text */}
        </span>
      </div>

      {/* Content area, shown only when expanded */}
      {!isCollapsed && (
        <div
          ref={contentRef} // Reference for scrolling
          className="max-h-[200px] overflow-auto border-l border-gray-200 pl-2 ml-1 mt-1">
          {items.length > 0 ? ( // Check if there are items to render
            items.map((item) => {
              // Map through sorted items
              const isTool = (item as CrewsToolStateItem).tool !== undefined; // Check if item is a tool
              const isHighlighted = item.id === highlightId; // Check if item should be highlighted
              return (
                <div
                  key={item.id} // Unique key for each item
                  className={`mb-2 ${isHighlighted ? "animate-fadeIn" : ""}`}>
                  {/* Item title (tool name or task name) */}
                  <div className="font-bold text-gray-800 dark:text-gray-200">
                    {isTool
                      ? (item as CrewsToolStateItem).tool // Display tool name
                      : (item as CrewsTaskStateItem).name}{" "}
                    {/*Display task name*/}
                  </div>
                  {/* Thought section, if present */}
                  {"thought" in item && item.thought && (
                    <div className="mt-1 opacity-80 text-gray-600 dark:text-gray-400 prose dark:prose-invert max-w-none">
                      <span className="font-medium">Thought:</span>{" "}
                      <ReactMarkdown>{item.thought}</ReactMarkdown>{" "}
                      {/* Render thought as markdown */}
                    </div>
                  )}
                  {/* Result section, if present */}
                  {"result" in item && item.result !== undefined && (
                    <pre className="mt-1 text-sm bg-gray-50 dark:bg-gray-800 p-2 rounded-md overflow-x-auto">
                      {JSON.stringify(item.result, null, 2)}{" "}
                      {/* Display result as formatted JSON */}
                    </pre>
                  )}
                  {/* Description section, if present */}
                  {"description" in item && item.description && (
                    <div className="mt-1 text-gray-700 dark:text-gray-300 prose dark:prose-invert max-w-none">
                      <ReactMarkdown>{item.description}</ReactMarkdown>{" "}
                      {/* Render description as markdown */}
                    </div>
                  )}
                </div>
              );
            })
          ) : (
            <div className="opacity-70 text-gray-500">No activity yet...</div> // Placeholder for empty state
          )}
        </div>
      )}

      {/* Inline styles for fade-in animation */}
      <style jsx>{`
        @keyframes fadeIn {
          0% {
            opacity: 0;
            transform: translateY(4px); // Start slightly below
          }
          100% {
            opacity: 1;
            transform: translateY(0); // End at normal position
          }
        }
        .animate-fadeIn {
          animation: fadeIn 0.5s; // Apply 0.5s fade-in animation
        }
      `}</style>
    </div>
  );
}

export default CrewStateRenderer;
The CrewStateRenderer component is then imported to the CrewQuickstart component, where it is used by CopilotKit’s useCoAgentStateRender hook to render the CrewAI agent state dynamically, as shown below.
// Import the useCoAgentStateRender hook from CopilotKit for rendering crew state
import { useCoAgentStateRender } from "@copilotkit/react-core";

// Import the custom CrewStateRenderer component for visualizing crew state
import CrewStateRenderer from "./CrewStateRenderer";

export const CrewQuickstart: React.FC<CrewQuickstartProps> = ({
  crewName, // Name of the crew/agent
  inputs, // Array of input field names (unused in this version)
}: {
  crewName: string;
  inputs: Array<string>;
}) => {
  // Use CopilotKit's hook to render crew state dynamically
  useCoAgentStateRender({
    name: crewName, // Pass the crew name to identify which crew's state to render
    render: (
      { state, status } // Define how to render the state
    ) => (
      <CrewStateRenderer
        state={state} // Pass the crew's current state (steps, tasks, etc.)
        status={status} // Pass the crew's execution status (e.g., "inProgress")
      />
    ),
  });

  return (
    <div className="w-full h-full relative">
      {/* Placeholder for additional UI */}
    </div>
  );
};
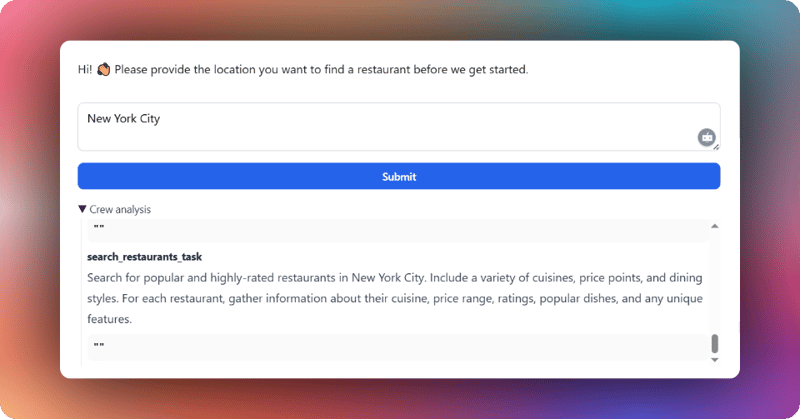
To see the restaurant CrewAI agent state being rendered in real-time, add New York City as an input in the user input form and click the submit button. If you open the agent’s state status text, you should see the agent’s state and progress, as shown below.
Step 8: Handling Human Feedback in a CrewAI Agent
To handle human feedback, you need to define a CrewHumanFeedbackRenderer component that handles user feedback on CrewAI agent task output, as shown in the src/components/CrewHumanFeedbackRenderer.tsx file.
"use client";

// Import CopilotKit types for crew status and state items
import { CrewsResponseStatus, CrewsStateItem } from "@copilotkit/react-core";
// Import React hook for state management
import { useState } from "react";
// Import ReactMarkdown for rendering markdown content
import ReactMarkdown from "react-markdown";

// Define an interface extending CrewsStateItem for feedback-specific data
interface CrewsFeedback extends CrewsStateItem {
  /**
   * Output of the task execution
   */
  task_output?: string; // Optional field for the task's output
}

/**
 * Renders a simple UI for agent-requested user feedback (Approve / Reject).
 * @param feedback - The crew's feedback data including task output
 * @param respond - Optional callback to send user response back to the crew
 * @param status - Current status of the feedback process
 */
function CrewHumanFeedbackRenderer({
  feedback, // Feedback data from the crew
  respond, // Callback to send response (optional)
  status, // Status like "inProgress", "executing", or "complete"
}: {
  feedback: CrewsFeedback;
  respond?: (input: string) => void;
  status: CrewsResponseStatus;
}) {
  // State to toggle visibility of task output
  const [isExpanded, setIsExpanded] = useState(true);
  // State to track user's response (Approved/Rejected)
  const [userResponse, setUserResponse] = useState<string | null>(null);

  // Render feedback submission confirmation when complete
  if (status === "complete") {
    return (
      <div style={{ marginTop: 8, textAlign: "right" }}>
        {" "}
        {/* Right-aligned confirmation */}
        {userResponse || "Feedback submitted."}{" "}
        {/* Show user's response or default message */}
      </div>
    );
  }

  // Render feedback UI when in progress or executing
  if (status === "inProgress" || status === "executing") {
    return (
      <div style={{ marginTop: 8 }}>
        {isExpanded && ( // Show task output only when expanded
          <div
            className="border border-gray-200 rounded-lg p-4 mb-4 bg-white prose dark:prose-invert max-w-none dark:bg-gray-800 dark:border-gray-700 shadow-sm"
            // Styled container for task output with light/dark theme support
          >
            <ReactMarkdown>{feedback.task_output || ""}</ReactMarkdown>{" "}
            {/* Render task output as markdown */}
          </div>
        )}
        <div className="flex justify-end gap-2 mt-2">
          {/* Toggle button to show/hide task output */}
          <button
            className="px-3 py-2 text-sm font-medium text-gray-700 hover:text-gray-900 transition-colors duration-200"
            onClick={() => setIsExpanded(!isExpanded)} // Toggle expanded state
          >
            {isExpanded ? "Hide" : "Show"} Feedback {/* Dynamic button text */}
          </button>
          {/* Approve button */}
          <button
            className="px-4 py-2 text-sm font-medium text-white bg-gray-800 rounded-md hover:bg-gray-700 focus:outline-none focus:ring-2 focus:ring-offset-2 focus:ring-gray-500 transition-colors duration-200"
            onClick={() => {
              setUserResponse("Approved"); // Set local response state
              respond?.("Approve"); // Send "Approve" to crew if respond exists
            }}>
            Approve
          </button>
          {/* Reject button */}
          <button
            className="px-4 py-2 text-sm font-medium text-white bg-gray-800 rounded-md hover:bg-gray-700 focus:outline-none focus:ring-2 focus:ring-offset-2 focus:ring-gray-500 transition-colors duration-200"
            onClick={() => {
              setUserResponse("Rejected"); // Set local response state
              respond?.("Reject"); // Send "Reject" to crew if respond exists
            }}>
            Reject
          </button>
        </div>
      </div>
    );
  }

  // Return null for any other status (e.g., initial state before feedback request)
  return null;
}

export { CrewHumanFeedbackRenderer };
The CrewHumanFeedbackRenderer component is then imported to the CrewQuickstart component, where it is used by CopilotKit’s useCopilotAction to create a crew_requesting_feedback action that renders a feedback UI and waits for user response, as shown below.
// Import CopilotKit types and hook for crew actions
import {
  CrewsResponseStatus, // Type for crew execution status (e.g., "inProgress", "complete")
  CrewsStateItem, // Base type for crew state items
  useCopilotAction, // Hook to define custom crew actions
} from "@copilotkit/react-core";

// Import custom feedback renderer component
import { CrewHumanFeedbackRenderer } from "./CrewHumanFeedbackRenderer";

// Define interface for feedback, extending CrewsStateItem
interface CrewsFeedback extends CrewsStateItem {
  /**
   * Output of the task execution
   */
  task_output?: string; // Optional field for task output
}

// Define props interface for the CrewQuickstart component
interface CrewQuickstartProps {
  crewName: string; // Name of the crew/agent
  inputs: Array<string>; // Array of input field names (unused in this version)
}

// Export the CrewQuickstart component with typed props
export const CrewQuickstart: React.FC<CrewQuickstartProps> = ({
  crewName, // Crew identifier
  inputs, // Required inputs (not utilized here)
}: {
  crewName: string;
  inputs: Array<string>;
}) => {
  // Define a Copilot action for requesting user feedback
  useCopilotAction({
    name: "crew_requesting_feedback", // Action name
    description: "Request feedback from the user", // Action description
    renderAndWaitForResponse(props) {
      // Function to render UI and wait for response
      const { status, args, respond } = props; // Destructure props
      return (
        // Render the feedback UI using CrewHumanFeedbackRenderer
        <CrewHumanFeedbackRenderer
          feedback={args as unknown as CrewsFeedback} // Pass action arguments as feedback (type cast due to unknown args type)
          respond={respond} // Pass the respond callback to send user feedback back
          status={status as CrewsResponseStatus} // Pass the current status
        />
      );
    },
  });

  return (
    <div className="w-full h-full relative">
      {/* Placeholder for additional UI */}
    </div>
  );
};
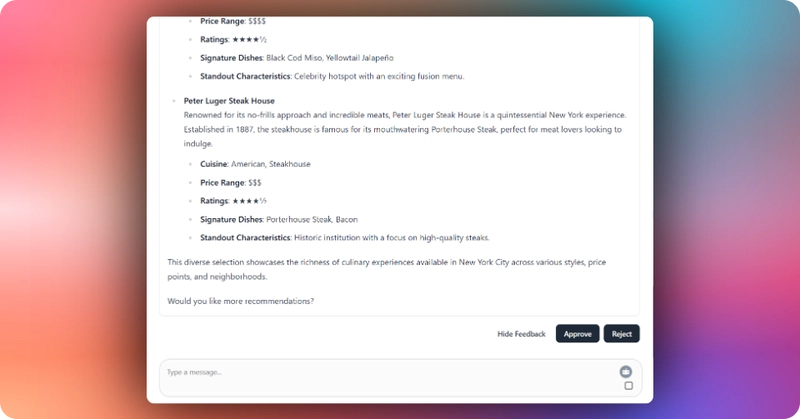
The restaurant CrewAI agent uses the CrewHumanFeedbackRenderer component to create a curated list of restaurant recommendations in a city. You can send feedback to the agent by clicking the Approve or Reject button, as shown below.
Step 9: Streaming CrewAI Agent Response
To stream your CrewAI agent response, you need to render the crew’s result in markdown format in the CrewQuickstart component, as shown below.
"use client";

// Import CopilotKit types and hook for crew management
import { CrewsAgentState, useCoAgent } from "@copilotkit/react-core";

import { useEffect, useState } from "react";
// Import ReactMarkdown for rendering markdown content
import ReactMarkdown from "react-markdown";
// Import custom UI components for resizable panels
import {
  ResizablePanelGroup,
  ResizablePanel,
  ResizableHandle,
} from "./ui/resizable";
// Import custom hook for window size detection
import { useWindowSize } from "@/hooks/useWindowSize";

// Define props interface for the component
interface CrewQuickstartProps {
  crewName: string; // Name of the crew/agent
  inputs: Array<string>; // Array of input field names (unused in this version)
}

// Export the CrewQuickstart component with typed props
export const CrewQuickstart: React.FC<CrewQuickstartProps> = ({
  crewName, // Crew identifier
  inputs, // Required inputs (not utilized here)
}: {
  crewName: string;
  inputs: Array<string>;
}) => {
  // Get mobile detection from custom hook
  const { isMobile } = useWindowSize();
  // State for panel layout direction (horizontal for desktop, vertical for mobile)
  const [direction, setDirection] = useState<"horizontal" | "vertical">(
    "horizontal" // Default to horizontal
  );

  // Effect to update layout direction based on mobile status
  useEffect(() => {
    setDirection(isMobile ? "vertical" : "horizontal"); // Switch to vertical on mobile
  }, [isMobile]); // Re-run when isMobile changes

  // Setup crew with custom state using useCoAgent hook
  const { state, setState, run } = useCoAgent<
    CrewsAgentState & {
      result: string; // Crew execution result
      inputs: Record<string, string>; // User-provided inputs
    }
  >({
    name: crewName, // Set crew name from props
    initialState: {
      inputs: {}, // Initially empty inputs object
      result: "Crew result will appear here...", // Default result placeholder
    },
  });

  // Clean crewName for display by replacing non-alphanumeric chars with spaces
  const agentName = crewName.replace(/[^a-zA-Z0-9]/g, " ");

  // Render the UI
  return (
    <div className="w-full h-full relative">
      {" "}
      {/* Full-size container */}
      {/* Resizable panel group for responsive layout */}
      <ResizablePanelGroup direction={direction} className="w-full h-full">
        {/* Left/main panel (empty in this version) */}
        <ResizablePanel defaultSize={60} minSize={30}>
          {/* Placeholder for additional content (e.g., chat) */}
        </ResizablePanel>

        {/* Handle for resizing panels */}
        <ResizableHandle withHandle />

        {/* Right panel for crew results */}
        <ResizablePanel defaultSize={40} minSize={25}>
          <div className="h-full overflow-y-auto bg-gray-50 dark:bg-gray-900 p-3">
            {/* Scrollable container with light/dark theme */}
            <div className="flex flex-col h-full">
              {/* Header section */}
              <div className="flex items-center justify-between mb-2">
                <h1 className="text-lg font-medium text-gray-800 dark:text-gray-200">
                  {agentName} {/* Display cleaned crew name */}
                </h1>
              </div>

              {/* Content area */}
              <div className="h-full">
                <div className="text-sm text-gray-700 dark:text-gray-300 bg-white dark:bg-gray-800 rounded-md shadow-sm p-4 h-full overflow-y-auto prose dark:prose-invert max-w-none">
                  {/* Styled container for result */}
                  <ReactMarkdown>{state?.result || ""}</ReactMarkdown>{" "}
                  {/* Render result as markdown */}
                </div>
              </div>
            </div>
          </div>
        </ResizablePanel>
      </ResizablePanelGroup>
    </div>
  );
};
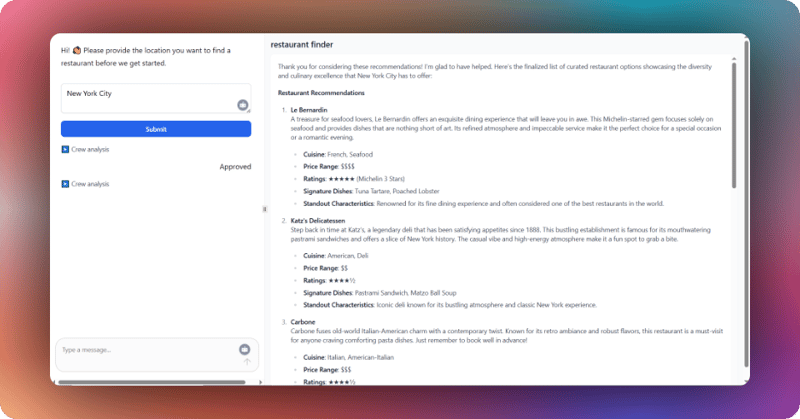
You can stream the restaurant CrewAI agent response by clicking the Approve button in the human feedback section. Then the agent will render a finalized list of curated restaurant options, as shown below.
Conclusion
We covered a lot in this tutorial. I hope you learned how to build, run, deploy, and chat with full-stack AI agents using CrewAI and Copilotkit.
Check out the full source code on GitHub here
Follow CopilotKit on Twitter and say hi, and if you'd like to build something cool, join the Discord community.


Top comments (32)
The screenshots are really nice {The Gradient Background thing . also it's quite subtle}. From where Did you create this ???
And this is very good tutorial on CrewAI-AI Agents + CopilotKit . This is amazing 🚀
Thanks for the feedback, Srijan.
For the screenshots I used xnapper.com/app
You're Welcome. And now I'll give xnapper.com a try.
Awesome.
Oh look, another “build your own AI agent in 10 minutes” demo. Great if you’re a startup with zero baggage and a repo cleaner than a nun’s browser history.
But for big orgs? Please. You’ve got legacy code older than TikTok interns. You’re not building agents—you’re still trying to find who the hell has access to that Jenkins server from 2013.
Startups can play with CrewAI and CopilotKit like it’s Lego for devs. But drop that into a corporate monolith and it’s like strapping a jet engine to a tricycle. The thing’ll shake, scream, and crash straight into a compliance meeting.
You don’t need AI agents—you need an exorcism, a rewrite, and a team of therapists for your devs.
Cool tech though. Just don’t pretend it’s plug-and-play when your repo’s a museum exhibit.
Haha, fair point! You’re absolutely right—startups get to skip around in a sandbox while big orgs are still digging through the archaeological ruins of their codebase.
For the corporate monoliths, yeah, it’s less “build an AI agent in 10 minutes” and more “schedule a 6-month committee to discuss if we can think about AI agents.”
Still, I think the cool part isn’t the plug-and-play fantasy—it’s the nudge to start somewhere. Even if it’s just a tiny agent to auto-generate meeting excuses while the exorcism’s in progress.
At least they can keep that massive technical debt and the repositories buildup in check.
💯
This combo will make a huge impact! 🔥
Totally agree.
I've been excited to see the first CrewAI-AI Agent + CopilotKit tutorial.
This is fantastic 🚀
I am happy to hear that, Nathan.
I'm gonna try this for sure !!
Let me know how you find it, Harshit.
Looking forward to trying this out!
Feel free to let me know how you find it out, Ferguson.
Nice, I was hoping y'all were going to support crew
CrewAI is now supported on CopilotKit.
Feel free to give it a try.
Thanks so much for the tutorial, that’s another project for my CV!
I am happy to hear that, Zicctor.
Why does the ss become so blurred ...dev.to should improve it
By the nice post
I will see how to improve the SS next time, Sahil.
Thanks for the feedback.
Love this!
I am happy to hear that, Sammy.