Installing Visual Studio Code on Linux is quick and really easy. If you are a Linux user, then this article might be old news to you. If, however, you are a developer that usually works on Windows but likes to play around a bit with Linux, then stick around. Perhaps this article can give you some pointers.
Looking for something else? Try these links instead:
- Visual Studio 2022 Releasing this Summer
- Visual Studio IntelliCode – AI For your Code
- Enabling C# 8 in Visual Studio 2019
- What C# version does my App use?
- Moving VirtualBox VM’s To An External Drive
As you know by now, Visual Studio Code is free and built on open source. Git is integrated and Visual Studio Code allows you to install extensions if you need something specific to your workflow. To install Visual Studio Code on Linux, I will be using Snap. If you for some reason do not have snap packages listed in your software centre, you can enable Snap support in your Linux distribution.
Enabling Snap support in Linux
I am running Linux Mint in a VM to illustrate how to use Snap. Linux Mint is a Linux distribution based on Ubuntu. If you haven’t enabled Snap support for your Linux distribution, you can do so by running the following command:
sudo apt install snapd
This will install Snap for my version of Linux. Therefore, if you are using a distribution based on Ubuntu, you can use the command above to get Snap.
What is Snap?
The quick explanation is that Snap is a universal Linux package that will work on any Linux distribution. Snaps are therefore applications compiled including all the required dependencies and libraries. This will create a sandboxed environment for your application to run in.
This means that you no longer have to worry about finding and installing the correct package (DEB, RPM etc.) for your Linux distribution. Updates are also automatic and goes out to everyone, no matter what the base OS is. Because Snaps run sandboxed, it is more secure because it is isolated from the rest of your system. Check out the website for more info regarding Snap.
Installing Snap on other Distributions
To enable support for Snap on Fedora based distributions, run the following command:
sudo dnf install snapd
Enabling support for Snap on Arch based distributions, run the following commands:
yaourt -S snapd
sudo systemctl enable --now snapd.socket
Once you have Snap installed, you need to find Visual Studio Code.
Installing Visual Studio Code on Linux using Snap
As mentioned earlier, Visual Studio Code is available as a Snap package. I will be using commands throughout to install Visual Studio Code. To find Visual Studio Code, run the following command:
sudo snap find vscode
You should see the following output.
The name of the snap package is code which means that you can use the following command to install Visual Studio Code on Linux.
sudo snap install code --classic
Depending on your Internet connection speed, this might take a few minutes to download. Once it is done, you can fire up Visual Studio Code.
This is Visual Studio Code running on my version of Linux Mint. You are of course not required to use Snap to install Visual Studio Code on Linux. You could always just download the .deb and .rpm files for your flavour of Linux.
Installing Visual Studio Code on Linux via Software Package
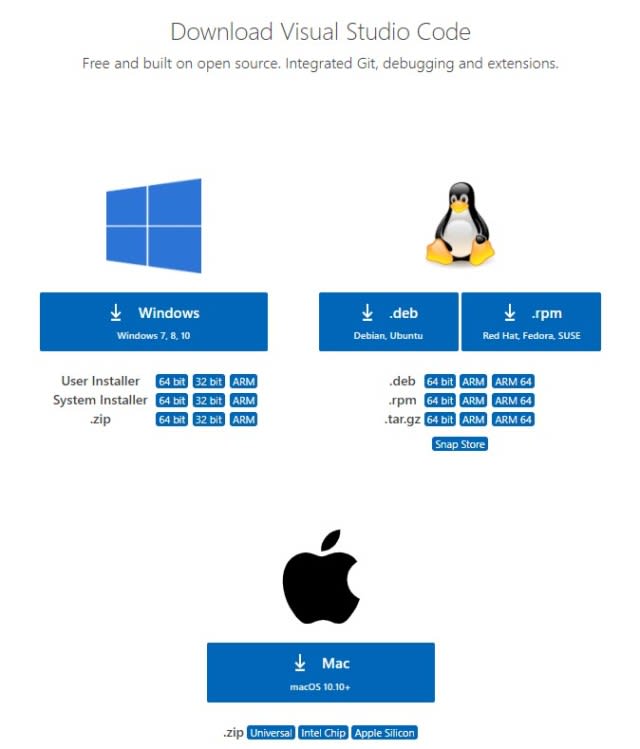
You can head over to the Visual Studio Code Downloads page and find the correct package for your Linux distribution. Linux distributions based on Ubuntu, such as Linux Mint that I am using requires me to download and install the .deb file. If you are using Fedora and SUSE based Linux distros, grab the .rpm file.
It is really very nice to see that Visual Studio Code is available for Apple Silicon too. As a software developer using Linux, you have everything you need to install Visual Studio Code on Linux.
Using Snap on Linux
There are various commands that you can run with Snap. In essence, Snap is similar to apt-get commands. Here is a list of some of the commands that you could find useful.
Finding Snap Packages
As we saw earlier, you can find packages on Snap by running the following command:
snap find <text_to_find>
The search query entered in the place of <text_to_find> does not need to be an exact match. The command will find similar results to the search query you entered.
Installing Snap Packages
As before, the command to install Snap packages is also quite easy. Once you have found the name of the package to install via the find command, you can install the package as follows:
sudo snap install <package_name>
The <package_name> is obviously the name of the package in the find results.
Listing Installed Snap Packages
If you want to see the installed Snap packages on your system, you can simply run:
snap list
The command return a list of packages installed as seen in the following screenshot.
As you can see, the list includes the package name, version, revision, tracking, published, and notes.
Listing Changes to Installed Snap Packages
To see any changes to Snap installed Snap packages, you can run the following command:
snap changes
This will list apps that have recently been updated, as seen in the screenshot below.
You can see that the .NET Core was refreshed automatically before Visual Studio Code was installed.
Refreshing, Updating, and Reverting Installed Snap Packages
Earlier I mentioned that Snap packages are automatically updated if there is an update available. It isn’t necessary to manually go updating Snap packages. If you wanted to you can check to see which Snap packages have updates waiting to be installed by running the following command:
sudo snap refresh --list
This will list packages with updates ready to be installed. To manually update an installed package, run the following command:
sudo snap refresh <package_name>
If you want to revert a Snap package, the following command will do the trick:
sudo snap revert <package_name>
This will revert the currently installed version to the previous version.
Deleting Snap Packages
To remove an installed Snap package, you can do the following:
sudo snap remove <package_name>
This essentially uninstalls the package from your Linux system.
Installing Visual Studio Code on Linux using Channels
The channels feature of Snap allows users to switch between stable and development releases of a package. By default, Snap packages are installed form the stable channel (which makes sense). If you are more bleeding edge, you can switch between these channels as follows:
sudo snap refresh <package_name> --channel=<channel_name>
The available channels are:
- stable – this is the default channel
- candidate – this is a release candidate nearing a stable release
- beta – this is an unstable version of the application
- edge – the daily or nightly build of an app still in development
All future updates to the application will come from the channel it was installed from.
Downloading Snap Packages
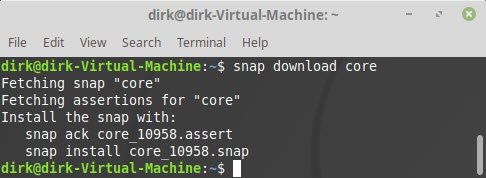
If for some reason, you need to install Snap packages offline, you can download them as follows:
snap download <package_name>
This will download the .assert and .snap file that you can stick onto a thumb drive and copy to a different Linux machine.
As you can see from the screenshot above, you need to install the downloaded package as follows:
snap ack <package_name.assert>
snap install <package_name.snap>
All these terminal commands remind me of running dotnet commands, and this is the point of this article. If you’re developing applications in .NET Core (or .NET 5.0 and later), working from a terminal window will feel very natural.
Running Installed Visual Studio Code on Linux
Last but not least, running your Snap is just as easy if you know the run command. This is usually just the name of the Snap. In our case, simply the word code will start Visual Studio Code.
And that’s all there is to it. Wasn’t that super easy?
Installing Visual Studio Code on Linux is Super Easy with Snap
If there is anything I have left out, please let me know in the comments section. I have only recently started playing around with Snap on Linux and I have to admit, it does make life easier. Being a noob, however, does leave the door open for mistakes. Learning is fun and I hope that using Snap and Visual Studio Code makes your dev workflow more productive.
The post Installing Visual Studio Code on Linux appeared first on Programming and Tech Blog.


Top comments (1)
Hello, i am trying VSCode on fedora core 36, but i cannot use nodejs, command not found, i have of course installe node, and npm, added the path to the binary of npm and nano on .bash_profile within vscode terminal, but the error message persist, command not found, do you know about a guide to use node and npm in vscode on fedora core 35-36 ? thanks in advance