
When I notice there are old computers collecting dust in my place, I ask about the possibility of repurposing them. With that in mind, I start building a homelab as a hobby. Each device can host one service, but I decide to virtualize my infrastructure to efficiently utilize every bit of hardware I have. There are popular solutions such as Proxmox, ESXI, and XCP-ng, but to make it more fun, I want to try out a more obscure solution. After looking around, Harvester, an open-source Hyperconverged Infrastructure, is the choice for my setup.
In this article, I will go over my very first experience with Harvester on a cluster of 3 management nodes. Keep in mind though, this article is more about documenting my experience, rather than being a proper tutorial, so please treat it with a grain of salt.
The hardware
When using a hypervisor type 1 such as Harvester, users should pay attention to the hardware of their infrastructure, because there are a plethora of compatibility issues that are lurking around, so what I experience may very well be isolated to my setup. Also, these are repurposed computers, so the specifications are nowhere near the recommendation from the Harvester team.
Node 1, an old laptop:
CPU: Intel I7-7700HQ
RAM: 16GB
NIC: Realtek RTL8111 (management NIC)
Storage: 1 TB NVME SSD (used for both Harvester and VM data)
Node 2, a medium form factor computer:
CPU: Intel I5-6500
RAM: 8GB
NIC 1: Intel I219-LM
NIC 2: Realtek RTL8125 (not rev. A or B, only 8125)
NIC 3: Intel X710 DA-2 (management NIC)
Storage: 128 GB SATA SSD (used for both Harvester and VM data)
Node 3, a mini computer:
CPU: Intel I5-6500T
RAM: 16GB
NIC: Intel I219-LM
Storage: 256 GN NVME SSD (used for both Harvester and VM data)
Harvester installation experience
The basic steps
The Harvester team has excellent documentation on initial installation, but being a geek, I decided to initially skip that to have a true first-hand experience. Overall, the installation process is fairly standard, but with some catches, more below.
-
Download the ISO: This confused me a little bit, because the very first "Get Started" on the Harvester website did not lead to an installation, but rather, it is a download button at the bottom of the page. Also, the switch leads to the Harvester GitHub repository, not a direct download.

Create a bootable USB drive using Rufus: There is not much about this step, because Rufus can burn the image without any issues.
-
Install Harvester in the other Node 1 > Node 2 > Node 3: Each node takes about 10 minutes to install. Perhaps there is a way to install them all at once (IaC?), if so, it will scale much better.

The weird first-login issue?
Here is a thing, although the image above shows the name, Rancher, I did not notice that, but bear with me and keep that in mind for a bit. When first installing Harvester, one step was to define a static VIP (Virtual IP for management). Well, it only shows an acronym and not knowing what that is, I essentially left it at default (DHCP). When the installation finished, I logged into the first node using its static node IP and was greeted with a login screen ... from Rancher?
I did not know about Rancher at that point, so here came another confusion. Later on, I also noticed that the branding of that page actually randomly changes between Harvester and Rancher branding when refreshed (F5). Also, it asks for a Bootstrap password and that is not the one I chose during the Harvester setup.
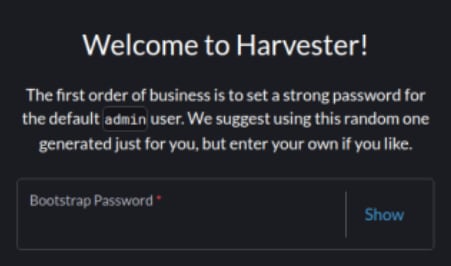
With this being nowhere documented, I dived into GitHub issues and found #1479. I learned the bootstrap password is admin, which then allowed me to log in.
And ... here is the Rancher dashboard. The best part is, I was not supposed to be here in the first place. This happened because I did not set up VIP for my cluster, so the Rancher dashboard and this whole weird first login behavior manifested. That said, there is no trivial way to modify management IP after Harvester installation, so I needed to reinstall the whole node. At the time of writing, I have an idea of Rancher's role already (albeit limited), but still, I could not find an explanation for the login behavior.
After setting up the VIP, I was able to create the first account and sign in to the Harvester dashboard (located at VIP) without an issue.
Harvester platform experience
Aside from the log-in issue that I mentioned, there were several pain points that I faced when trying out Harvester. Were they really pain points though? I'm not certain, and there is a chance they are intended behaviors. This is my first time trying out the platform after all. Anyway, here are some of them.
The failover functionality is clunky
With my setup, I have 3 nodes. Initially, only Node 1 is a management node, but after the other two nodes join the cluster, they were automatically promoted to a management one. Three nodes are required for the promotion to form a high-availability cluster. In a Harvester cluster of three, the fault tolerance is one. Well, the theory is that, but in practice, it is not as "high-availability" as I expected.
If node 1 is down, my cluster is effectively down (VIP - not ready; VMs, dashboard, and remaining nodes are not accessible).
From a power-off state, if only nodes 1 and 3 are turned on, then node 2 is cordoned. Nothing wrong there, but if I turn on node 2 afterward, then node 3 is cordoned. I have to reset node 3 so all are ready again. The same behavior applies when only nodes 1 and 2 are turned on.
From the power-off state, the nodes often cannot properly form a cluster after starting up (always not ready). This can be fixed with a few tries of rebooting the whole cluster (via console, F12).
-
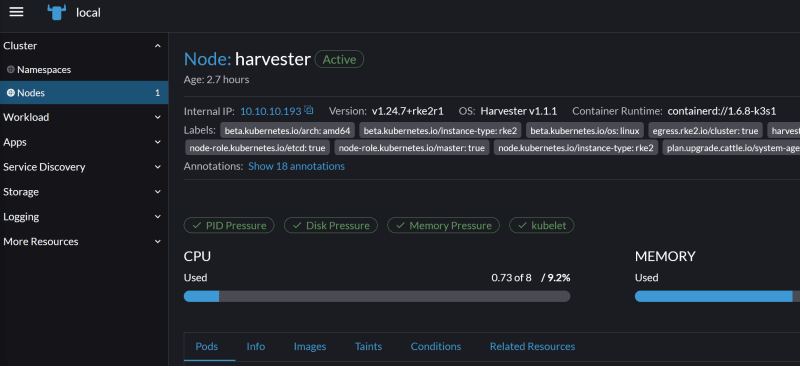
When the cluster is working, but node 2 or 3 is cordoned, the whole cluster often becomes unstable. It takes ages to access the Harvester dashboard, VMs become unresponsive, and actions are stuck in in-progress. Resources (capacity) spike sky-high and are more or less stuck there. I guess this has something to do with live migration. If the node is online again, the resources will gradually decrease and the cluster is usable again. To emphasize, this behavior often happens, but not always. The picture below was when one node just came back from being cordoned.

And compared to after it got settled down.

Some essential processes are not trivial in Web UI, for example, the update process
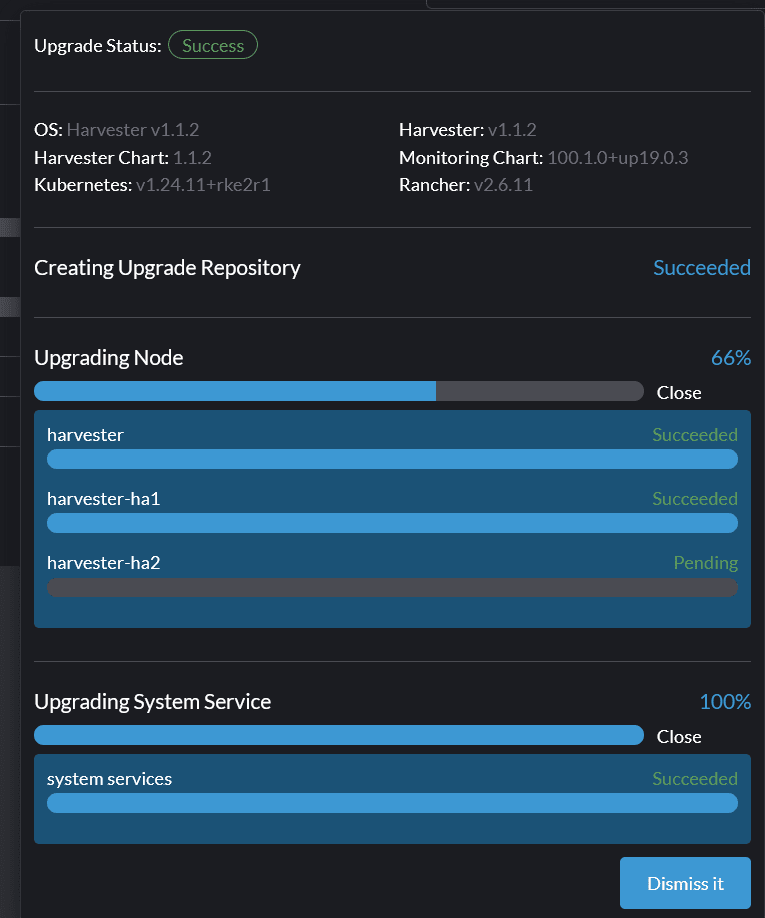
There does not seem to be a Check for Update button. Only when a new release arrives, a small button appears in the top right corner of the Dashboard tab that provides the update functionality. The update is also very slow even with my 1 gigabit connection and SSD in the nodes. It took me about 90 minutes to update nodes 1 and 2, but node 3 never got updated. My cluster has been working normally under this condition though (not considering the issues mentioned in this article).
This issue can be generalized as a lack of essential UX components like an official way to power off or reboot the cluster, view SMART data for hosts, and more. They certainly can be done in a headless manner or directly using the node console, but those might not be user-friendliest depending on your preference.
System-wide logging capability is rather limited out of the box
When facing problems, my first thought was to look at the logs to troubleshoot. That's when I noticed it does not even exist in the admin dashboard. I mean something equivalent to syslog or dmesg to be specific, because Harvester does have monitoring and logging capabilities via Events, Metrics, or Grafana. The first two are rather limited, while Grafana has been hit-or-miss for me. I'm often not able to view data in Grafana for some reasons (as errors shown in the picture below, plus some other random ones).
# Some errors that prenvent me from using Grafana. They randomly happens.
Templating [job]
Error updating options: no elements in sequence

Templating
Templating init failed Couldn't find variable with id:instance

502 Bad Gateway

Harvester consumes a lot of resources
This by itself is not necessarily an issue, but when compared to other solutions like Proxmox or XCP-ng, Harvester does require a beefy device to run on. Considering it reserves about 6 cores on a 4-core 8-thread node, I suppose an 8-core 16-thread node is a better starting point, which is in line with the Harvester team recommendation.

Almost all my nodes are over-committed upon fresh installation (no VMs, or configuration changes), but the cluster is still fairly responsive under this condition. The downside is, it forces my devices to run at full power and inherently increases power consumption and heat dissipation. They are not deal breakers by any means though.
The OS is read-only, but still modifiable to a certain extent
Harvester is openSUSE-based, so I thought additional packages can be installed directly on nodes via SSH or direct console. However, Harvester enforces immutability to most locations by default.
rancher@harvester:~> sudo zypper install smartmontools
The target filesystem is mounted as read-only. Please make sure the target filesystem is writable.
However, there are a few possibilities to overcome this immutability:
The installation image can be customized.
Using cloud-config to apply boot-time changes.
Temporarily enable the read-write mode for the system.
I have not tried any of them, however, I needed to modify the system for one reason. My node 1 is a laptop, so when the lid is closed, the system will be suspended. I don't want to keep the lid open all day so I had to disable this suspension feature. Luckily, this was not restricted by the immutability of Harvester.
# Harvester only has Vim by default.
# This was done via direct console access on the laptop (F12).

# Step 1: Access logind.conf.
sudo vim /etc/systemd/logind.conf

# Step 2: Make sure the following rows use the "ignore" option, and remove the "#" sign.
HandleLidSwitch=ignore
HandleLidSwitchExternalPower=ignore
HandleLidSwitchDocked=ignore
LidSwitchIgnoreInhibited=no

# Step 3: Mask some system options.
sudo systemctl mask sleep.target suspend.target hibernate.target hybrid-sleep.target

# Side note: There are many online discussions regarding on making the laptop not suspended when its lid is close. It seems the answer varies based on your device. On my laptop, the above sequence works, but may not be applicable to yours.
Wrap up
In this article, I went over multiple issues I face when trying out Harvester.
Were they annoying? Kind of.
Were they fun to go through? Yes!
Is Harvester a good option for a beginner? I think so.
At default, Harvester is fairly straightforward, but it certainly can become complicated on an established infrastructure. Getting my hands dirty is how I learn things over time, so for homelab purposes, it is a good choice. In the next article, I will go over my experience virtualizing the firewall on Harvester. Spoiler, it can handle my Gigabit connection easily, but with some catches. Stay tuned for that!
This article was first published at hungvu.tech: Is Harvester a good hypervisor for a beginner? My hands-on experience.
If you find this article to be helpful, I have some more for you!
And, let's connect!

Top comments (0)