Pixel art is a timeless form of digital art that has captivated creators and gamers alike for decades. Whether you're designing sprites for a game or just having fun, a pixel art generator can be a fantastic tool to bring your ideas to life. In this blog, I’ll walk you through the process of building a Pixel Art Generator with an Export Option that allows you to draw pixel art and export it as a PNG file. I’ve already built the app, and you can try it out here: Pixel Art Generator.
Below, I’ll explain the structure and functionality of the app in detail, leaving placeholders for the code. You can fill in the blanks with the provided HTML, CSS, and JavaScript code.
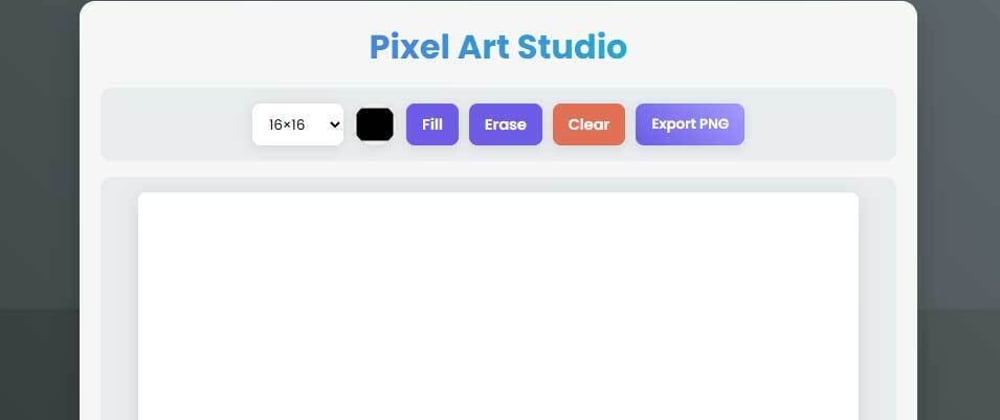
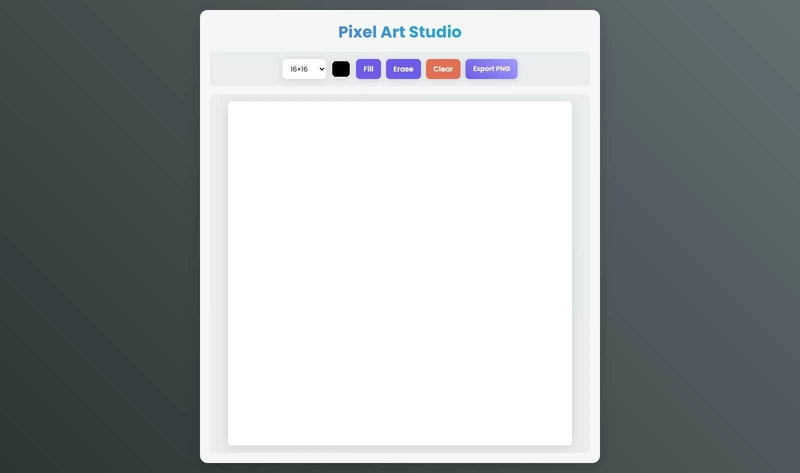
What Does the Pixel Art Generator Do?
The Pixel Art Generator is a web-based tool that allows users to:
- Draw pixel art on a customizable grid (16×16, 32×32, or 64×64).
- Choose colors using a color picker.
- Use tools like Fill, Erase, and Clear to refine their artwork.
- Export the final artwork as a PNG file.
The app is built using HTML, CSS, and JavaScript, making it lightweight and easy to use.
Structure of the App
The app consists of three main components:
- HTML: Defines the structure of the app.
- CSS: Styles the app to make it visually appealing.
- JavaScript: Handles the logic for drawing, filling, erasing, and exporting.
Let’s break down each component.
1. HTML Structure
The HTML file sets up the basic structure of the app, including the canvas, control panel, and buttons. Here’s the outline:
<!DOCTYPE html>
<html lang="en">
<head>
    <meta charset="UTF-8">
    <meta name="viewport" content="width=device-width, initial-scale=1.0">
    <title>Pixel Art Studio</title>
    <link rel="stylesheet" href="styles.css">
</head>
<body>
    <div class="container">
        <h1>Pixel Art Studio</h1>

        <div class="control-panel">
            <select id="gridSize" class="custom-select">
                <option value="16">16×16</option>
                <option value="32">32×32</option>
                <option value="64">64×64</option>
            </select>

            <input type="color" id="colorPicker" value="#000000" class="color-input">

            <button id="fillTool" class="tool-button">Fill</button>
            <button id="eraseTool" class="tool-button">Erase</button>
            <button id="clearBtn" class="tool-button danger">Clear</button>
            <button id="exportPNG" class="export-button">Export PNG</button>
        </div>

        <div class="canvas-wrapper">
            <canvas id="pixelCanvas" class="pixel-canvas"></canvas>
        </div>
    </div>

    <script src="script.js"></script>
</body>
</html>
Explanation:
- The
<head>section includes meta tags for responsiveness and links to the CSS file. - The
<body>contains a container with a title, control panel, and canvas wrapper. - The control panel includes a dropdown for grid size, a color picker, and buttons for tools like Fill, Erase, Clear, and Export PNG.
- The canvas is where the pixel art is drawn.
2. CSS Styling
The CSS file styles the app to make it visually appealing and user-friendly. Here’s the outline:
:root {
    --primary: #6c5ce7;
    --secondary: #a29bfe;
    --accent: #00cec9;
    --dark: #2d3436;
    --danger: #e17055;
}

* {
    margin: 0;
    padding: 0;
    box-sizing: border-box;
    font-family: 'Poppins', sans-serif;
}

body {
    background: linear-gradient(45deg, #2d3436, #636e72);
    min-height: 100vh;
    display: flex;
    justify-content: center;
    align-items: center;
    padding: 20px;
}

.container {
    background: rgba(255, 255, 255, 0.95);
    border-radius: 15px;
    padding: 20px;
    box-shadow: 0 10px 30px rgba(0, 0, 0, 0.2);
    width: 100%;
    max-width: 800px;
}

h1 {
    text-align: center;
    color: var(--dark);
    margin-bottom: 15px;
    font-size: 2em;
    font-weight: 700;
    background: linear-gradient(45deg, var(--primary), var(--accent));
    -webkit-background-clip: text;
    -webkit-text-fill-color: transparent;
}

.control-panel {
    display: flex;
    flex-wrap: wrap;
    gap: 10px;
    padding: 15px;
    background: rgba(223, 230, 233, 0.6);
    border-radius: 10px;
    margin-bottom: 15px;
    justify-content: center;
}

.custom-select {
    padding: 8px 12px;
    border: none;
    border-radius: 8px;
    background: white;
    box-shadow: 0 2px 10px rgba(0, 0, 0, 0.1);
    cursor: pointer;
    transition: all 0.2s ease;
}

.custom-select:hover {
    transform: translateY(-2px);
    box-shadow: 0 4px 15px rgba(0, 0, 0, 0.15);
}

.color-input {
    width: 40px;
    height: 40px;
    border: none;
    padding: 0;
    cursor: pointer;
    border-radius: 50%;
    box-shadow: 0 2px 10px rgba(0, 0, 0, 0.1);
    transition: transform 0.2s ease;
}

.color-input:hover {
    transform: scale(1.1);
}

.tool-button {
    padding: 8px 15px;
    border: none;
    border-radius: 8px;
    background: var(--primary);
    color: white;
    font-size: 0.9em;
    font-weight: 600;
    cursor: pointer;
    box-shadow: 0 2px 10px rgba(0, 0, 0, 0.1);
    transition: all 0.2s ease;
}

.tool-button:hover {
    transform: translateY(-2px);
    background: var(--secondary);
}

.tool-button.active {
    background: var(--accent);
    transform: scale(0.95);
}

.tool-button.danger {
    background: var(--danger);
}

.tool-button.danger:hover {
    background: #e55039;
}

.export-button {
    padding: 8px 15px;
    border: none;
    border-radius: 8px;
    background: linear-gradient(45deg, var(--primary), var(--secondary));
    color: white;
    font-weight: 600;
    cursor: pointer;
    box-shadow: 0 2px 10px rgba(0, 0, 0, 0.1);
    transition: all 0.2s ease;
}

.export-button:hover {
    transform: translateY(-2px);
    background: linear-gradient(45deg, var(--secondary), var(--primary));
}

.canvas-wrapper {
    padding: 15px;
    background: rgba(223, 230, 233, 0.6);
    border-radius: 10px;
    display: flex;
    justify-content: center;
    max-width: 100%;
    overflow: auto;
}

.pixel-canvas {
    background: white;
    border-radius: 8px;
    box-shadow: 0 5px 20px rgba(0, 0, 0, 0.1);
    max-width: 100%;
}
Explanation:
- The
:rootselector defines CSS variables for consistent colors. - The
bodyhas a gradient background and centers the app on the page. - The
.containerholds the app content and has a rounded, shadowed design. - Buttons and inputs are styled to be interactive and visually distinct.
3. JavaScript Logic
The JavaScript file handles the core functionality of the app. Here’s the outline:
class PixelArtGenerator {
    constructor() {
        this.canvas = document.getElementById('pixelCanvas');
        this.ctx = this.canvas.getContext('2d');
        this.gridSize = 16;
        this.pixelSize = 20;
        this.color = '#000000';
        this.isDrawing = false;
        this.isFilling = false;
        this.isErasing = false;

        this.init();
        this.bindEvents();
    }

    init() {
        this.adjustCanvasSize();
        this.clearCanvas();
    }

    adjustCanvasSize() {
        const maxWidth = 700; // Reduced for condensed design
        this.pixelSize = Math.floor(maxWidth / this.gridSize);
        this.canvas.width = this.gridSize * this.pixelSize;
        this.canvas.height = this.gridSize * this.pixelSize;
    }

    bindEvents() {
        document.getElementById('gridSize').addEventListener('change', (e) => {
            this.gridSize = parseInt(e.target.value);
            this.adjustCanvasSize();
            this.clearCanvas();
        });

        const colorPicker = document.getElementById('colorPicker');
        colorPicker.addEventListener('change', (e) => {
            this.color = e.target.value;
        });

        document.getElementById('fillTool').addEventListener('click', () => {
            this.isFilling = !this.isFilling;
            this.isErasing = false;
            this.toggleToolState('fillTool', this.isFilling);
        });

        document.getElementById('eraseTool').addEventListener('click', () => {
            this.isErasing = !this.isErasing;
            this.isFilling = false;
            this.toggleToolState('eraseTool', this.isErasing);
        });

        document.getElementById('clearBtn').addEventListener('click', () => {
            this.clearCanvas();
        });

        this.canvas.addEventListener('mousedown', (e) => this.handleMouseDown(e));
        this.canvas.addEventListener('mousemove', (e) => this.handleMouseMove(e));
        this.canvas.addEventListener('mouseup', () => this.isDrawing = false);

        document.getElementById('exportPNG').addEventListener('click', () => this.exportPNG());
    }

    toggleToolState(toolId, isActive) {
        const btn = document.getElementById(toolId);
        btn.classList.toggle('active', isActive);
    }

    getPixelCoordinates(e) {
        const rect = this.canvas.getBoundingClientRect();
        const x = Math.floor((e.clientX - rect.left) / this.pixelSize);
        const y = Math.floor((e.clientY - rect.top) / this.pixelSize);
        return { x, y };
    }

    drawPixel(x, y) {
        this.ctx.fillStyle = this.isErasing ? '#ffffff' : this.color;
        this.ctx.fillRect(x * this.pixelSize, y * this.pixelSize, this.pixelSize, this.pixelSize);
    }

    handleMouseDown(e) {
        this.isDrawing = true;
        const { x, y } = this.getPixelCoordinates(e);

        if (this.isFilling) {
            this.floodFill(x, y, this.ctx.getImageData(x * this.pixelSize, y * this.pixelSize, 1, 1).data);
        } else {
            this.drawPixel(x, y);
        }
    }

    handleMouseMove(e) {
        if (!this.isDrawing || this.isFilling) return;
        const { x, y } = this.getPixelCoordinates(e);
        this.drawPixel(x, y);
    }

    floodFill(x, y, targetColor) {
        const currentColor = this.ctx.getImageData(x * this.pixelSize, y * this.pixelSize, 1, 1).data;
        if (this.colorsMatch(currentColor, targetColor)) {
            this.drawPixel(x, y);
            if (x > 0) this.floodFill(x - 1, y, targetColor);
            if (x < this.gridSize - 1) this.floodFill(x + 1, y, targetColor);
            if (y > 0) this.floodFill(x, y - 1, targetColor);
            if (y < this.gridSize - 1) this.floodFill(x, y + 1, targetColor);
        }
    }

    colorsMatch(color1, color2) {
        return color1[0] === color2[0] && color1[1] === color2[1] &&
               color1[2] === color2[2] && color1[3] === color2[3];
    }

    clearCanvas() {
        this.ctx.fillStyle = '#ffffff';
        this.ctx.fillRect(0, 0, this.canvas.width, this.canvas.height);
    }

    exportPNG() {
        const link = document.createElement('a');
        link.download = 'pixel-art.png';
        link.href = this.canvas.toDataURL('image/png');
        link.click();
    }
}

new PixelArtGenerator();
Explanation:
- The
PixelArtGeneratorclass encapsulates all the app’s functionality. - The
constructorinitializes the canvas, context, and variables. - Methods like
adjustCanvasSize,drawPixel, andfloodFillhandle specific tasks. - Event listeners are added in
bindEventsto respond to user actions. - The
exportPNGmethod allows users to download their artwork as a PNG file.
How It Works
- Grid Size Selection: Users can choose a grid size (16×16, 32×32, or 64×64). The canvas adjusts dynamically to the selected size.
- Drawing: Users can click and drag to draw pixels on the canvas.
-
Tools:
- Fill: Fills an area with the selected color.
- Erase: Erases pixels by drawing with white.
- Clear: Clears the entire canvas.
- Export: Users can export their artwork as a PNG file with a single click.
Try It Out
You can try the Pixel Art Generator here: Pixel Art Generator. Feel free to experiment with different grid sizes, colors, and tools to create your own pixel art masterpiece!
Conclusion
Building a Pixel Art Generator is a fun and educational project that combines HTML, CSS, and JavaScript to create an interactive web app. By following this guide, you can understand the structure and logic behind the app and even customize it further to suit your needs.
If you have any questions or suggestions, feel free to leave a comment below. Happy pixel art creation! 🎨

Top comments (0)