
Introduction
Recently I've had the opportunity to play around with some IX Systems NAS appliances and their platform, TrueNAS, piqued my interest. While I was scanning some of their deployment documentation, I noticed that there were instructions for deployment on AWS but none for Azure. I checked with support and they said there wasn't a technical limitation, they just haven't worked on getting it certified yet. That made me think about how would I go about making this work on Azure.
Goal
I took it upon myself to see if I could make a TrueNAS appliance in Azure. I've never created a custom image for Azure or really spent much time using Hyper-V so it was time to roll up my sleeves and learn some new things. This post details my process and the result. I hope you find my journey and the result useful.
Journey
Initially, I did some research on converting an existing VMware OVA image and getting that to work in Azure. After a few attempts, it became pretty apparent that this was more complicated than it needed to be.
Next, I used Veeam to backup then restore a TrueNAS virtual machine from a VMware environment into Azure. This worked and I was able to connect to the OS and configure pools, etc. I didn't want everyone who wanted to run TrueNAS in Azure to go through the backup/restore process I needed something that was more portable.
I tried creating a TrueNAS Hyper-V image to simplify the conversion and was able to convert the Hyper-V virtual disk into a disk image that can be used in Azure. I uploaded the disk and then built a virtual machine around it. After that, I turned it into a VMware image to deploy.
This presented some deployment issues based on the script I'd cobbled together. The script would run, create the VM and then wait another 25 minutes before throwing an error message, that ended up not affecting the VM. I worked on that for a while but couldn't find a solution so I simplified my process a bit.
This time around I took the virtual disk created from the Hyper-V virtual machine and instead of worrying about creating an image I just cloned the disk this allowed me to just create the VM with a PowerShell script into my already existing tenant. I can now reproduce creating a basic TrueNAS virtual machine in Azure rather easily with my base disk.
I originally created my Hyper-V image with the TrueNAS 12.X Core software which is built on FreeBSD. There were a couple of issues I ran into with FreeBSD (mostly my own limitations working in UNIX) so I switched the image to TrueNAS SCALE software which is based on Debian Linux.
Even though this code is currently an "alpha" I was able to install the Azure Linux Agent in the first release (20.10-ALPHA). The builds are progressing quickly and now the waagent is included in the 20.12-ALPHA code.
Challenges
Uploading a Hyper-V virtual disk to Azure is a lot harder than I expected. One of the bigger issues I had was uploading the virtual disks to Azure.
A virtual disk that is uploaded to Azure needs the following characteristics (Convert the virtual disk to a fixed size VHD) :
- Disks in Azure must have a virtual size aligned to 1 MiB
- Disk "Size" must be a multiple of 1 MiB and Disk "FileSize" must be the "Size" plus 512 byte VHD footer
- Maximum size for a OS VHD is 2 TiB
- Maximum size for a data VHD is 32 TiB
I also wanted to keep the OS disk small in Azure because the bigger it is the more monthly costs are incurred. To create the proper sized VHD file I did the following steps:
Created a Hyper-V virtual machine with a 28 GiB OS (dynamic) disk
Converted it to a fixed disk with the Hyper-V GUI (PowerShell would've also worked)
Convert-VHD .\TrueNAS.vhdx D:\Azure\TrueNAS00.vhd -VHDType fixed
- Resized the VM to 31GB (any size would do, I kept it small because the OS only needs 32GB)
Resize-VHD .\TrueNAS00.vhd -SizeBytes 31GB
- Since that lead to a faction of a 1 MiB I resized it to a size divisible by 1024
Resize-VHD .\TrueNAS00.vhd -SizeBytes 33285996544
- Since that lead to a faction of a 1 MiB I resized it to a size divisible by 1024
Here you can see what the resize command and the get-vhd command output looks like:
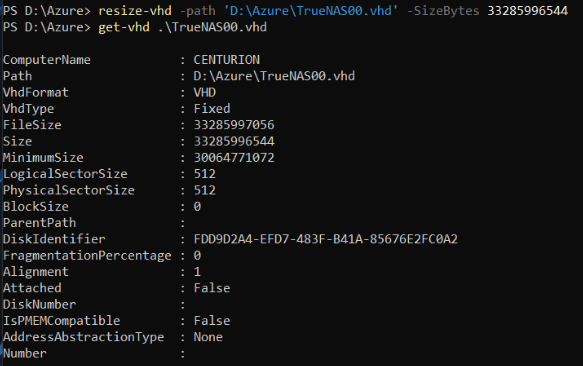
As you can see the Size is listed in bytes. For this to be a valid VHD that can be uploaded to Azure it needs to be divisible by 1 MiB (1 MiB = 1048576 bytes).
33285996544 bytes / 1048576 bytes = 31,744 bytes = 31 GiB
If the result was not a whole number we'd need to resize the VHD. In this case, it is a whole number so it is a valid VHD. Now we can use PowerShell or Azure Storage Explorer to upload the VHD to your Resource Group of choice as a managed disk.
Creating the VM
Creating the Virtual machine is relatively straight forward. I used Microsoft documentation and PowerShell examples I found online to create the script below.
Here is my script: Create TrueNAS VM from uploaded VHD.ps1
If you don't want to go through the process of creating your own VHD, you can use mine. The credentials are root / TrueNAS
My TrueNAS SCALE Image: TrueNAS00.vhd
# Create TrueNAS VM from uploaded VHD
#
# Assumptions:
# You have the following resources created:
# -Resourcegroup
# -Virtual network w/subnet
# -Virtual network gateway deployed and VPN tunnel created (if on-prem access is desired)
#
# Step 1: Upload the VHD to your subscription as a managed disk (not into a storage account). I used Azure Storage Explorer for this task.
#
# Step 2: Fill in your information and copy and paste this into Cloud Shell or Azure PowerShell. It will prompt you to enter credentials, but they do not actually apply to the OS so they will not be used.
#
# Step 3: Wait for the VM to be created. You should not have to wait for the progress bar to complete as it not recognizing that the resources have been created. It will eventually timeout and throw an error.
#
# Step 4: Modify or delete the inbound NSG rule allowing HTTPS depending on your security requirements.
#
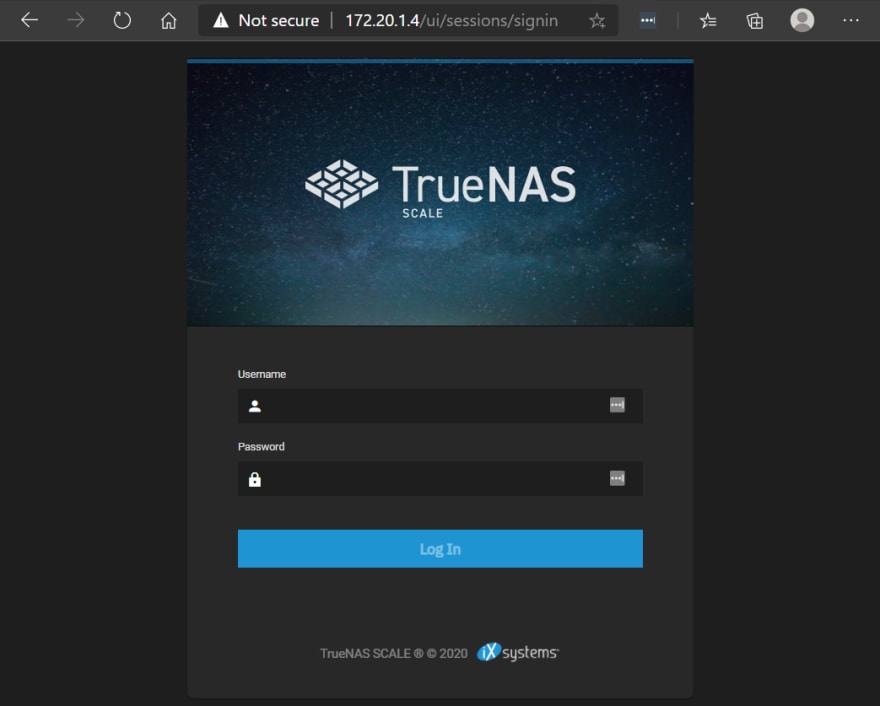
# Step 5: Connect to TrueNAS server via the "internal" IP address and configure to your needs.
#
# ---------------------------------------------------------------------------------------------------------------------------------------------------
#
# Setting the table
$vmName = "TN-Test01"
$vmConfig = New-AzVMConfig -VMName $vmName -VMSize "Standard_B2ms"
$rgname = "Lab_RG"
$vnetName = "lab-ncus-vnet"
$location = "northcentralus"
# Name of your uploaded managed disk
$osDiskName = "TrueNAS01"
$vnet = Get-azvirtualnetwork -Name $vnetName
$nicName = $vmName+"-nic"
$nic = New-AzNetworkInterface -Name $nicName `
-ResourceGroupName $rgname `
-Location $location -SubnetId $vnet.Subnets[0].Id `
$osDisk = Get-AzDisk -Name $osDiskName
$vm = Add-AzVMNetworkInterface -VM $vmConfig -Id $nic.Id
$vm = Set-AzVMOSDisk -VM $vm -ManagedDiskId $osDisk.Id -StorageAccountType Standard_LRS `
-DiskSizeInGB 32 -CreateOption Attach -Linux
New-AzVM -ResourceGroupName $rgname -Location $location -VM $vm
To create the VM, I used Visual Studio Code to edit and run the PowerShell script.
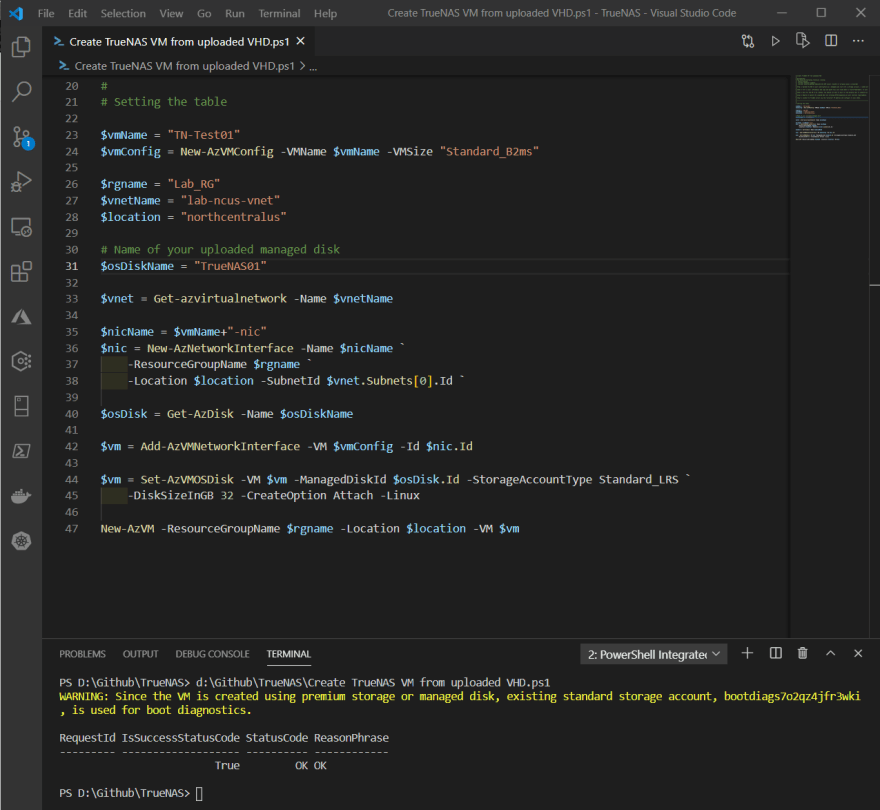
The script ran successfully and as we can see it created the VM with the attributes we defined.
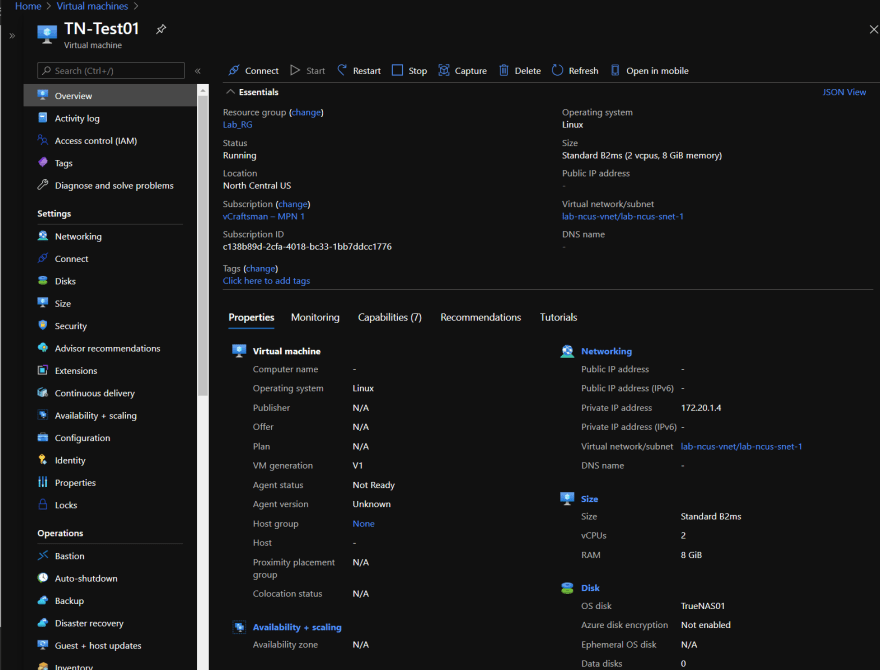
From here you can add additional data or caching disk to create your storage pool. After that, connect to the management interface and login to configure your TrueNAS appliance settings using the credentials you defined when you created the VM.
Wrap up
This project required me to sharpen my skills in PowerShell and Azure. I was certainly frustrated a number of times, but I was able to work through it. In the future, I'd like to add more to my script to add data disks and be able to copy the VHD directly from my storage account into my resource group, but as it stands I achieved my goal of being able to create a basic TrueNAS appliance in Azure.
Skilled used/learned:
- Creating a virtual machine using PowerShell
- Creating virtual machines in Hyper-V
- Converting and uploading Hyper-V virtual disks to Azure using Azure Storage Explorer
- Unix/Linux commands
- Creating virtual machines in Azure with PowerShell
- Using Github and Visual Studio Code
Links:

Top comments (0)