DEV Community

Cover image for Learn How to Create a Passion Economy Platform on Blockchain
Niharika Singh ⛓
Niharika Singh ⛓

Posted on • Edited on

6 2

Learn How to Create a Passion Economy Platform on Blockchain

“The line between hobbies, careers and personal brands is blurring.” — Adam Davidson, author of “The Passion Economy: The New Rules for Thriving in the 21st century”

The passion economy is all about monetizing individuality. Successful people usually have a unique skill set that is uncommon and hard to find elsewhere. When you combine your passion with skills, you can carve out a perfect niche in the economy.

The nature of work as we see it today is changing rapidly. Post COVID-19 crisis, we don’t know if we can go back to the way we were. Who thought they would be writing their end semester exams from their dorm!? Do we really need brick and mortar to run an office? COVID-19 is making us challenge the status quo.

The beginning of the journey into the passion economy starts with you. (This is usually the hardest step.) The passion economy is all about monetizing your individuality, so step #1 is reflecting within to find what you’re truly passionate about. This idea resonates with many religions where the focus is on finding a greater purpose in life and to work towards it with raw passion.

And passion pays off. According to a16z, the top-earning writer on the paid newsletter platform Substack earns more than $500,000 a year from reader subscriptions. The top content creator on Podia, a platform for video courses and digital memberships, makes more than $100,000 a month. And teachers across the US are bringing in thousands of dollars a month teaching live, virtual classes on Outschool and Juni Learning.

Yet, so many platforms lack transparency for content creators. In this blog post, we will focus on leveraging blockchain to create a passion economy platform for writers.

Here’s a step-by-step guide on how to develop a journal entry prototype on the Ethereum blockchain using Sia as a decentralized storage platform.

We will build a platform where a user can make a journal entry and push it to a decentralized storage platform. The unique hash of the journal entry will be stored on the blockchain. We will also fetch previous journal entries.

Sia is an open source decentralized storage platform that leverages blockchain technology to create a data storage marketplace. It is more robust and affordable when compared to traditional cloud storage providers. You don’t require any signups, servers, or need to trust third parties. Sia keeps your data private. You control your private encryption keys and you own your data. No third party has access to your files, unlike traditional cloud storage providers. Learn more about Sia here.

DappStarter is a full-stack blockchain app generator. We’ll be using DappStarter to spin up a minimalistic blockchain dapp within 5 minutes. DappStarter makes development faster and more efficient so developers can focus on the smart contract’s business logic, saving weeks of learning and development time. Learn more about DappStarter here.

Checklist before starting:

  1. Visual Studio Code (or any IDE for editing JavaScript)
  2. NodeJS v10.x
  3. Solidity v0.5.11
  4. Truffle v5.0.7
  5. Ganache v2.0.0 - Blockchain simulator for Ethereum

Step 1: Go to dappstarter.trycrypto.com to generate your blockchain dapp

DappStarter supports your choice of blockchain and blockchain language as well as an integrated front end user experience in your choice of client side framework.

Step 1.1: Select your choice of blockchain. For this tutorial, we will use Ethereum.

Alt Text

Step 1.2: Select Solidity as smart contract language
Alt Text

Step 1.3: For now we will work with vanilla JS
Alt Text

Step 1.4: Select a name for your dapp and click on the ‘CREATE DAPP’ button! 🎉
Alt Text

If you have followed all these steps successfully, you should have a unique github repository link where you can find your dapp!

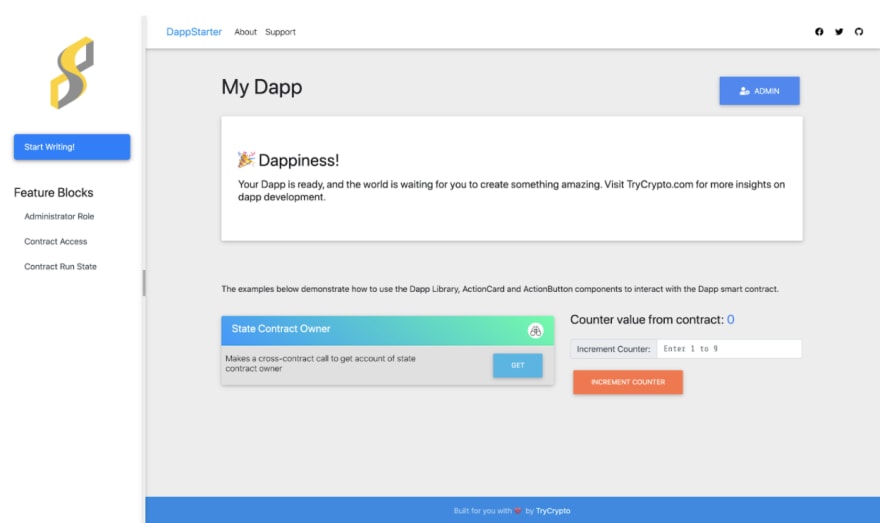
Step 2: Go to the GitHub repository and start your dapp using README

Once you have successfully started your dapp, you should see something like this-

Alt Text

To get an overview of DappStarter, go to trycrypto.com/.

Alt Text

Step 3: Customize your dapp

Let’s see how we can modify the navigation pane. Go to src/dapp/pages/components/page-navigation.js

You can find all the code related to dapp navigation here.

getPages() {
let staticPages = [{
name: 'dapp',
title: 'Start Writing!',
route: '/'
}, {
name: 'admin',
title: 'Dapp Admin',
route: '/admin',
hidden: true
}]
return staticPages.concat([{"name":"administrator_role","title":"Administrator Role","description":"Define accounts that can perform certain admin functions.","category":"Access Control","route":"/administrator_role"},{"name":"contract_access","title":"Contract Access","description":"Control which external contracts can interact with your contract.","category":"Access Control","route":"/contract_access"},{"name":"contract_runstate","title":"Contract Run State","description":"Ability to pause operation of your smart contract.","category":"Access Control","route":"/contract_runstate"}]);

On saving the file, the dapp will be reloaded automatically because DappStarter uses webpack. Now, you should see a navigation panel and Start Writing page like this-
Alt Text

Step 4: Create a new widget to make our dapp modular

It’s good practice to create widgets for different functionalities. Create a file named html-widget.js in src/lib/components/widgets.

Insert the following code in this file:

import CustomElement from '../shared/custom-element';
export default class HtmlWidget extends CustomElement {
static get ATTRIBUTE_FIELD() {
return 'field'
}
static get ATTRIBUTE_LABEL() {
return 'label'
}
static get ATTRIBUTE_PLACEHOLDER() {
return 'placeholder'
}
static get observedAttributes() {
return HtmlWidget.attributes;
}
static get attributes() {
return [
HtmlWidget.ATTRIBUTE_FIELD,
HtmlWidget.ATTRIBUTE_LABEL,
HtmlWidget.ATTRIBUTE_PLACEHOLDER
];
}
constructor(...args) {
super(HtmlWidget.attributes, ...args);
this.quill = null;
}
get value() {
let markup = this.quill.container.querySelector('.ql-editor').innerHTML;
return `<html>
<head> </head>
<body>
<div style="font-family:lato;">
${markup}
</div>
</body>
</html>`
}
render() {
let self = this;
let content = `
<div class="input-group">
<div id = "editor" class = "form-control"> </div>
</div>
`
self.style.display = 'block';
if (self.nextSibling) {
self.classList.add('mb-3')
}
self.innerHTML = content;
var toolbarOptions = [
['bold', 'italic', 'underline', 'strike'], // toggled buttons
['blockquote', 'code-block'],
[{ 'header': 1 }, { 'header': 2 }], // custom button values
[{ 'list': 'ordered'}, { 'list': 'bullet' }],
[{ 'script': 'sub'}, { 'script': 'super' }], // superscript/subscript
// [{ 'indent': '-1'}, { 'indent': '+1' }], // outdent/indent
// [{ 'direction': 'rtl' }], // text direction
// [{ 'size': ['small', false, 'large', 'huge'] }], // custom dropdown
[{ 'header': [1, 2, 3, 4, 5, 6, false] }],
[{ 'color': [] }, { 'background': [] }], // dropdown with defaults from theme
// [{ 'font': [] }],
// [{ 'align': [] }],
['clean'] // remove formatting button
];
self.quill = new Quill('#editor', {
modules: {
toolbar: toolbarOptions
},
theme: 'snow'
});
}
}
customElements.define('html-widget', HtmlWidget);
view raw html-widget.js hosted with ❤ by GitHub

In this file, we have integrated Quill to make rich text journal entries. Quill is a free, open source WYSIWYG editor built for the modern web.

To use Quill’s functionalities, make sure you add Quill CDNs in dapp/index.html. In the head, add

...
<head>
...
<link href="https://cdn.quilljs.com/1.3.6/quill.snow.css" rel="stylesheet">
...
</head>
<body>
...
<script src="https://cdn.quilljs.com/1.3.6/quill.js"></script>
</body>
view raw index.html hosted with ❤ by GitHub

To increase length of the text editor, make the following changes to src/dapp/index.css-

...
#editor {  
height: 375px;
}
strong {
font-weight: bold !important;
}
...
view raw index.css hosted with ❤ by GitHub

Step 5: Make use of html-widget in our dapp

Go to src/dapp/pages/dapp-page.js (this is where all our dapp front-end logic will reside) and make the following changes. Import the created html-widget there. We will be able to use this widget like a regular html tag to use Quill editor anywhere in our dapp.

import DappLib from '../../lib/dapp-lib';
import CustomElement from '../../lib/components/shared/custom-element';
import DOM from '../../lib/components/shared/dom';
import '../../lib/components/shared/action-card.js';
import '../../lib/components/widgets/number-widget.js';
import '../../lib/components/widgets/html-widget.js';
import ActionButton from '../../lib/components/shared/action-button';
import canvas from '../assets/img/canvas.jpg';
export default class SiaPage extends CustomElement {    
constructor(...args) {        
super([], ...args);        
this.mode = 'multiple';         
this.files = [];        
this.eventHandlerRegistered = false;    
}    
render() {        
let self = this;        
self.category = "Maintain your journal on decentralized web";        
self.description = "Store your journal on decentralized file storage";            
let uiHtml = {            
[CustomElement.UI_READ]: '',            
[CustomElement.UI_WRITE]: '',            
[CustomElement.UI_ADMIN]: ''            
}                 
uiHtml[CustomElement.UI_READ] =    
`            
<action-card                 
title="Get Document"
description="Get Sia document using its ID"                
action="getSiaDocument"
method="${CustomElement.METHOD_GET}"
fields="id">                    
<number-widget                     
field="id" label="Doc ID" placeholder="Document ID">                
</number-widget>            
</action-card>                
<action-card                 
title="Get Documents by Owner"
description="Get all Sia documents for any account"                
action="getSiaDocumentsByOwner"
method="${CustomElement.METHOD_GET}"
fields="account">                        
<account-widget                         
field="account" label="Account" placeholder="Account address">                    
</account-widget>                
</action-card>    
`            
uiHtml[CustomElement.UI_WRITE] =    
`            
<action-card                 
title="Make a journal entry"
description="Upload entry to Sia and add hash to contract"                
action="addSiaDocument"
method="${CustomElement.METHOD_POST}"
fields="myText"                
target="card-body-addSiaDocument"                
message="Waiting for Sia upload and smart contract transaction">                    
<h2> Start Writing! </h2>                    
<html-widget                    
data-field= "myText"
field="label"
label="Label"                     
placeholder="Description">                
</html-widget>                                    
<input
type="hidden"
data-field="mode"
value="${self.mode}"
style="display:none;"
></input>            
</action-card>    `                    
let content =            
`        
<page-body
title="${self.title}"
category="${self.category}"
description="${self.description}">            
${uiHtml[CustomElement.UI_READ]}            
${uiHtml[CustomElement.UI_WRITE]}            
${uiHtml[CustomElement.UI_ADMIN]}        
</page-body>        
<page-panel id="resultPanel">
</page-panel>        
`        
self.innerHTML = content;        
// self.querySelector('upload-widget').addEventListener(UploadWidget.EVENT_FILES_CHANGED, (e) => {        
//     //Could do something here        
//     //let files = e.detail.files;        
// });            
if (!self.eventHandlerRegistered) {            
self.eventHandlerRegistered = true;            
DappLib.onAddSiaDocument((result) => {                
let resultPanel = self.querySelector('#resultPanel');                
resultPanel.append(DappLib.getFormattedResultNode(result));                
resultPanel.open();            
});            
}        
}
async fetchAndDisplayCounter() {        
let result = await DappLib['getStateCounter'].call();        
DOM.elid('counter').innerHTML = result.callData;    
}‍
}
customElements.define('dapp-page', DappPage);
view raw dapp-page.js hosted with ❤ by GitHub

Your dapp should look like this now-

Alt Text

Alt Text

Step 6: Remove extra blocks and change logo

Let’s take the customization of the dapp to the next level. Let’s make it look like this-

Alt Text

Alt Text

Let’s change the logo first. You can use any image. Save it in src/dapp/assets/img. Let’s name it YOUR_FILE_NAME.png. Now go to src/dapp/pages/components/page-navigation.js. You see this line in the code-

import logo from "../../../dapp/assets/img/dappstarter.png";

Change it to

import logo from "../../../dapp/assets/img/YOUR_FILE_NAME.png";

We also need to make a change to webpack.config.dapp.js (this is in the root of the project)-

…    
plugins: [      
new HtmlWebpackPlugin({        
template: path.join(__dirname, 'src/dapp/index.html')      
}),      
new FaviconsWebpackPlugin('src/dapp/assets/img/YOUR_FILE_NAME.png')     
],

This is what your dapp should look like now-

Alt Text

Now let’s remove the Feature blocks from the left navigation panel. Go to src/dapp/pages/components/page-navigation.js.

...
// Remove the block between '
//BEGIN //END below to remove feature blocks from navigation                
// BEGIN: Feature Blocks                
// DOM.h4({                
//     className: 'mt-5 mb-2'                
// },                 
// "Feature Blocks"),                
// DOM.ul({                
//     id: self.listId + '-blocks',                
//     className: 'list-group list-group-flush'                
// },                
// listItems.slice(1)                
// ),   
// END: Feature Blocks…

Your dapp should look like this now-

Alt Text

We are almost there!! Finally, let’s get rid of the top navigation bar. Go to src/dapp/pages/components/top-navigation.js and remove all the html that is being rendered.

src/dapp/pages/components/top-navigation.js should look like this-

import CustomElement from '../../../lib/components/shared/custom-element';‍
export default class TopNavigation extends CustomElement {    
static get ATTRIBUTE_COLLAPSE() {        
return 'collapse'    
}‍    
static get observedAttributes() {        
return TopNavigation.attributes;     
}‍    
static get attributes() {        
return [            
TopNavigation.ATTRIBUTE_COLLAPSE        
];    
}‍    
constructor(...args) {        
super(TopNavigation.attributes, ...args);    
}
}‍
customElements.define('top-navigation', TopNavigation);

This is what your dapp should look like now-

Alt Text

Step 7: Handle journal entry with Sia

All the code related to Sia document upload rests in src/lib/dapp-lib.js. Go to FILE STORAGE: SIA section. The only code block that needs editing here is addSiaDocument().

static async addSiaDocument(data) {        
let folder = data.mode === 'folder';         
let config = DappLib.getConfig();                
//Name of the journal entry is the date and time when it was written         
const timeStamp = new Date().toString();‍
// Convert data received from html-widget into a file        
data.files = [
new File([data.myText], `${timeStamp}.html`, {            
type: "text/html",          
})];‍        
// Push files to SIA        
let siaResult = await DappLib.siaUpload(config, data.files, folder);        
let results = [];        
for(let f=0; f<siaResult.length; f++) {            
let file = siaResult[f];            
let result = await Blockchain.post({                    
config: config,                    
contract: DappLib.DAPP_STATE_CONTRACT,                    
params: {                        
from: null,                        
gas: 2000000                    
}                
},                
'addSiaDocument',                
file.docId,                
DappLib.fromAscii(data.label || '', 32)            
);            
results.push({                
transactionHash: DappLib.getTransactionHash(result.callData),                
docId: file.docId            
});        
}
view raw dapp-lib.js hosted with ❤ by GitHub

Step 8: Final touch ups

Our dapp is almost ready. We just need to make a few tweaks in src/dapp/index.css. Add the following lines to the file-

.markup {  
font-family:courier;
}
view raw index.css hosted with ❤ by GitHub

These were all the changes we had to make! Now let’s see our dapp in action.

Congratulations, if you made it till here! 🎉

Alt Text

You can modify your dapp to develop more sophisticated platforms for writers. What we built was merely an example of one of the many use cases you as a developer could build upon.

The future of the passion economy is predicated on the concept of transparency and fairness for content creators. Blockchain provides a unique infrastructure that encourages creators to make awesome content by ensuring that they’ll be fairly compensated for their efforts. Building a dapp for the passion economy is about more than just monetizing content — it’s about providing a transparent, open system where creators feel empowered to create and share what makes them unique.

Start building your dapp with DappStarter.

Sentry blog image

How I fixed 20 seconds of lag for every user in just 20 minutes.

Our AI agent was running 10-20 seconds slower than it should, impacting both our own developers and our early adopters. See how I used Sentry Profiling to fix it in record time.

Read more

Top comments (3)

Collapse
 
rickystam profile image
Ricky Stam • Edited

Hi nice article :) Just a small tip when you use markdown for code you can use

'''javascript
// your code here
'''
Replace ' with `

This way your code gets highlighted

Collapse
 
prahladmishra profile image
Prahlad Mishra

Very interesting, will try that out in my next down time. Is there any live site or journal that run in the same framework?

Collapse
 
niharrs profile image
Niharika Singh ⛓

Um, not yet. But hopefully soon! ;)

A Workflow Copilot. Tailored to You.

Pieces.app image

Our desktop app, with its intelligent copilot, streamlines coding by generating snippets, extracting code from screenshots, and accelerating problem-solving.

Read the docs