
Hi!
I'm @nyaomaru, a frontend engineer who finally managed to make it to the first zombie in Resident Evil 9. It was terrifying. 🧟🧑⚕️
A couple of articles ago, I introduced a browser game I built. Have you played it yet?

Game - Nyaomaru
Portfolio of Nyaomaru – A frontend engineer specializing in Vue, React, and TypeScript.
 nyaomaru-portfolio.vercel.app
At first glance, it looks like a very simple game. But once I actually started building it, I ran into a surprising number of tricky problems.
In this article, I’ll share the main things that tripped me up and how I dealt with them.
Let’s get into it.
🍽️ Quick recap
I built a browser game with:
Remix × React × TypeScript × FSD
If you want the full background, check out my previous two articles:

⛳ What I struggled with
These were the biggest issues:
- extra whitespace when animating SVG-based sprites
- inconsistent frame behavior across different screen sizes and devices
- AI not generating the CSS animation I actually wanted
- collision detection that didn’t match the visuals
Let’s go through them one by one.
1. SVG sprite animation and the whitespace problem
At first, I thought:
“They’re SVGs. Animation should be easy if I just swap them nicely.”
It was not easy at all.
The biggest issue was this:
Even when two SVGs looked like they were the same size, their positions shifted during animation.
For example:
- frame 1 and frame 2 of the running animation had slightly different visual centers
- the boss’s idle state and attack state didn’t line up at the bottom
- even with the same
widthandheight, the actual rendered position didn’t match perfectly
So from React’s point of view, I was “just swapping images of the same size.”
But in reality, differences in the SVG viewBox and internal whitespace made them visibly jump.
In the end, instead of trying to force the SVG contents to align perfectly, I treated the outer container as fixed and only swapped the sprite inside it.
<img
  ref={playerSpriteRef}
  src={PLAYER_RUN_SPRITES[0]}
  alt="player"
  className={styles.playerSprite}
  draggable={false}
  aria-hidden
/>
.playerSprite {
  display: block;
  width: 100%;
  height: 100%;
  object-fit: contain;
  object-position: center bottom;
}
The key was to align everything to the bottom.

That alone greatly reduced the weird “bouncing” feeling when frames switched.
🔑 The takeaway here was:
Treat SVGs not as visuals, but as boxes that include invisible padding. 📦
If you underestimate that, it will absolutely come back to bite you later.
2. DOM movement behaving differently depending on display size and device
This was the next problem.
At first, I used requestAnimationFrame and moved obstacles left a little bit on every frame.
That sounds reasonable, but it caused the game speed to vary depending on the device.
requestAnimationFrame does not guarantee perfectly consistent timing.
That led to problems like:
- the game felt smooth on desktop
- obstacles looked slower on mobile when FPS dropped
- differences in screen size and rendering load changed the perceived difficulty
If I left that alone, the exact same code would create effectively different games on different devices.
So instead of moving things by a fixed amount per frame, I switched to time-based movement.
The important thing here was using deltaTime.
deltaTime represents how many milliseconds passed between the previous frame and the current one.
For example:
- at 60fps, one frame is about
16.6ms - at 30fps, one frame is about
33.3ms
So when FPS drops, each frame covers more time.
If you move an obstacle by the same number of pixels every frame, then lower-FPS devices will make the obstacle move more slowly overall.
But with deltaTime, you can adjust movement based on elapsed time.
const frameDistancePx = (obstacleSpeedPxPerSec * deltaTimeMs) / 1000;
obs.style.left = `${Number.parseFloat(obs.style.left) - frameDistancePx}px`;
This made it much easier to keep movement consistent on a per-second basis, even when FPS fluctuated.
That said, deltaTime alone was not enough to fully close the gap.
So after switching to time-based movement, I also:
- used different speed constants for mobile and desktop
- applied an additional pace scale only on large desktop screens
That let me preserve the original feel on desktop without making mobile gameplay too slow or too heavy.
🔑 The takeaway here was:
Game logic should be designed around time, not frames. 🕛
Browser games may look simple, but if you ignore device differences, the overall quality drops fast.
3. AI couldn’t generate the CSS animation I actually wanted
This one was subtle, but painful.
For some effects, like the clear animation, I needed something with these characteristics:
- the image changes midway
- the starting position is only known at runtime
- the duration also changes depending on the situation
- but the overall animation shape should stay fixed
This kind of thing did not go well with codex.
It really struggled with animations that included dynamic values like runtime position and duration.
So I ended up handling this part myself.
At first, I tried doing everything inline.
But once I started pushing even @keyframes-related concerns into the component, the responsibilities between rendering and visual behavior got messy very quickly.
So I split it like this:
- fixed animation definitions live in CSS Modules
- only dynamic values like position and duration are passed via CSS variables
<div
  className={styles.flyoutMotion}
  style={
    {
      "--flyout-origin-x": `${specialFlyoutOrigin.x}px`,
      "--flyout-origin-y": `${specialFlyoutOrigin.y}px`,
      "--flyout-duration-ms": `${specialFlyoutDurationMs}ms`,
    } as CSSProperties
  }
/>
.flyoutMotion {
  left: var(--flyout-origin-x);
  top: var(--flyout-origin-y);
  animation: special-flyout-motion var(--flyout-duration-ms)
    cubic-bezier(0.24, 0.82, 0.22, 1) forwards;
}
From there, I fine-tuned the easing with cubic-bezier and adjusted the actual motion in the browser, kind of like shaping keyframes in After Effects.
🔑 The takeaway here was:
Keep fixed animation logic in CSS, and pass only dynamic values through CSS variables. 🫱
That separation made the animation code much easier to reason about and tweak later.
4. Collision detection didn’t match the visuals
And finally, collision detection.
This is always painful in browser games, and this project was no exception.
The main issue was this:
The visual shape and the actual collision area did not match.
When I naïvely used getBoundingClientRect() against everything, I ran into problems like:
- collisions triggering even when it didn’t look like the player touched anything
- obvious hits sometimes slipping through
The reasons were mainly these two:
- the visible SVG shape didn’t match its rectangular bounds
- the “visually correct” size and the “feels fair in gameplay” size were different for each obstacle
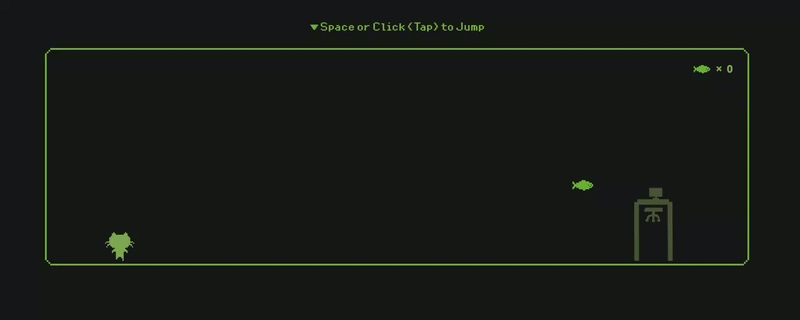
For example, desk-type obstacles had a large visual box, so using the raw rectangle made collisions feel unfair.
Here’s what the desk obstacle looked like:

So I separated visual size from hitbox size.
obstacleElement.dataset.hitboxScale = `${resolvedHitboxScale}`;

const hitboxScale = Number(obs.dataset.hitboxScale ?? "1");
const obstacleHitbox = getScaledHitboxFromRectLike(obstacleBox, hitboxScale);
const isCollision =
  !!playerRect && isPlayerOverlappingHitbox(playerRect, obstacleHitbox);
That way, the obstacle could stay visually large and impactful, while the collision box could be slightly reduced to feel fair.
This also made balancing much easier, because I could tweak hitbox scale per obstacle.
🔑 The takeaway here was:
Visuals and collision should be designed separately. 🛠️
This was probably the part that made me feel the most like, “Okay, now I’m actually building a game.”
Summary
The game looks simple, but the implementation involved a lot of careful decisions.
The biggest lessons were:
- treat SVGs as boxes that include whitespace
- design movement based on time, not frames
- separate CSS and JS responsibilities clearly
- separate visuals and hit detection
Getting these details right makes a huge difference in how polished the game feels.
So if you’re thinking about building a browser game, I’d really recommend paying attention to these parts from the beginning. 🚀
Also, the repository is public, so feel free to take a look:
 nyaomaru
/
nyaomaru-portfolio
nyaomaru
/
nyaomaru-portfolio
"Run Away From Work" Game is here → https://nyaomaru-portfolio.vercel.app/game
Nyaomaru Portfolio
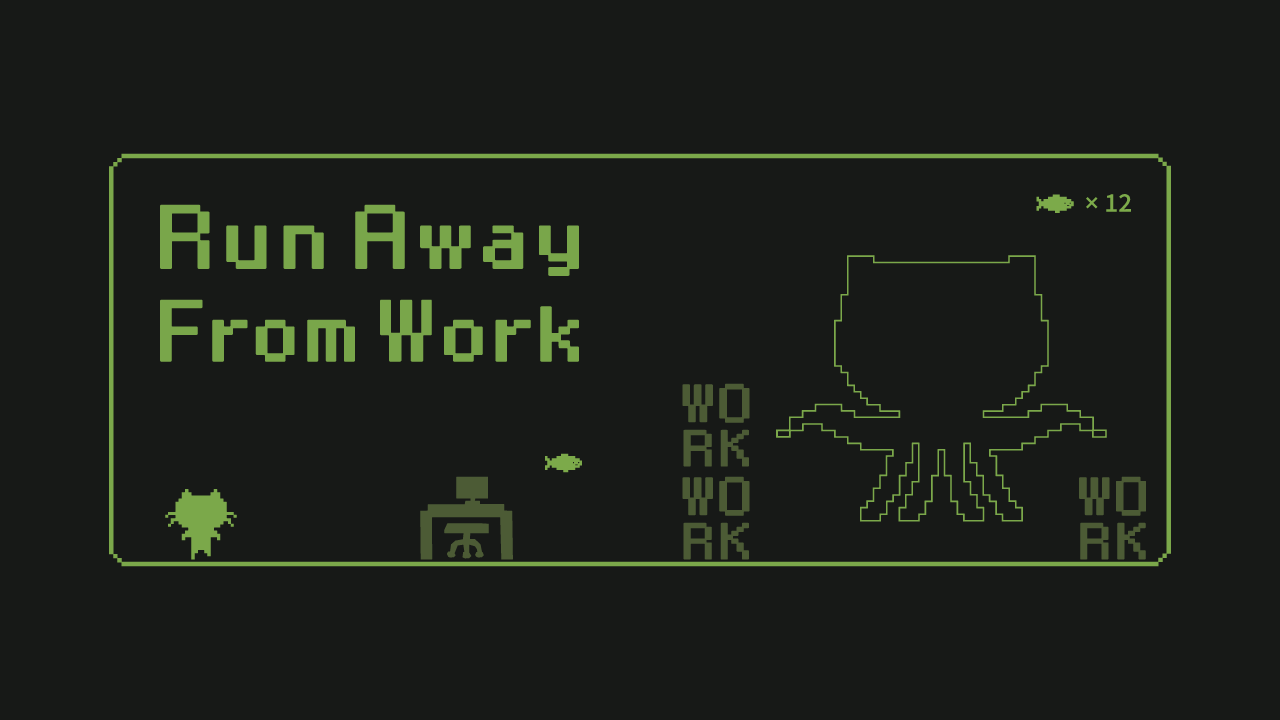
"Run Away From Work"
You can play here: https://nyaomaru-portfolio.vercel.app/game
A Remix + React + TypeScript portfolio built with Feature-Sliced Design.
🚀 Highlights
- Jump Game (Main Feature): Side-scrolling jump game with obstacles, boss phases, clear sequences, and restart flow.
-
Interactive Terminal: Ask profile-related questions in a terminal-style UI backed by the
/api/askendpoint. - Responsive UI: Works across desktop and mobile layouts.
- FSD Architecture: Organized by features/widgets/pages/shared layers.
🎮 Main Feature: Game
The game is available at /game.
Can you watch true ending? 🚀
🕹️ Controls
Action
Description
Space / Click
Jump
Tap
Jump
Double Jump
Jump again while in the air
💻 Terminal
The terminal is available on the top page and is designed for profile Q&A.
✨ What It Does
- Sends user input to
/api/ask. - Returns an AI-generated answer based on profile context.
- Shows typing/waiting states in terminal history.
⚠️ Important
/api/ask…
Bonus: Sound effects matter too
One thing that turned out to be more important than I expected was sound. 🔊
Audio files need to be lightweight. Even a small delay can hurt the feel of the game.
I originally exported my sound effects from GarageBand as wav files, but the file sizes were too large and the game started to feel noticeably heavier.
So I used ffmpeg to convert them to ogg and reduce the size.
ffmpeg -i input.wav -ac 1 -ar 22050 -b:a 64k output.ogg
After converting them like this, things got much lighter.
And just to be safe, I also recommend preparing an mp3 fallback.
So the takeaway here was:
Small sound files matter. A lot. If you care about game feel, optimize audio too. 👍
Happy coding! 💻

Top comments (3)
Insightful post that clearly shows the challenges of using React for browser games, especially around timing, performance, and separation of game logic from UI.
Thanks, I really appreciate that! 😸
That separation between game logic and UI ended up being one of the biggest lessons for me.
React works great for structure, but once we get into high-frequency updates, we really start to feel its limits.
Spot on. It’s a tough balance to strike! Using React for the 'structure' and something else for the 'action' seems to be the sweet spot. It’ll be interesting to see how you evolve the architecture in your next build!