
🚀 Welcome Devs to the World of DevOps and Automation!
Hey Devs! 👋
Today, we’re diving into an exciting and hands-on project where we’ll be deploying a Spring Boot Bank Application on an Amazon EKS cluster. To make things even more interesting, we’ll be using MySQL as our database and leveraging ArgoCD for continuous delivery.
Why is this project worth your time?
You’ll get practical experience in deploying a real-world application on a Kubernetes cluster.
You’ll learn how to use ArgoCD for GitOps-based continuous deployment.
You’ll explore how to manage a MySQL database alongside your application in a Kubernetes environment.
This project is packed with valuable insights, and by the end, you’ll have a fully functional bank application running on Amazon EKS. So, without further ado, let’s get started! 🚀
💡 Prerequisites: What You’ll Need Before Getting Started
Before we jump into the deployment process, let’s make sure we have all the necessary tools and resources in place. Here’s what you’ll need:
✅ 1. Docker and Docker-Compose Installed
We’ll be containerizing the Spring Boot Bank Application and running it locally before deploying it to Amazon EKS. To do this, you’ll need:
Docker: To build and manage the application container.
Docker-Compose: To run multiple services together, such as the app and MySQL database, during local testing.
💡 If you haven’t installed Docker yet, you can follow the Docker installation guide.
✅ 2. AWS Account with an IAM User Configured with AWS CLI
To interact with Amazon EKS, you’ll need:
An AWS account with sufficient permissions.
An IAM user with administrative access or specific permissions for EKS, EC2, and RDS.
The AWS CLI installed and configured with your IAM user credentials.
💡 To configure AWS CLI, run:
aws configure
You’ll be prompted to enter your Access Key ID, Secret Access Key, region, and output format.
✅ 3. Basic Understanding of Docker and Kubernetes
While this blog will walk you through the process step by step, it’s helpful to have some familiarity with:
Docker concepts like building images, running containers, and Docker-Compose basics.
Kubernetes basics such as pods, deployments, and services.
📚 If you’re new to Kubernetes, you can check out Kubernetes Documentation.
Once you have these prerequisites in place, you’re ready to dive into the deployment process! 🚀
💡 Youtube Demo
💡 Walking Through the Project: Local Testing with Docker
Before we deploy the Spring Boot Bank Application on Amazon EKS, let’s first run it locally to understand how it works. This will help us verify that everything is functioning properly before moving to the cloud.
🛠️ Step 1: Clone the GitHub Repository
The project is hosted on GitHub. Let’s start by cloning the repository:
git clone https://github.com/Pravesh-Sudha/Springboot-BankApp.git
📁 Step 2: Navigate to the Project Directory
Once the repository is cloned, move into the project directory:
cd Springboot-BankApp/
🐳 Step 3: Run the Application Locally with Docker-Compose
The project uses Docker-Compose to run the application along with a MySQL database as a service.
Make sure your Docker Engine is up and running, then execute the following command:
docker-compose up --build

Here’s what happens:
--build: Builds the Docker image for the Spring Boot Bank App.The MySQL service and the application will start together.
💡 It may take around 10-20 seconds for the services to spin up completely.
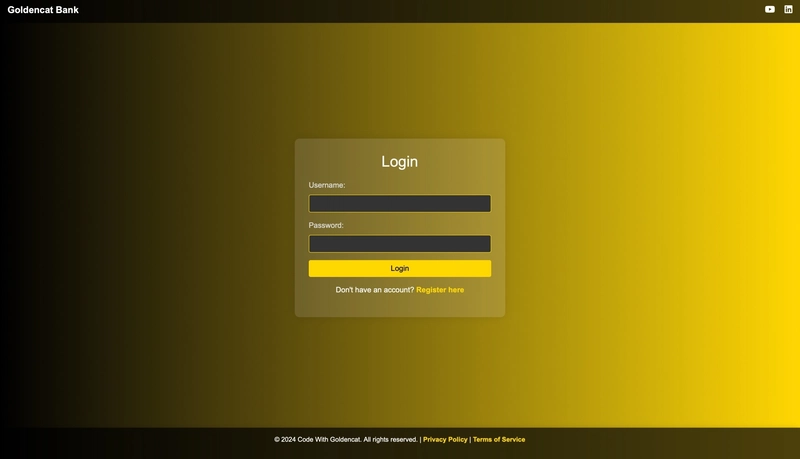
🌐 Step 4: Access the Application
Once the app is running, open your browser and go to:
http://localhost:8080
You’ll see the Bank Application’s login screen. 🎉
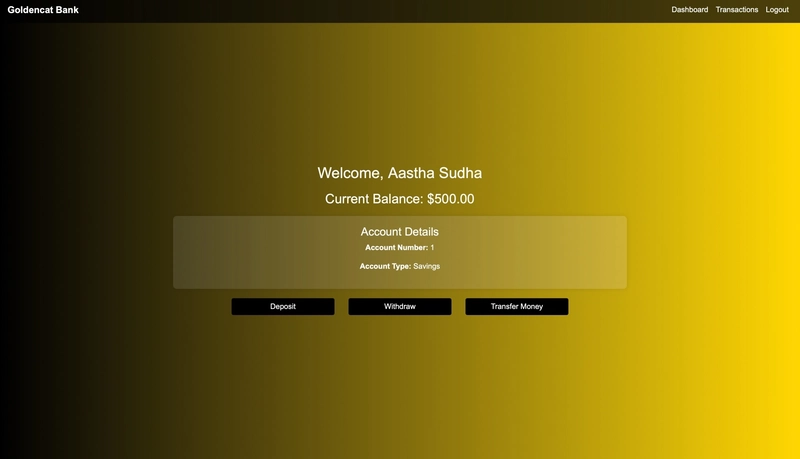
💳 Exploring the Application Features
Here’s what you can do:
- Register a User:
* Create an account by registering a new user.
- Login and Manage Funds:
* After logging in, you can perform various fund management activities:

    * **Deposit funds** 💰

    * **Withdraw funds** 💸

    * **Transfer funds** 🔁
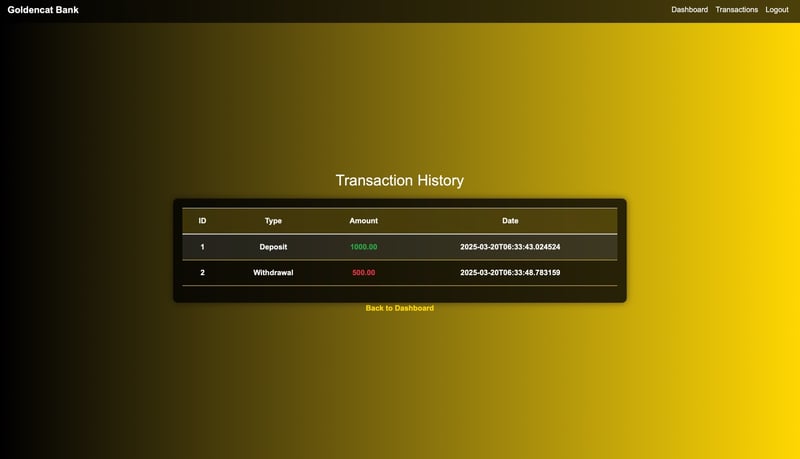
- Track Your Transactions:
* Head over to the **Transactions tab**.

* You’ll see a detailed history of all your fund activities, including deposits, withdrawals, and transfers.
✅ Local Testing Completed!
By running the application locally, we’ve verified that it works as expected. Now, it’s time to take it to the next level by deploying it on an Amazon EKS cluster! 🚀
💡 Setting Up the Kubernetes Cluster
Now that we’ve successfully tested the Bank Application locally, it’s time to take it to the cloud! 🌥️
We’ll be deploying it on an Amazon EKS (Elastic Kubernetes Service) cluster, which will provide a scalable and highly available environment for our application.
🔧 Step 1: Installing the Required Tools
To configure and manage our EKS cluster, we need to install the following tools:
✅ 1. kubectl (Kubernetes CLI)
kubectl is the command-line tool used to interact with Kubernetes clusters.
Run the following commands to install kubectl on a Linux-based distribution:
curl -o kubectl https://amazon-eks.s3.us-west-2.amazonaws.com/1.19.6/2021-01-05/bin/linux/amd64/kubectl
chmod +x ./kubectl
sudo mv ./kubectl /usr/local/bin
kubectl version --short --client
💡 This verifies that kubectl is installed correctly.
✅ 2. eksctl (EKS Management Tool)
eksctl is a simple CLI tool for creating and managing Amazon EKS clusters.
Install it with the following commands:
curl --silent --location "https://github.com/weaveworks/eksctl/releases/latest/download/eksctl_$(uname -s)_amd64.tar.gz" | tar xz -C /tmp
sudo mv /tmp/eksctl /usr/local/bin
eksctl version
💡 This ensures that you have the latest version of eksctl installed.
⚠️ Note for Windows Users:
If you’re on Windows, it’s recommended to use:
WSL (Windows Subsystem for Linux)
A Ubuntu VM
These environments will allow you to run Linux-based commands and manage your EKS cluster effectively.
🛠️ Step 2: Creating the EKS Cluster
Now, let’s create the Amazon EKS cluster using eksctl.
Run the following command:
eksctl create cluster --name=bankapp \
                      --region=us-west-1 \
                      --version=1.30 \
                      --without-nodegroup
Here’s what the flags mean:
--name=bankapp: Sets the cluster name to bankapp.--region=us-west-1: Specifies the AWS region where the cluster will be created.--version=1.30: Specifies the Kubernetes version.--without-nodegroup: Creates the cluster without any node groups initially.
🔐 Step 3: Associate OIDC Provider with the Cluster
We need to associate an OIDC (OpenID Connect) provider with our cluster. This is required for managing authentication and permissions.
Run the following command:
eksctl utils associate-iam-oidc-provider \
  --region us-west-1 \
  --cluster bankapp \
  --approve
✅ This ensures that our cluster has a trusted IAM OIDC provider.
⚙️ Step 4: Creating the Node Group
Next, we’ll create a Node Group that will be associated with our EKS cluster.
Node groups define the EC2 instances (worker nodes) that will run the application.
Run the following command:
eksctl create nodegroup --cluster=bankapp \
                        --region=us-west-1 \
                        --name=bankapp \
                        --node-type=t2.medium \
                        --nodes=2 \
                        --nodes-min=2 \
                        --nodes-max=2 \
                        --node-volume-size=29 \
                        --ssh-access \
                        --ssh-public-key=default-ec2
Here’s what each flag does:
--cluster=bankapp: Associates the node group with the bankapp cluster.--region=us-west-1: Specifies the region.--name=bankapp: Names the node group.--node-type=t2.medium: Sets the EC2 instance type.--nodes=2: Creates 2 nodes.--nodes-min=2and--nodes-max=2: Ensures the node group always has 2 nodes.--node-volume-size=29: Sets the storage size to 29 GB.--ssh-access: Enables SSH access to the worker nodes.--ssh-public-key=default-ec2: Uses the SSH key default-ec2 for access.
💡 Important:
Ensure you have the SSH key (default-ec2) available in your AWS account.
If you don’t have one, create it from the EC2 Dashboard → Key Pairs → Create Key Pair and use the key name in the command.
✅ Cluster and Node Group Setup Completed!
At this point, you have:
A fully configured Amazon EKS cluster.
A Node Group with 2 EC2 instances ready to host your Bank Application.
Next, we’ll move on to deploying the Bank App on EKS using Kubernetes manifests and ArgoCD for continuous delivery! 🚀
🚀 Deploying the Bank App on EKS with ArgoCD
Now that our EKS cluster is up and running, it’s time to deploy the Bank Application using ArgoCD for Continuous Delivery.
🔥 Step 1: Configuring kubectl for EKS Cluster
Before we install ArgoCD, we need to configure kubectl to interact with the BankApp EKS cluster.
Run the following command:
aws eks update-kubeconfig --region us-west-1 --name bankapp
✅ This updates the kubeconfig file, allowing kubectl to connect to and manage the bankapp EKS cluster.
To verify that the configuration is successful, run:
kubectl get nodes
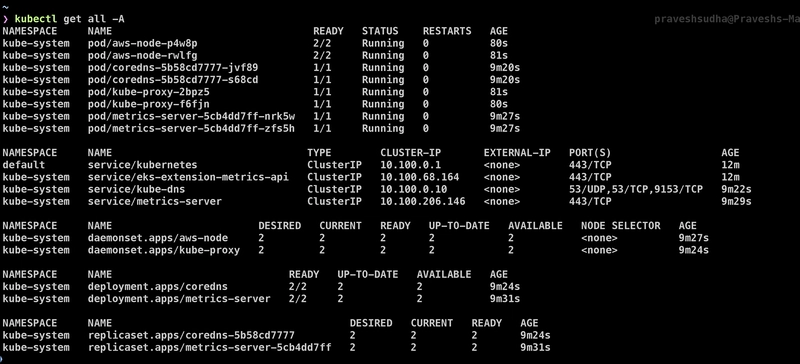
💡 You should see the EC2 nodes listed, confirming that kubectl is properly connected to the cluster.
⚙️ Step 2: Installing ArgoCD on EKS
We will now install ArgoCD, the GitOps continuous delivery tool, on our EKS cluster.
📌 Create a Namespace for ArgoCD:
kubectl create namespace argocd
✅ This creates a dedicated namespace for ArgoCD resources.
📌 Apply the ArgoCD Manifests:
kubectl apply -n argocd -f https://raw.githubusercontent.com/argoproj/argo-cd/stable/manifests/install.yaml
✅ This installs ArgoCD components in the argocd namespace.
💡 It might take a minute or two for all the ArgoCD pods to come up. You can check the status using:
kubectl get pods -n argocd
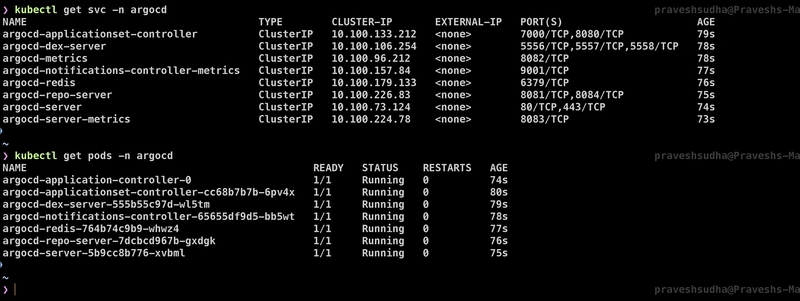
Wait until all the pods are in the Running state.
🌐 Step 3: Exposing the ArgoCD Dashboard
By default, the ArgoCD server service is exposed as a ClusterIP, which means it is only accessible within the cluster.
To access the dashboard from outside, we need to change the service type to LoadBalancer.
📌 Patch the ArgoCD Service:
kubectl patch svc argocd-server -n argocd -p '{"spec": {"type": "LoadBalancer"}}'
✅ This changes the service type to LoadBalancer, making it externally accessible.
📌 Check the External IP Address:
kubectl get svc -n argocd
Look for the argocd-server service in the output. You will see an EXTERNAL-IP field.
💡 Example Output:
NAME                TYPE           CLUSTER-IP       EXTERNAL-IP      PORT(S)          AGE
argocd-server       LoadBalancer   10.100.20.150    54.202.89.101    80:32001/TCP    5m
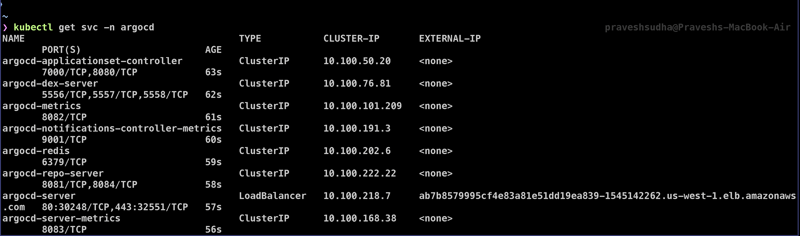
✅ The EXTERNAL-IP (in this case 54.202.89.101) is what you’ll use to access the ArgoCD dashboard.
🔑 Step 4: Accessing the ArgoCD Dashboard
- Open your browser and go to:
http://<EXTERNAL-IP>
- You will be prompted to enter the username and password.
📌 Get the Initial Admin Password:
kubectl -n argocd get secret argocd-initial-admin-secret -o jsonpath="{.data.password}" | base64 -d; echo
✅ This command retrieves the initial admin password and decodes it from Base64 format.
- Login Credentials:
Username:
admin-
Password:
<retrieved password>🎉 You are now logged into the ArgoCD dashboard!
🚀 Deploying the Bank App on EKS Using ArgoCD
Now that we have ArgoCD running, it’s time to deploy the Bank Application on the EKS cluster using ArgoCD.
🌐 Step 1: Creating the ArgoCD Application
- Go to the ArgoCD dashboard in your browser:
http://<EXTERNAL-IP>
- Login using the credentials:
Username:
adminPassword:
<retrieved password>
- Create a New Application:
Click on
+ NEW APPin the top-right corner.Fill in the following configuration:
📌 General Configuration:
Application Name:
bank-appProject:
defaultSync Policy:
Automatic
📌 Source Configuration:
- Repository URL:
https://github.com/Pravesh-Sudha/Springboot-BankApp.git
- Path:
kubernetes
📌 Destination Configuration:
- Cluster URL:
https://kubernetes.default.svc
- Namespace:
bankapp-namespace
✅ Hit the Create button to deploy the application.
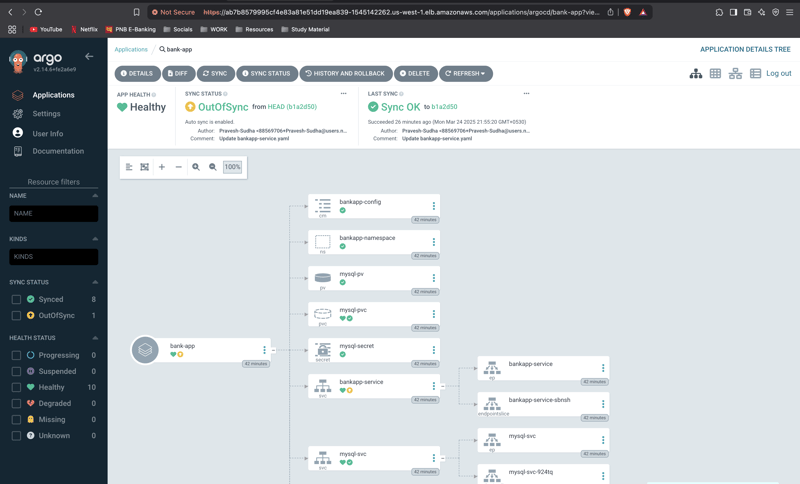
⚙️ Step 2: Verifying the Deployment
Once you create the application:
You’ll see the bank-app in the ArgoCD dashboard.
The status will change to Healthy and Synced once the deployment is successful.
💡 To confirm the deployment, run the following command:
kubectl get pods -n bankapp-namespace
✅ You should see the Bank Application pods running.
🌐 Step 3: Accessing the Bank Application
To access the Bank Application, you’ll need the NodePort of the bank-app service.
📌 Get the Service Details:
kubectl get svc -n bankapp-namespace
✅ The output will look something like this:
NAME               TYPE       CLUSTER-IP       EXTERNAL-IP   PORT(S)        AGE
bank-app-service   NodePort   10.100.50.150    <none>        8080:30776/TCP 5m
The NodePort is
30776in this example.Your NodePort might be different, so make sure to use the value from your output.

📌 Get the Public IP of the EC2 Worker Node:
Go to your AWS EC2 Dashboard.
Select one of the worker nodes.
Copy the Public IP.
✅ Now, open your browser and access the application:
http://<EC2-PUBLIC-IP>:<NODE-PORT>
💡 Example:
http://54.183.241.73:30776
To access the login page, go to:
http://54.183.241.73:30776/login
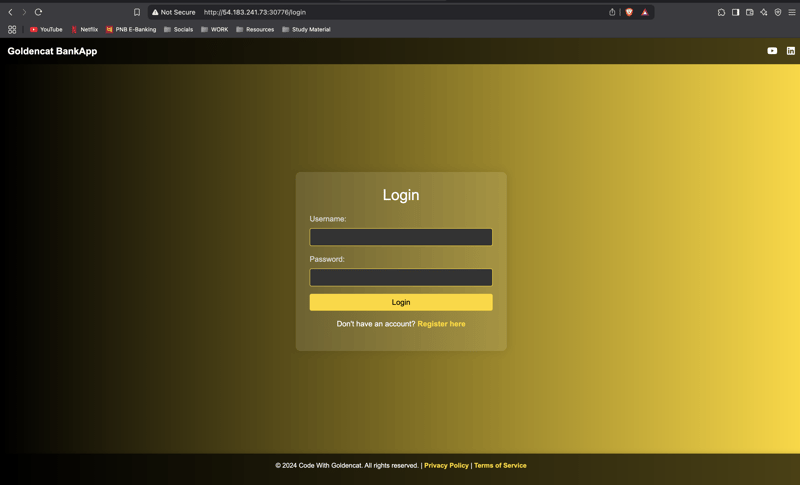
🎯 Test the Application
Register a new user.
Login and access your account.
Deposit, Withdraw, and Transfer Funds.
Check the Transaction History.
✅ Bank Application Successfully Deployed on EKS
At this point, you have:
Created the ArgoCD application.
Deployed the Bank App on the EKS cluster.
Successfully accessed the app using the EC2 Public IP and NodePort.
🎉 Congratulations! Your Bank App is now running on EKS using ArgoCD! 🚀
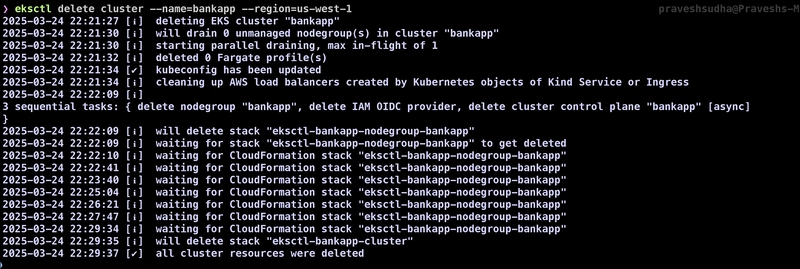
After completing the project, make sure to delete the cluster to avoid unwanted costs, you can use the following command for that:
eksctl delete cluster --name=bankapp --region=us-west-1
🛠️ Conclusion: Deploying a Spring Boot Bank Application on EKS with ArgoCD
In this project, we successfully:
✅ Containerized the Spring Boot Bank Application using Docker and tested it locally.
✅ Created an EKS cluster and deployed the application using ArgoCD for continuous delivery.
✅ Learned how to access the ArgoCD dashboard, create an application, and deploy it with automatic synchronization.
✅ Accessed the Bank Application using the EC2 public IP and performed various operations like fund transfers, deposits, and viewing transaction history.
💡 Key Takeaways
EKS + ArgoCD provides a powerful combination for scalable, automated, and continuous deployment of Kubernetes applications.
With GitOps practices, you can automate deployments and keep your infrastructure configuration consistent with your Git repository.
This setup is easily extensible—you can add monitoring, logging, and auto-scaling to make your deployment production-ready.
🚀 What’s Next?
You can expand this project by:
Integrating CI/CD pipelines to automate Docker image builds and GitOps deployments.
Adding Helm charts or Kustomize for better management of Kubernetes manifests.
Using AWS RDS instead of the local MySQL container to achieve better scalability and persistence.
🎯 Final Thoughts
By deploying the Spring Boot Bank Application on EKS using ArgoCD, you’ve taken a significant step toward mastering Kubernetes-based deployments and GitOps practices. This project not only helps you understand cloud-native deployments but also equips you with the skills needed for real-world DevOps automation.
🔥 Keep experimenting, keep learning, and keep building! 🚀
✨ For more informative blog, Follow me on Hashnode, X(Twitter) and LinkedIn.

Top comments (3)
Great work man.
Nicely articulated. Thank you!
Much Appreciated!