
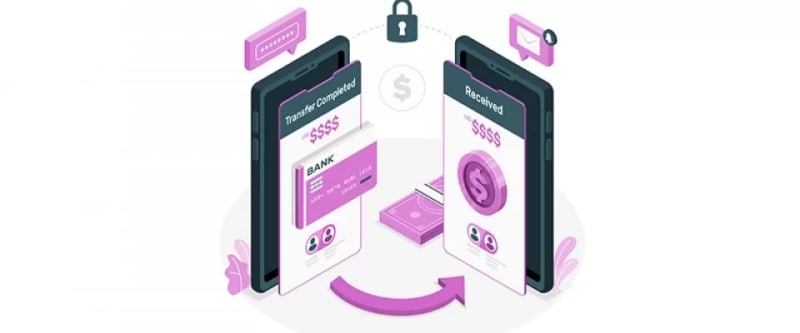
The Payment Request API has emerged as the new standard for online payments, transforming the way transactions are conducted on the internet. In this two-part series, we will delve into the intricacies of this powerful API and explore how it simplifies the payment experience for both users and merchants.
The Payment Request API serves as a bridge between merchants and users, enabling seamless and secure payments. With its integration into modern browsers, the API allows websites to request payment information from users, such as credit card details or digital wallet credentials, in a standardized and user-friendly manner. By eliminating the need for manual form-filling and offering a consistent payment interface across different platforms, the API significantly enhances the checkout process.
To illustrate the simplicity of integrating the Payment Request API, let's consider an example. The following code demonstrates how to create a basic payment request:
THE HTML
<!--The button with the id paymentButton triggers the payment process when clicked.-->
<button id="paymentButton">Pay Now</button>
<div id="response">We do not charge you anything, it is just a test!</div>
THE JAVASCRIPT
// Define the supported payment methods
const supportedPaymentMethods = [
  {
    supportedMethods: ['basic-card'],
    data: {
      supportedNetworks: ['visa', 'mastercard'],
    },
  },
  {
    supportedMethods: ['https://google.com/pay'],
    data: {
      merchantIdentifier: '0123456789',
      allowedPaymentMethods: ['TOKENIZED_CARD', 'CARD'],
    },
  },
];
// Define the payment details
const paymentDetails = {
  total: {
    label: 'Total',
    amount: {
      currency: 'USD',
      value: '100.00',
    },
  },
  displayItems: [
    {
      label: 'Product A',
      amount: {
        currency: 'USD',
        value: '50.00',
      },
    },
    {
      label: 'Product B',
      amount: {
        currency: 'USD',
        value: '50.00',
      },
    },
  ],
};
// Create a payment request
const paymentRequest = new PaymentRequest(supportedPaymentMethods, paymentDetails);
// Display the payment sheet when the user clicks a button
const paymentButton = document.getElementById('paymentButton');
paymentButton.addEventListener('click', async () => {
  try {
// Show the payment request sheet to the user
    const paymentResponse = await paymentRequest.show();
// Process the payment response
    await processPaymentResponse(paymentResponse);
  } catch (error) {
    console.error('Error processing payment:', error);
  }
});
// Process the payment response
async function processPaymentResponse(paymentResponse) {
// Implement your logic to handle the payment response here
// This function will be called when the user completes the payment
}
And now, let's have a look at the last part of the code, explaining the code step by step.
First of all, we create a Payment Request Object using the
PaymentRequest()
constructor.
const paymentRequest = new PaymentRequest(supportedPaymentMethods, paymentDetails);
The
PaymentRequest
object is created with two parameters:
supportedPaymentMethods
and
paymentDetails
. The
supportedPaymentMethods
is an array that defines, as suggested, the supported payment methods, such as credit cards or third-party payment providers.
The
paymentDetails
object specifies the details of the payment, including the total amount and individual items.
Let's continue:
const paymentButton = document.getElementById('paymentButton');
// Display the payment sheet when the user clicks a button
paymentButton.addEventListener('click', async () => {
  try {
// Show the payment request sheet to the user
    const paymentResponse = await paymentRequest.show();
// Process the payment response
    await processPaymentResponse(paymentResponse);
  } catch (error) {
    console.error('Error processing payment:', error);
  }
});
In the first line, we define the
paymentButton
variable by retrieving the element using
document.getElementById
.
Then, an event listener is added to a button with the id
paymentButton
. When the button is clicked, the
click
event is triggered. Inside the event handler, the
show()
method of the paymentRequest object is called to display the payment sheet to the user. This method returns a promise that resolves with a
PaymentResponse
object when the user completes or cancels the payment.
If the payment is completed, the
processPaymentResponse()
function is called with the
paymentResponse
as an argument to handle the payment response. If an error occurs during the payment process, it is caught in the catch block, and an error message is logged to the console.
In the following code, we define the supported methods:
// Define the supported payment methods
const supportedPaymentMethods = [
  {
    supportedMethods: ['basic-card'],
    data: {
      supportedNetworks: ['visa', 'mastercard'],
    },
  },
  {
    supportedMethods: ['https://google.com/pay'],
    data: {
      merchantIdentifier: '0123456789',
      allowedPaymentMethods: ['TOKENIZED_CARD', 'CARD'],
    },
  },
];
The
supportedPaymentMethods
variable is an array that defines the supported payment methods. In this example, two methods are defined:
basic-card
and
https://google.com/pay
. The
basic-card
method supports credit cards with the visa and mastercard networks. The
https://google.com/pay
method is a custom payment method provided by Google Pay, and it requires the merchant identifier and the allowed payment methods to be specified.
Clearly the choice of supported payment methods depends on your specific requirements and the target audience of your application or website. Here are some commonly used payment methods that you may consider adding to the
supportedPaymentMethods
array:
1. Credit Cards:
'
basic-card
': This method supports basic credit card payments. It is widely supported and allows users to enter their card details manually.
2. Digital Wallets:
https://google.com/pay
: This method enables users to pay using Google Pay. It requires the merchant identifier and supports various payment methods provided by Google Pay.
https://apple.com/apple-pay
: This method enables users to pay using Apple Pay. It requires additional configuration and supports Apple Pay as a payment method.
'
https://www.paypal.com/webapps/mpp/paypal-checkout
`: This method integrates PayPal Checkout, allowing users to pay with their PayPal accounts.
3. Bank Transfers:
https://secure.checkout.example/bank
: This method allows users to initiate bank transfers directly from their bank accounts.
4. Cryptocurrencies:
https://example.com/bitcoin
: This method supports payments using cryptocurrencies like Bitcoin or Ethereum. It requires integration with a cryptocurrency payment processor.
5. Local Payment Methods:
https://example.com/local-payment
: This method represents a custom local payment method specific to your region or target audience. It would require integration with a local payment provider.
It's important to note that the availability and support for these payment methods may vary depending on the payment processor or platform you are using. You should consult the documentation of your payment provider or platform to identify the specific supported payment methods they offer.
Consistent with the choice to use
https://google.com/pay
, the
allowedPaymentMethods
property is set to
['TOKENIZED_CARD', 'CARD']
. These values represent the specific payment methods allowed within the Google Pay integration.
The
allowedPaymentMethods
property helps define the available options within a payment method. For example, it could be used to differentiate between credit card payments and tokenized card payments (where the card details are stored securely by the payment provider).
By specifying the allowed payment methods, you can control the options presented to the user during the payment process. It allows you to tailor the payment experience based on your specific integration requirements and the capabilities of the payment provider or platform you are working with.
In the code that follows, we will define the payment details:
// Define the payment details
const paymentDetails = {
  total: {
    label: 'Total',
    amount: {
      currency: 'USD',
      value: '100.00',
    },
  },
  displayItems: [
    {
      label: 'Product A',
      amount: {
        currency: 'USD',
        value: '50.00',
      },
    },
    {
      label: 'Product B',
      amount: {
        currency: 'USD',
        value: '50.00',
      },
    },
  ],
};
As the
paymentDetails
variable name suggested, it specifies the details of the payment. It includes a
total
object that defines the total amount to be paid. In this case, the total is $100.00 USD. The
displayItems
array contains individual items included in the payment, such as 'Product A' and 'Product B', each with a value of $50.00 USD.
Overall, this code sets up a payment request with supported payment methods and payment details, shows a payment sheet when a button is clicked, and handles the payment response.
When the
paymentButton
is clicked, the click event handler is triggered. It calls the
show()
method on the
paymentRequest
object, which displays the payment sheet to the user. The user will be presented with a UI to choose a payment method and enter payment details.
If the user completes the payment, the
show()
method will resolve with a
PaymentResponse
object, which represents the user's payment authorization. This response is then passed to the
processPaymentResponse()
function for further processing. The
processPaymentResponse()
function is not shown in the code snippet you provided, but it would typically handle the payment response by sending it to a server for verification and processing the payment on the server-side.
On the other hand, if the user cancels the payment or an error occurs during the payment process, the
catch
block will be executed, and an error message will be logged to the console.
Overall, this code demonstrates a basic implementation of the Payment Request API, where the user is presented with a payment sheet, and the payment response is processed asynchronously. The specific implementation of the
processPaymentResponse()
function and the subsequent steps for handling the payment will depend on the requirements of the application or website where this code is being used.
By utilizing the Payment Request API, websites can streamline the payment experience for users. It provides a standardized and user-friendly interface, supports multiple payment methods, and enhances security through tokenization.
In addiction, here are some useful links to the Mozilla Developer Network (MDN) documentation that provide more detailed information about the Payment Request API, including browser support:
- Payment Request API - MDN Web Docs: This page provides an overview of the Payment Request API, including its purpose, browser compatibility, and key concepts. It covers the basic usage of the API and provides examples to help you get started.
- PaymentRequest - MDN Web Docs: This is the specific documentation for the PaymentRequest interface. It explains the properties, methods, and events associated with the PaymentRequest object. It also provides examples and usage guidelines for creating payment requests.
- PaymentResponse - MDN Web Docs: This page focuses on the PaymentResponse interface, which represents the user's response to a payment request. It explains the properties and methods available on the PaymentResponse object and provides examples of how to handle and process the payment response.
Additionally, you can refer to the Can I use website, which provides up-to-date information on browser support for the Payment Request API. It shows a detailed breakdown of support across different browsers and versions, helping you understand the compatibility of the API.
By referring to these resources, you'll be able to get a more comprehensive understanding of the Payment Request API, its usage, and the browser support you can expect.
In conclusion, the Payment Request API simplifies the payment process for users and merchants alike. By incorporating this API into their websites, businesses can create a seamless and secure payment experience, resulting in improved customer satisfaction and increased conversion rates.
In the next part of this series, we will explore advanced features and how to process the payment response.

Top comments (0)