
Hi Reader! ✌
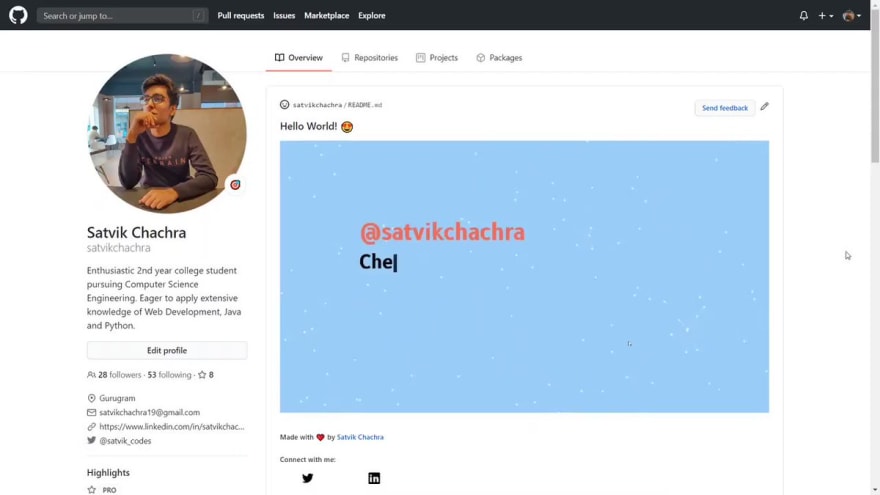
In this post, we are going to learn how to add an awesome README.md to a GitHub Profile. This is how it will look like:

 Satvik Chachra@satvik_codes
 15:12 PM - 10 Jul 2020
0
0
I was exploring the new GitHub feature that lets you add a README to your GitHub Profile when I came across this tweet.
This was the true inspiration behind my README.md.
 When you're not a designer so you try code something cool for your @github profile intro.
Code -> MP4 -> GIF
#Github #JavaScript08:41 AM - 09 Jul 2020

Key Steps:
- Make a repository
- Build a Website and Screen Record
- Convert the Video into a GIF
- Host it and add it to the
README.md
Here's a link to my GitHub repository for your reference.
 satvikchachra
/
profile-readme
satvikchachra
/
profile-readme
Website made for adding a README to GitHub Profile. Built for Desktop view only.
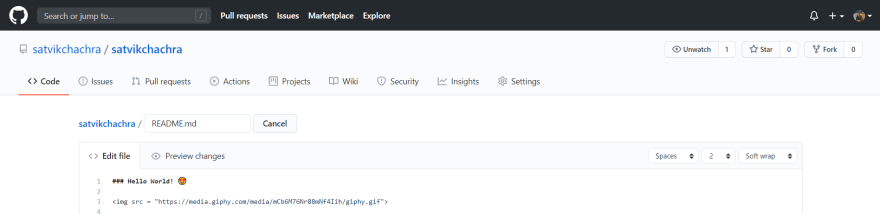
Set up the GitHub Repository
- Create a repository with your GitHub username
Template: https://github.com/username/username
Example: https://github.com/satvikchachra/satvikchachra
- Create a
README.md
So now that you have set it up, let's come to the interesting part: Designing your README.md.
Build a Website and Screen Record
Now let's jump into the Code!
Let's divide the code into 2 main sections.
Section 1: Particles JS
GitHub Link: https://github.com/VincentGarreau/particles.js/
When you look at the background there are some white particles floating and forming polygons.
We will use particiles.js to bring that effect into life.
- Important tip:
Remember to run the
index.htmlfile on a Live Server otherwise, you won't observe the particle effect.
Step 1: Include the CDN Link for particles.js
<script src="https://cdn.jsdelivr.net/particles.js/2.0.0/particles.min.js"></script>
Step 2: Specify the div and it's id where you want the particle effect. (in the index.html file).
<div id="particles-js">
Apply a style to the div.
#particles-js {
    background-color: #a0d0f8;
    height: 860px;
    width: 100%;
}
Step 3: To run the particles.js on load
(Here assets is a directory that contains patricles.json file.)
/* particlesJS.load(@dom-id, @path-json, @callback (optional)); */
particlesJS.load('particles-js', 'assets/particles.json', function() {
  console.log('callback - particles.js config loaded');
});
Step 4: Create a particles.json file.
You can tweak the values in the particles.json file. Experiment and have fun there!
Check this out:
A great tutorial in case you get stuck somewhere.
Section 2: Typewriter JS
GitHub Link: https://github.com/tameemsafi/typewriterjs
Step 1: Include the CDN Link for typewriter.js
<script src="https://unpkg.com/typewriter-effect@latest/dist/core.js"></script>
Step 2: Specify the div and it's id where you want the typewriter effect. (in the index.html file).
<div id="typewriter"></div>
Apply a style to the div.
#typewriter {
    position: absolute;
    font-size: 60px;
    font-family: 'B612', sans-serif;
    font-weight: 700;
    width: 800px;
    margin: 350px 250px;
}
Step 3: Create an object of Typewriter class pre-defined through the CDN link.
// To run this effect in loop set 'loop' to true
const instance = new Typewriter('#typewriter', {
    loop: true
});
Step 4: Use different methods to achieve the desired result
typeString(): Types a string. Takes a string as a parameter.
pauseFor(): Pauses the effect. Takes the number of milliseconds as a parameter.
deleteAll(): Deletes the entire string. Takes speed as an optional parameter.
deleteChars(): Deletes characters of a string. Takes the number of characters as a parameter.
start(): Starts the typewriter effect.
instance.typeString("Hello World!")
    .pauseFor(1000)
    .deleteAll()
    .typeString('I am Your-Name.')
    .pauseFor(1000)
    .deleteChars(15)
    .typeString('an aspiring<br>Your-Goal.')
    .pauseFor(1000)
    .deleteChars(29)
    .typeString('currently learning<br>Your-Skill.')
    .pauseFor(1000)
    .deleteAll()
    .typeString('Check out my work at<br>github.com/your-username')
    .pauseFor(1000)
    .deleteAll()
    .start();
- Important tip:
Remember to nest the
divsbecause you want the typewriter effect in front and particle effect in the background.
<div id="particles-js">
        <div id="typewriter"></div>
</div>
Add styling to elements on the page to get the desired output.
Now you can record the screen using any application.
I personally use OBS.
Check out this resourceful tutorial on how to screen record using OBS.
Convert the Video into a GIF
Converting the video to a GIF gets tricky because of two reasons:
- Large Size: GitHub doesn't allow to upload large size files.
- Loss in quality: There's a significant loss in quality when the video is converted to GIF format.
I personally used this application for conversion.
https://play.google.com/store/apps/details?id=com.gif.gifmaker
Host the GIF.
There are many platforms you can host your GIF on.
I personally used GIPHY. It's really simple.
Just sign up and hit upload.
Here's what Upload section looks like:

Here's the uploaded GIF:

Copy the selected GIF link.

Finally, add the link to your README.md.
Push the changes! 🚀
And now you have a beautiful README.md. Congratulations! 🥳🎉
This was my first tutorial. Your feedback would be much appreciated. Thank you 😊

Top comments (6)
Great post!
Very detailed and concise at the same time. I, for one, wouldn't use that cuz I feel several people would be doing the same and don't want to lump myself into the Readme Gif category hahaha 😄
I am glad you liked the tutorial! I am excited and looking forward to a lot of creative Readme(s). I think you might like Dynamic Readme(s). Check them out.
I am sure you would put something amazing on your GitHub profile. All the best 😊
<div id="paricles-js">here is a typo, should be particles-js.
Nice tutorial
Thank you. I just fixed it 😊 I am glad you liked the tutorial 😊
Have you ever tried tsParticles? github.com/matteobruni/tsparticles
I will try it out 😊 btw Great work 👏