Do you start freaking out when you have to use git commands? You're not alone, we've all been there. I still am to be honest 🙈. I am writing this as much for me as for you!
So I wanted to make a few articles to simply go over the basics and some less known - yet useful - commands. Let's go! 🤓
What's git?
It's a version control tool that allows you to take snapshots of your files at specific moments, so that you can easily go from a version to another.
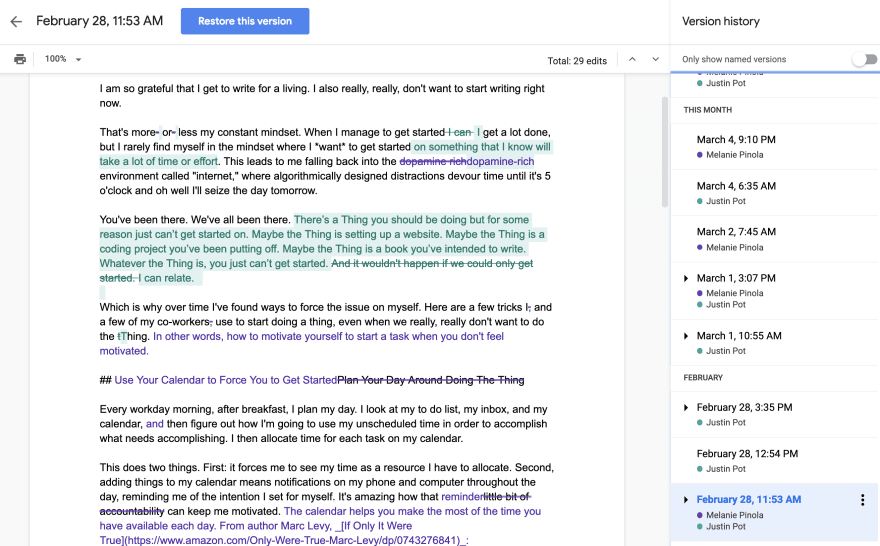
Since it's not tangible, it can be hard to apprehend. But you can think of it as the revision history feature on Google Docs for example.
You can see all the modifications that were made on a document and choose to go back to the state of the document at any point of those revisions.
Who uses it & why?
It is mainly used by software engineers in order to:
- keep track of files & files' modifications
- be able to rollback to a previous version of your files if a bug occured
- have several people working on a same project AND at the same time
The basic git commands: add, commit & push
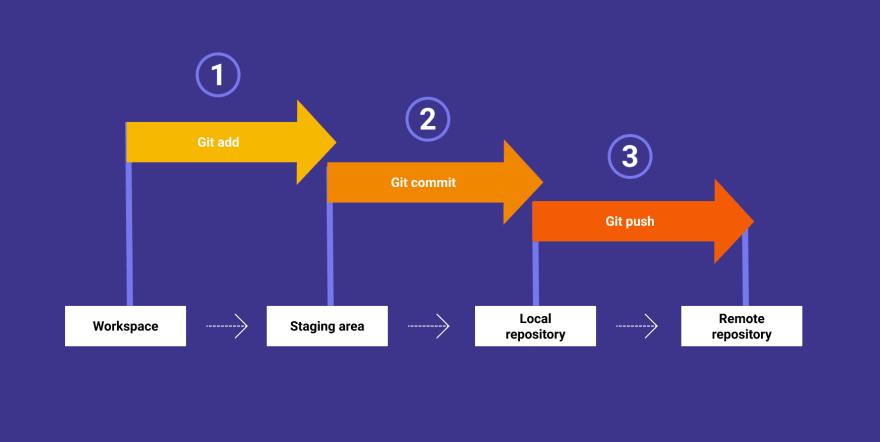
In order to understand the basic commands, we need to understand the different component of a .git project:
- Workspace: your file system, where you can view and modify files
- Staging area: where git keeps the modified files before they are committed. After committing, your Staging area will be empty.
- Local repository: it is the area that saves everything, where you will find all of your checkpoints or commits *.
💡 A *COMMIT IS A SNAPSHOT OF ALL YOUR FILES AT A POINT IN TIME
- Remote repository: server where changes made to files are uploaded (usually shared with collaborators).
You can see the 4 different components on the diagram: workspace, staging area, local repository & remote repository.
But how do we move our files from one stage to the other?
By using the 3 following commands (also on the diagram). And yes, the order matters:
1 - Git add <filename>: the command will stage the file
💡 If you want to add all files, you can type Git add *
2 - Git commit -m "commit message": the command will take all the files in the staging area and save them in the commit (snapshot). Your modified files are now saved, yaaayyy 🎉!
💡 WRITE IN THE COMMIT MESSAGE WHAT MODIFICATIONS YOU MADE.
THIS WILL BE USEFUL IF YOU NEED TO GO BACK TO A SPECIFIC COMMIT.
3 - Git push: this command will send the modified files to a distant instance - the remote repository - and make it accessible to other developers
That's it for the basics. I hope you don't hate git yet & you got to understand some concepts better.
In the next articles, I want to cover the good practices when working in a team (branches, merging,...), & some other useful commands! Stay tuned if you're interested in that topic 👋


Top comments (2)
Actually, I have been using no other than these three commands for several months. No branches or mergings. 😅😅😅 I will try them sooner, thanks.
It's a good practice when you collaborate with others to make sure you don't create conflicts (last thing you want to do 😢) but if you don't need to, no need to overcomplicate things!
If you want to try, you can create a branch, work on it, and then merge it to master to see how it works! Will be less painful when you'll have to work with them ahah. Good luck with those branches 🌳