As someone who's been always passionate about computers and electronics. I was closely following the release of Raspberry Pi 5. Last year, I purchased my first Raspberry Pi 5, but it has been sitting unused on my shelf ever since.
While I was excited to write my first program on a Pi, I was also afraid of destroying it 😓 Luckily, I have become comfortable handling microcontrollers and SBCs, so I decided to give the Pi a try ✨
In this post, I will give a step-by-step walkthrough of working with a Raspberry Pi, from assembling the components to writing the first Hello World! program.
NOTE: There is a lot of documentation and great resources about Raspberry Pi on the Internet. But I wanted to write my own for future reference.
Table of Contents
- Prerequisite
- Choosing a Storage Device
- Installing the Raspberry Pi OS
- Hardware Connections
- Running the Raspberry Pi for the First Time
- Installing Visual Studio Code on the Pi
- Installing Additional Software
- Running the First Line of Code
- Benchmarks
- Accessing the Pi Remotely
- What's Next?
Prerequisite
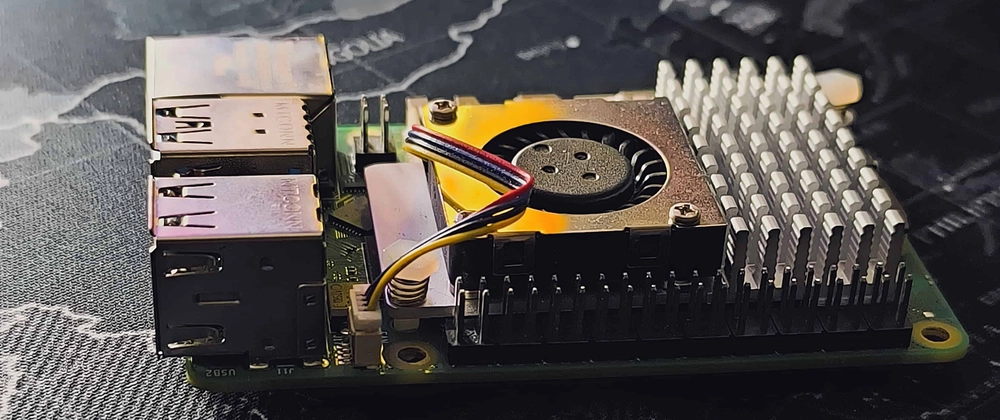
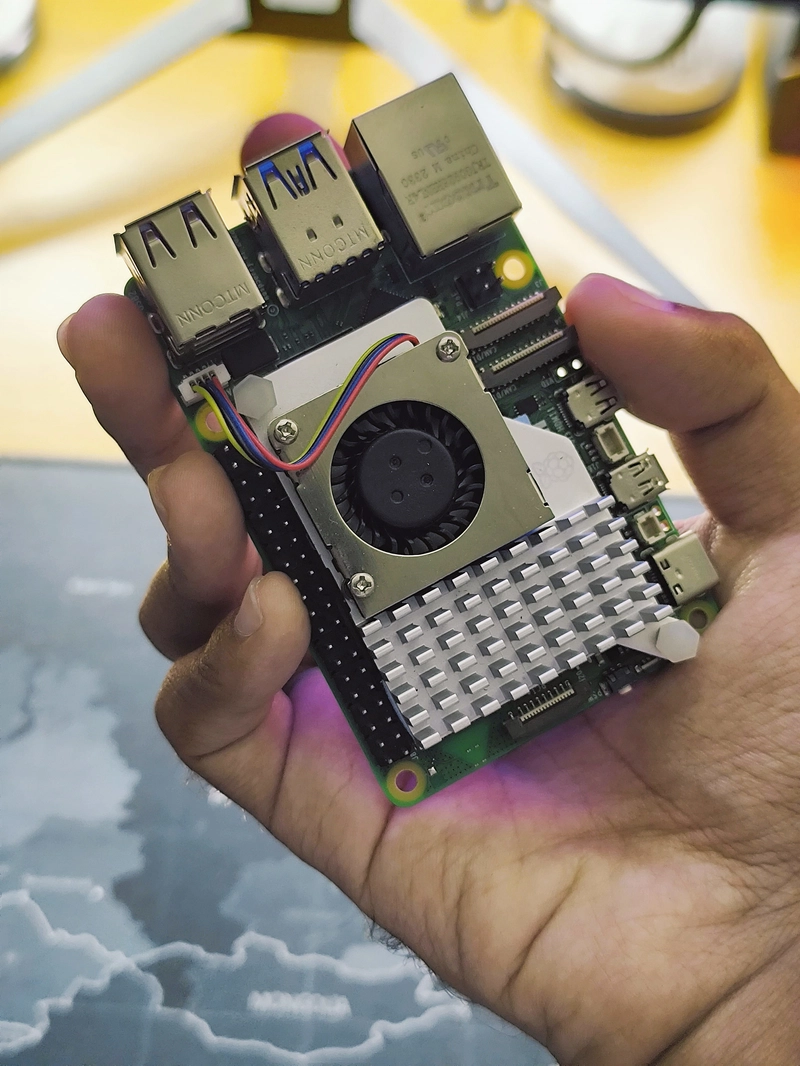
I picked up my Raspberry Pi 8GB complete set from Roboticsbd, which had all the required accessories. But if you are purchasing the hardware separately, here is everything you need:
- Raspberry Pi 5 (4GB/8GB/16GB variant)
- Active Cooler
- Official 27W 5A USB-C Power Supply
- Micro HDMI to HDMI cable
- Raspberry Pi Case (optional)
- Micro SD Card (or SSD)
- Wireless Mouse and Keyboard Combo
I followed this video from DIY Engineers to install the active cooler on the Raspberry Pi.
Choosing a Storage Device
Interestingly, Raspberry Pi now supports M.2 NVME SSDs. But I don't have an M.2 HAT+, so, I had to use a micro SD card instead.

However, after running some benchmarks, I found the micro SD card's performance was terrible. I looked up on Google and found out we can use an external USB SSD to boot up the Pi. I followed this video from Bytes N Bits and made the necessary preparations.

I had this pendrive-shaped SSD from Trancend, where I installed the Pi OS.
Installing the Raspberry Pi OS
Unlike microcontrollers, Raspberry Pi is a single-board computer (SBC), which can run full-blown operating systems such as Linux. To install an operating system on our Pi, we can use the Raspberry Pi Imager.
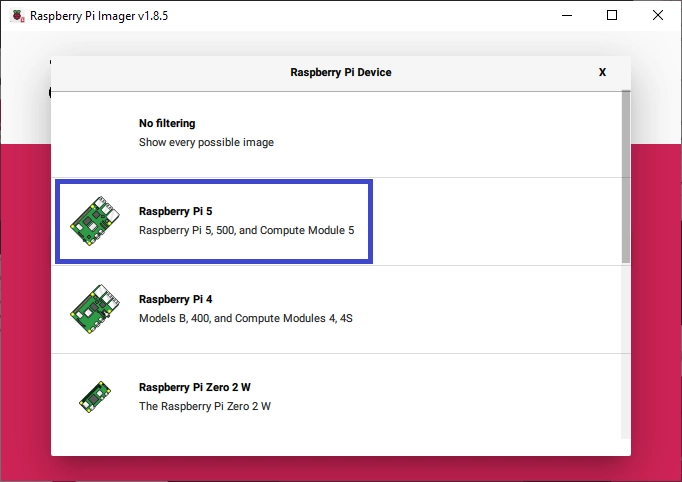
Install and open the Raspberry Pi Imager on your main computer.
-
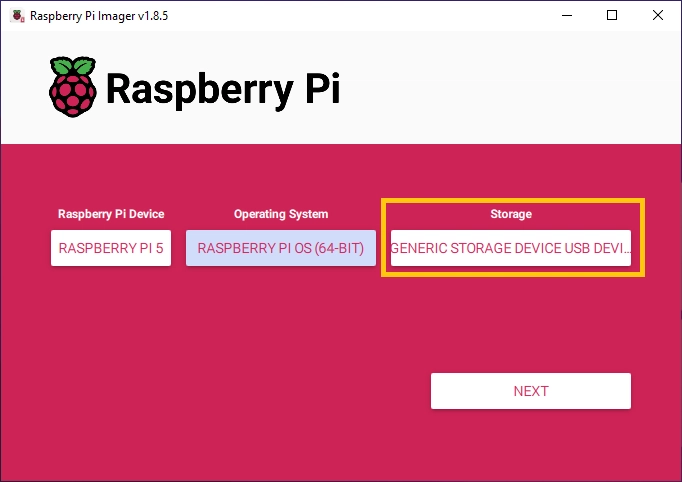
In the Pi Imager window, select your Raspberry Pi Device. Since I have a Raspberry Pi 5, I will choose that from the list.
-
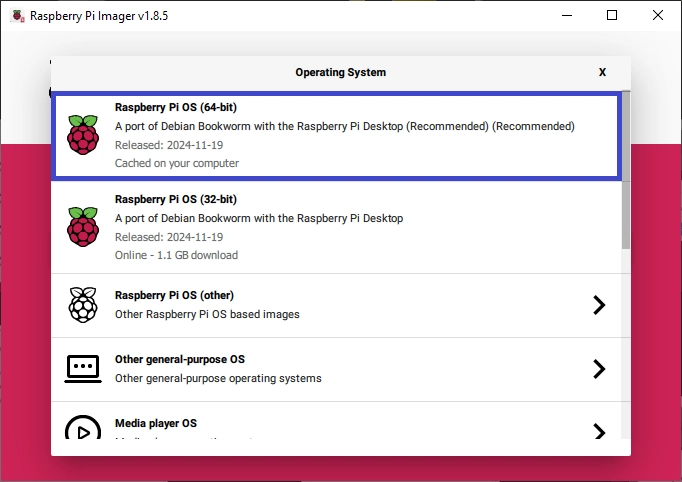
Now select the Operating System. I am going to choose the 64-bit version.
-
Connect the micro SD card or SDD and select the Storage Device.
-
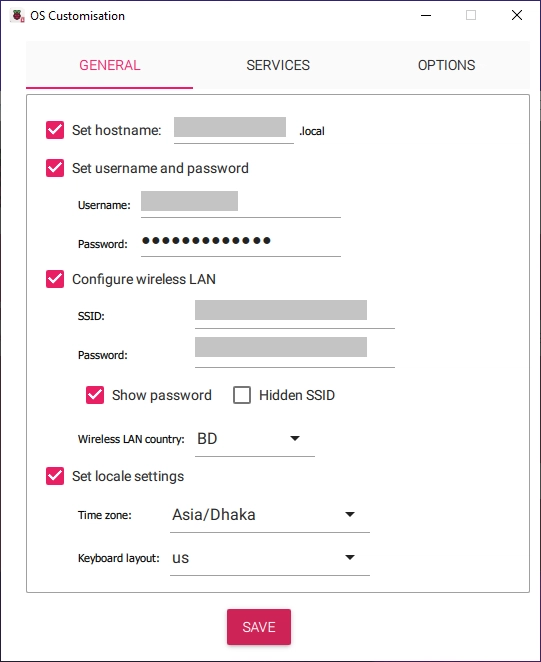
After you click Next, you will receive a prompt asking if you would like to apply OS customization settings. This step is optional, and you can click No to skip it. Since I want to customize some of the settings, I will click Edit Settings.

-
I will set the hostname, username, and password to access the Pi remotely. I will also set the WiFi SSID and password so that whenever the Pi boots up, it will automatically connect to my home WiFi.
Having done that, we are finally ready to install the Pi OS on the micro SD card or SSD. The installation process may take some time, depending on the device's speed and WiFi connection.
Unplug the micro SD card or SSD once the installation is complete.
Hardware Connections
I have created a YouTube video that you can follow along:
If you're using a micro SD card, insert it into the Raspberry Pi's SD card slot. If you're using an external SSD like I am, connect the SSD to one of the USB 3.0 ports (the blue ones).
Connect the USB dongle for the mouse and keyboard combo to one of the USB 2.0 ports (the black ones).
Connect the micro HDMI cable to one of the Raspberry Pi's micro HDMI ports and the HDMI end to a monitor.
Connect the power supply to the Raspberry Pi's USB Type-C port.
We will soon see the LED next to the power button, turn green, indicating that the Raspberry Pi is powered on.
Running the Raspberry Pi for the First Time
The Raspberry Pi will restart multiple times when booted for the first time. This happens only when we turn on the Raspberry Pi for the first time because it prepares all the services and peripherals under the hood.
There should be a welcome screen. However, I did not see one since I customized the OS in the previous step.
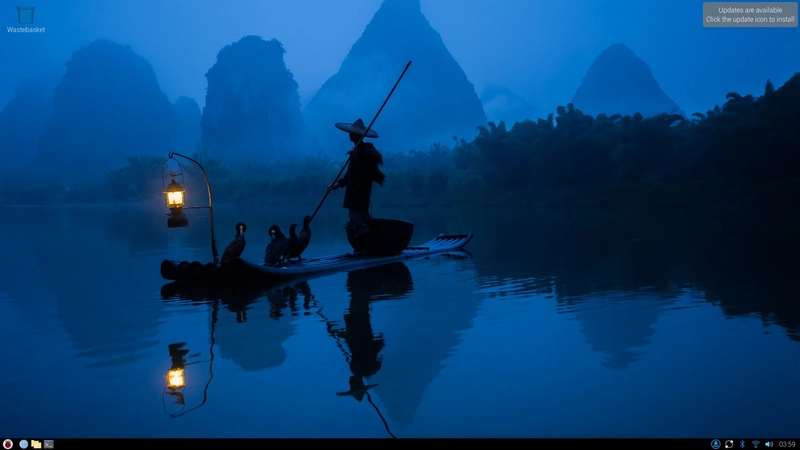
Once the Raspberry Pi has successfully booted up, we will be greeted by the desktop.
NOTE: If you experience any issues during the boot session ( such as a blank screen), you should check the HDMI and micro HDMI connections. The micro HDMI ports on the Raspberry Pi are fragile enough and can be easily damaged if not handled carefully. Also, ensure that your Raspberry Pi is receiving enough power from the power supply.
Installing Visual Studio Code on the Pi
I wanted to write my first line of code in JavaScript. Since I'm already familiar with the Visual Studio Code interface, I thought it would be a good idea to use VSCode. The installation process is straightforward and only takes a few clicks.
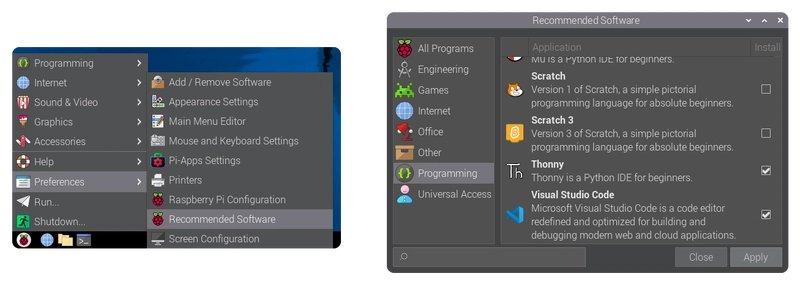
- Open the applications menu by clicking the Raspberry Pi button on the left corner.
- Head over to Preferences, click Recommended Software.
- Under the Programming section, check Visual Studio Code.
- Click Apply and wait for a few minutes.
This could have ended here. However, I soon encountered an obstacle when VSCode crashed within 5 seconds 😶
Investigating the Problem
After some research, I discovered that others are facing the same issue. I found this forum post where the OP manually installed an older version (v1.86.2) of VSCode, which resolved the problem. Here's how we can do the same:
Open the terminal and type the following command:
wget https://update.code.visualstudio.com/1.86.2/linux-deb-arm64/stable
Copy the file name and run:
sudo dpkg -i code_1.86.2-1707853305_arm64.deb
This was actually a simple fix, but it took quite a while to figure it out 😓
NOTE: Make sure to uninstall the previously installed version of Visual Studio Code, before running the above commands.
Installing the Extensions
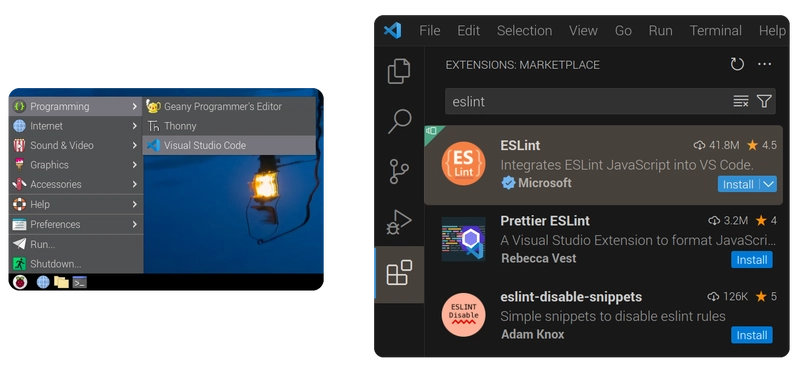
- Open the applications menu by clicking the Raspberry Pi button on the left corner.
- Head over to Programming and click Visual Studio Code.
- Press Ctrl + Shift + X to open the Extensions sidebar.
- Search for ESLint and install the one provided by Microsoft.
For this project, we only need to install one extension. However, we may install more extensions in a future project.
Installing Additional Software
To run our JavaScript code, we need a runtime environment like Node.js. While we could install it manually, I chose to use Pi-Apps to make things easier. You can think of Pi-Apps as a Google Play Store for Raspberry Pi. Here is the installation code from their official website:
wget -qO- https://raw.githubusercontent.com/Botspot/pi-apps/master/install | bash
Having done that, open Pi-Apps by either typing pi-apps in the terminal or by clicking the desktop shortcut.
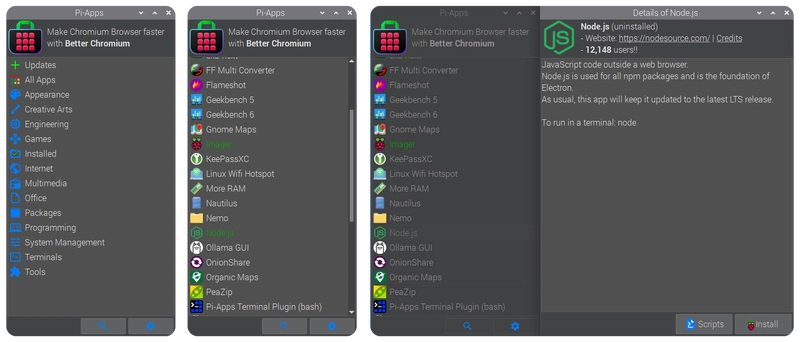
- Click Tools, then Node.js.
- Click Install and wait for a few minutes.
Installing Node.js through Pi-Apps also installs Node Version Manager (NVM), which is beneficial for managing multiple versions of Node.js for various projects. I will cover NVM and its applications in a future post.
Running the First Line of Code
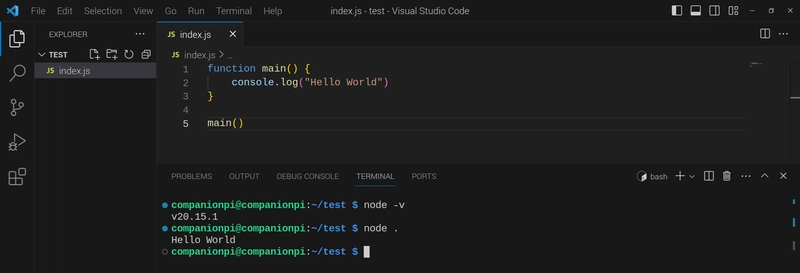
Phew! After much preparation, we are finally ready to write our first line of code on a Raspberry Pi! 🙈
Go to the Visual Studio Code window and follow these steps:
- From the menubar, go to File > Open Folder.... Create a new folder named
testin the home directory. - Create a new file named
index.jsin the Explorer. - From the menubar, click Terminal > New Terminal.
Verify the installation of Node.js by running the following command:
node -v
Write the following JavaScript code into index.js:
function main() {
    console.log('Hello World')
}

main()
Then run the following:
node .
If everything is okay, we should see Hello World printed in our terminal. Congrats! We just wrote our first JavaScript on a Raspberry Pi 🎉
Benchmarks
I used the built-in Raspberry Pi Diagonistics tool to perform a speed test in both micro SD card and SSD. Here are the results:
| Comparsion | Micro SD Card | External USB SSD |
|---|---|---|
| Sequential write speed | 26.828 MB/sec | 335.517 MB/sec |
| Random write speed | 1249 IOPS | 33098 IOPS |
| Random read speed | 3356 IOPS | 36963 IOPS |
As we can see, the speed of an external SSD dramatically surpasses that of a micro SD card. Now, some of you might think the test isn't fair as I am comparing a 64GB micro SD card with a 256GB SSD.
However, the theoretical maximum speed of a USB 3.0 device is 625 MB/s, which exceeds the maximum speed of a micro SD card, typically around 104 MB/s. Also, micro SD cards aren't designed for continuous data rewrites. So, they tend to get corrupt in a Raspberry Pi sooner than an external SSD.
Taking everything into account, opting for an external SSD seems like a good decision.
Accessing the Pi Remotely
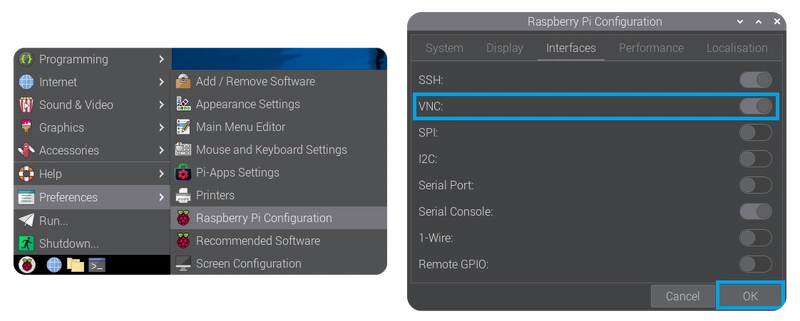
There are times when we might want to run the Raspberry Pi without a monitor. We can do this over our local WiFi by using remote access software like RealVNC Viewer. Here's how to set it up:
-
Enable VNC on the Raspberry Pi by opening the applications menu, Preferences > Raspberry Pi Configuration. Head over to Interfaces and toggle VNC on.
Download and install the RealVNC Viewer on your main computer.
Run the RealVNC Viewer executable.
Go to File > New Connection....
-
Update the text field VNC Server to the hostname of your Raspberry Pi.
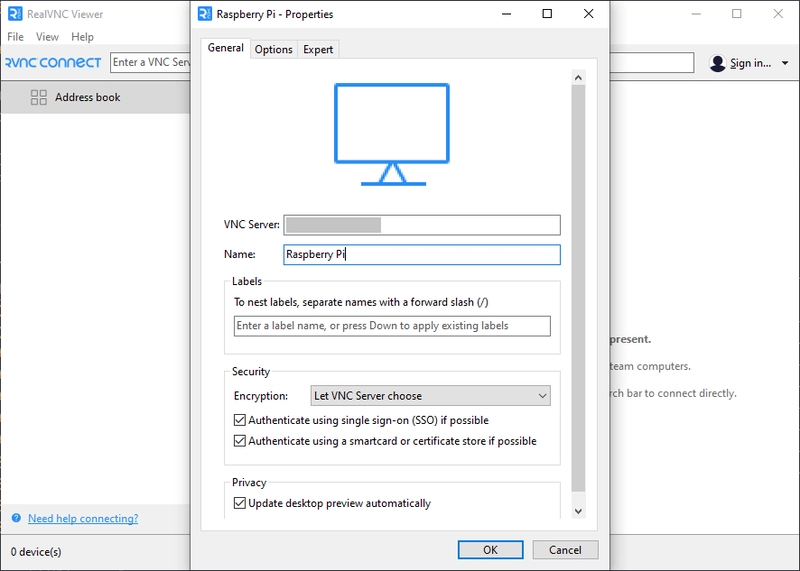
-
Type the username and password in the dialog box.

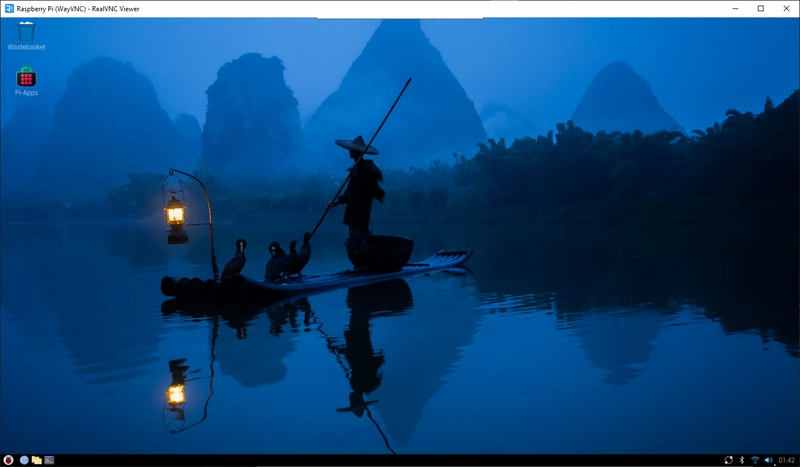
If everything goes right, we should see the desktop of our Raspberry Pi on our main computer 🎉
What's Next?
Setting up a Raspberry Pi 5 for the first time to run JavaScript code on it has been a great experience. I have done my best to cover all the basics so that any beginner can follow along. This is also the first post in the "Raspberry Pi Programming" series here on Dev Community 🚀
We both learned a lot in this journey. Feel free to ask any questions about the post or chat in the comments. See you soon! 🙈✨

Top comments (1)
Things I forgot to mention in the article:
To make VNC work, your main computer and the Raspberry Pi must be on the same WiFi network.
To prevent auto-updating Visual Studio Code on the Raspberry Pi, you need to run the following command:
You should also turn off background updates and extension auto-updates in VSCode, so things don't break.