In this post, we will begin learning about how different HTML elements connect to form what is called semantic structure. Semantics refers to the most ideal selection of HTML tags to describe a particular type of content or content grouping. This will make more sense as we cover our examples.
This is the fourth post and video in a series on learning web development. You may need to check out the first post to learn how to get set up to begin coding:

You may watch the following video or follow along with the expanded transcript that follows.
To begin this lesson, open the starter project you began in episode 1, or review the source files from episode 3.
In the Terminal, type the start command npm run start to run the project, and then open the index.html file.
When we left off from Episode 3, we had populated this file with essential content HTML tags as well as created a couple container <div> tags.
First, let's consider the semantics of the heading tags. The best practice for both semantics as well as for search engines (also known as SEO) is to only have one <h1> per page. The h1 should describe the page contents, and often matches the <title> tag that is found in the <head>.
Now in the overall page structure, the most valid structure is to have headings follow each other sequentially. This means an <h3> should follow and <h2> and so you should not jump from h2 to h4.
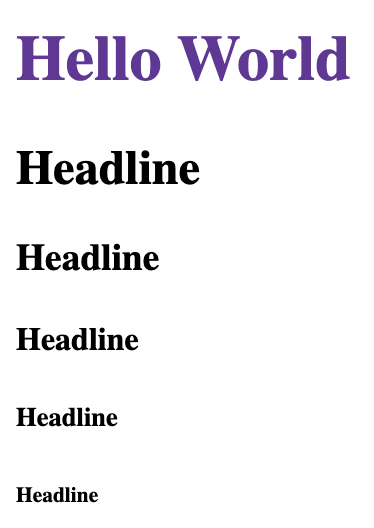
Let's look in the browser again and focus on how the heading elements are automatically styled in descending size.
It can be tempting to jump heading levels to simply achieve a different styled appearance. You will be ahead of the game if you understand now how that is not an ideal way to handle changing a heading style. Instead, we will talk about handling that type of concern when we explore the style complement to HTML called CSS.
Heading tags are the first element that begins to give your HTML page a sense of hierarchy. This hierarchy is useful both for algorithms that do content discovery such as from search engines, as well as indicating to visitors of your site the various sections.
Other tags that help indicate hierarchy are mostly used by algorithms in the browser and by content scanning technology.
We added a couple <div> tags in the previous episode and we saw that they didn't automatically provide any visual cues. In a similar way, there are a few more container tags that will not automatically look different but provide more semantic structure.
Let's copy our index file and rename the copy: semantic-layout.html

Go to the browser and after localhost:3000 add /semantic-layout.html. It will look the same since we haven't changed any content.
So, in the file semantic-layout.html, let's clear out everything between the <body> tags and save!
Next, we're going to do a skeleton structure of a page layout using the most semantic tags, going from top to bottom.
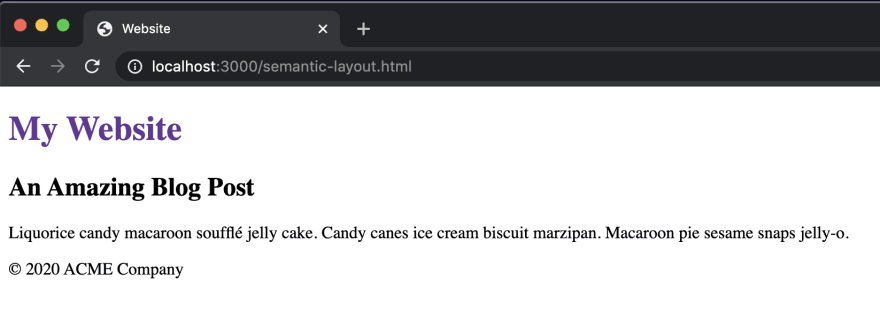
Within the body, the first tag we'll add is <header> - appropriately named, right? Within this, let's add our single <h1> and I'm going to use the text "My Website".
<body>
  <header>
    <h1>My Website</h1>
  </header>
</body>
Following the header let's add a <main> tag. This is intended to be used only once per HTML page and should wrap the main content that is serving the purpose of the page.
<body>
  <header>
    <h1>My Website</h1>
  </header>
  <main></main>
</body>
Within main we'll add an <article> which is intended to wrap any content that can stand alone, such as a blog post, a news article, or a job posting. If this was a listing of say multiple blog posts, we would include one article per post.
Within article we will add an <h2> and let's do the text "An Amazing Blog Post". Then, we can add one paragraph - <p> - with the content of your choosing (I like to drop in some tasty cupcake ipsum). We'll come back to this article and add more to create a full blog post layout in the next episode.
<main>
  <article>
    <h2>An Amazing Blog Post</h2>
    <p>Liquorice candy macaroon soufflé jelly cake. Candy canes ice cream biscuit marzipan. Macaroon pie sesame snaps jelly-o.</p>
  </article>
</main>
After the closing main tag we'll add a <footer> tag. From browsing the web, you've likely noticed that footers - or the ending of a page - hold various kinds of content. But for most websites, they include the copyright year and company name. So we'll start there. Add another p tag with the copyright symbol which we can easily add in HTML using the code © followed by the year - 2020 at the present time - and the text "ACME Company".
<footer>
<p>© 2020 ACME Company</p>
</footer>
Let's save and see what we've got in the browser.
It may not look too exciting yet, but you're already a long way toward creating a semantic, usable web page!
Next up in Episode 5: Blog HTML Layout

Top comments (0)