Introduction
Azure App Service is a cloud platform that makes it easier to design, deploy, and scale web apps. Imagine it as a hassle-free environment where you can focus on building your application without having to worry about infrastructure specifics. It effortlessly combines numerous programming languages, frameworks, and CI/CD systems. Azure App Service improves your development process with capabilities such as auto-scaling and quick deployment. It supports the seamless operation of your online applications, giving you more time to develop and less time to manage infrastructure.
Prerequisites:
Before moving forward with this step by step guid to deploy web apps via Azure Web App services it is important to ensure that you have the following prerequisites in place:
- An Azure account: Create an account on the Azure portal (https://portal.azure.com/) if you don't have one already.
- Visual Studio: Install the latest version of Visual Studio (https://visualstudio.microsoft.com/).
- Azure DevOps account: Set up an account on Azure DevOps (https://dev.azure.com/).
Step 1: Create a Web App in Visual Studio
- Open Visual Studio and click on
create new projectthen select.Net 6. - Leave the project settings to default and proceed with next and develop the project (we left the settings here at default because here in this guide our major focus is to learn how to host our web app using Azure app services). 3.Test your web application locally to ensure it functions correctly.
Step 2: Set Up Azure DevOps Project
- Go to Azure DevOps (https://dev.azure.com/) and create a new project.
- Set up a new repository to store your web application code.
- Link your Visual Studio project to the Azure DevOps repository.
Step 3: Configure Build Pipeline
- Inside Azure DevOps, navigate to the "Pipelines" section and create a new build pipeline.
- Select your source repository and configure the build steps.
- Add necessary build tasks such as restoring dependencies, building the solution, and publishing artifacts.
Step 4: Configure Release Pipeline
- In Azure DevOps, go to the "Releases" section and create a new release pipeline.
- Link the release pipeline to the artifacts produced by the build pipeline.
- Configure the deployment stages, specifying Azure App Service as the deployment target.
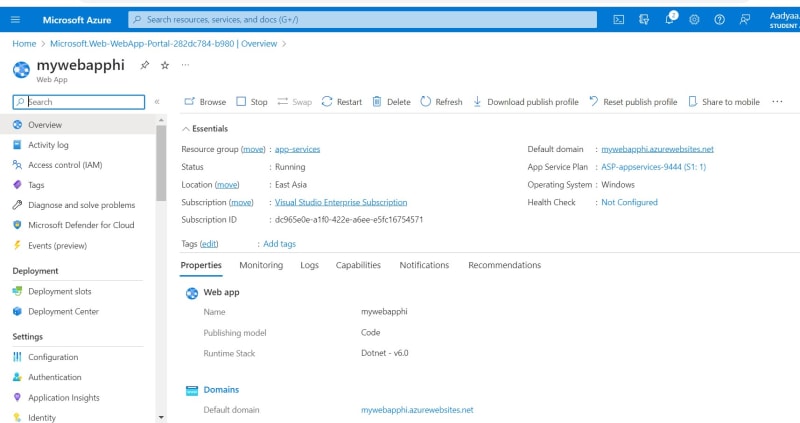
Step 5: Configure Azure App Service
- In the Azure portal, create a new Azure App Service.
- Configure the app service settings, including the runtime stack and deployment options.
- Retrieve the deployment credentials for later use in the release pipeline.
Step 6: Deploy the Web App using Visual Studio
- Go to the project that you previously created in Visual Studio. Then right-click on it and click
Publish. 2.Then proceed with the default settings - Once the deployment is complete, access your web app using the provided Azure App Service URL.

Conclusion:
By following this step-by-step guide, you have successfully deployed a web application to Azure App Service using Visual Studio and Azure DevOps. This streamlined process ensures efficient collaboration, automated builds, and reliable deployments, allowing you to focus on developing high-quality applications. Stay proactive in monitoring and continuous improvement to enhance your web app's performance on Azure.

Top comments (1)
Generated by ChatGPT
Some comments have been hidden by the post's author - find out more