
In this Tutorials, We will Declare How to Install Kali Linux in VMware Workstation 15.5 Pro and how to install VMware Workstation step by step guide. This is a virtual installation method with the help of which you can use Linux along with windows and other operating systems.
Learn What is Cryptography & Network Security.

What do you need Installation a Kali Linux In VMWare?
1. VMware Workstation
2. Kali Linux ISO Images
3. Minimum 20 GB Disk Space
4. Minimum 2 GB RAM
How to Install VMware Workstation?
VMware Workstation is a hosted hypervisor. It only runs on Windows and Linux operating systems and that too in 64-bit operating systems. With the help of this, we can set up virtual machines on a single physical machine And you can execute many of the operating systems on your physical machine with the help of a virtual machine.
VMware Workstation is developed by VMware in May 1999. The first released version is 1.0 and the current version is 15.5.1. VMware Workstation is composed of only C and C++ languages.
You can download VMware from its official website (vmware.com). If you want, you can use any version above 12.0 version, I use VMware Workstation Pro 15.5.1 version in these tutorials. This is the latest version to be done so you can download and install it if you want. The installation of this is a very easy step, you can install it by doing next-next, by the way, I have made a video tutorial to help you people. If we go, let's learn the installation of Kali Linux directly.

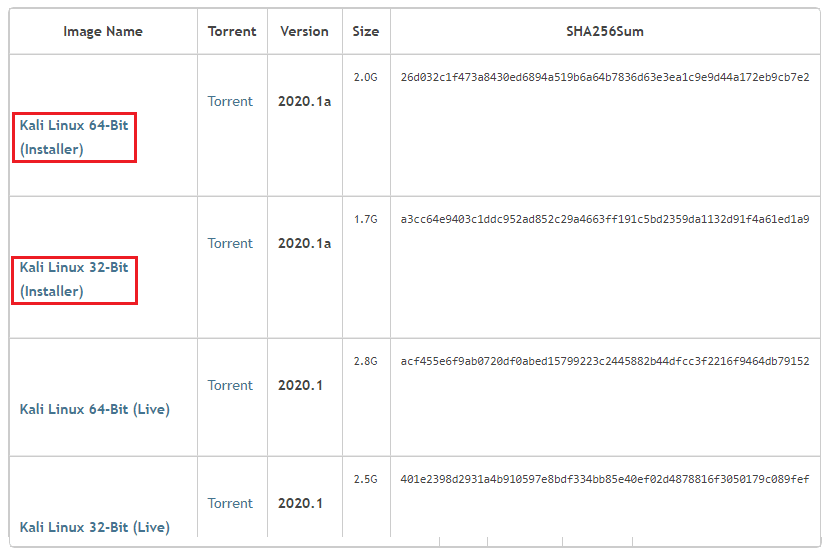
How to Download Kali Linux ISO Images?
Go to Kali Linux official website (kali.org) and download the latest version according to your system. If your system is 64-bit, then you should only download it and if your system is 32-bit, then you should download it and do not download it anymore.
If you want to know about Kali Linux, then you can read my tutorials, I have defined the live booting process of Kali Linux in this tutorial as well as about Kali Linux. I am going to use 2.0 version of Kali Linux in this tutorial, the latest version of Kali Linux has been released 2020.1a. If you want then you can use it.
How to Install Kali Linux in VMware
How to Install Kali Linux in VMware Let's go started...
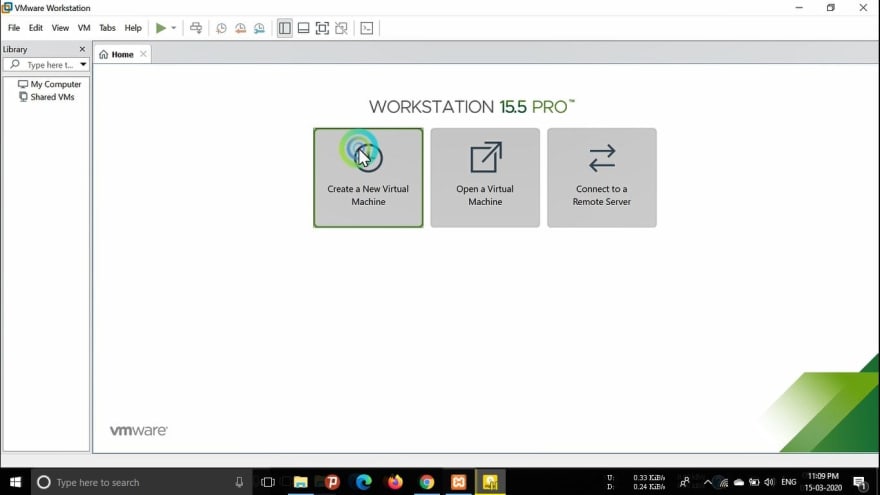
☆ Step 1:-
Open your VMware Workstation 15.5 and click Create a New Virtual Machine button.
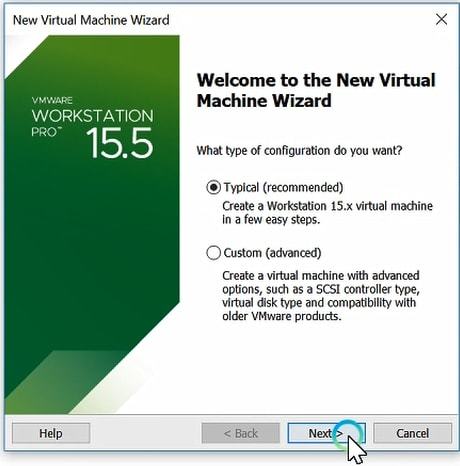
☆ Step 2:-
Select what type of configuration do you want? Click Typical (recommended), Create a workstation 15.x virtual machine in a few easy steps and click the next button.
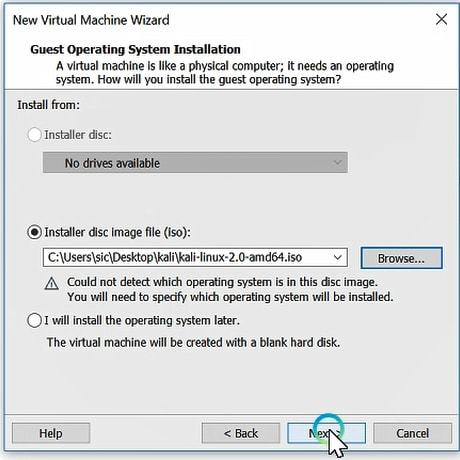
☆ Step 3:-
Select the Installer disc image file (ISO). Click the Browse button and select your operating system and click the next button.
☆ Step 4:-
Select a guest operating system. Which operating system will be installed on this virtual machine, Select gets operating system "Linux" and version "Debian 9.x" and click the next button.

☆ Step 5:-
Enter the Name of the virtual machine (Anything you wish), and select the installation path of the virtual machine and click the next button.

☆ Step 6:-
Enter Specify disk capacity, Recommended size for Debian 9.x: 20GB and select store virtual disk as a single file or split virtual disk into multiple files Anything you wish and click next button.

☆ Step 7:-
Configure your hardware, select the number of the processor: 2 and the number of cores per processor: 2 and total processor cores: 4. If you want good performance, you should take 4 processors from work to work, and at most, you can see according to your PC.

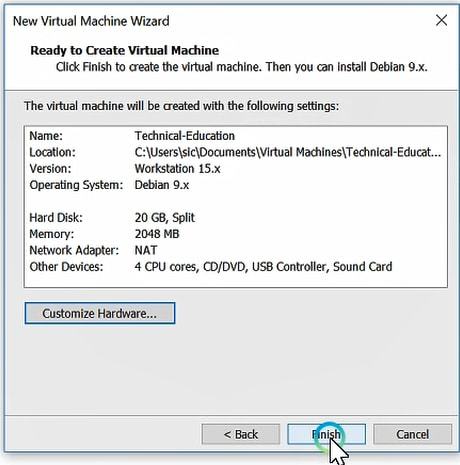
☆ Step 8:-
The virtual machine will be created with the following setting, click Finish to create the virtual machine. Then you can install Debian 9.x.
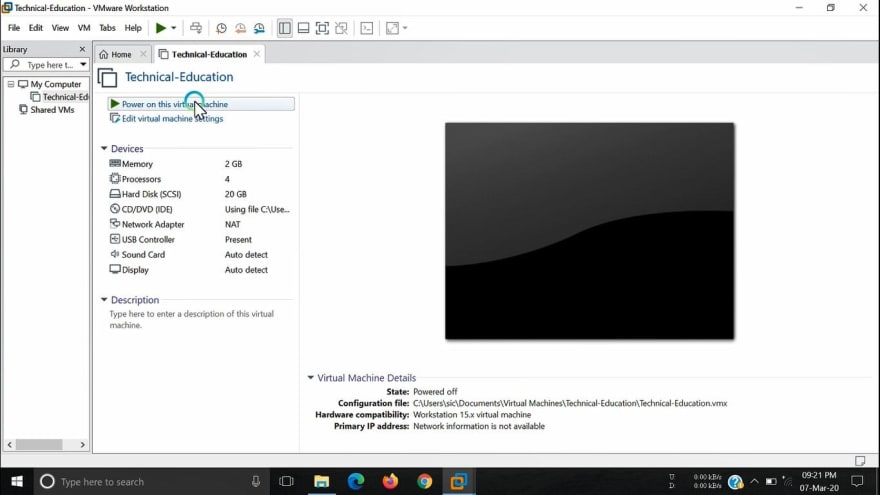
☆ Step 9:-
Now click Power on this virtual machine. Click on it, your Kali Linux will start booting from your virtual machine.
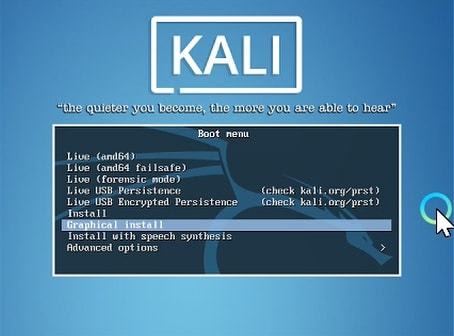
☆ Step 10:-
Snap Graphical Install "the calmer you become, the more can hear"
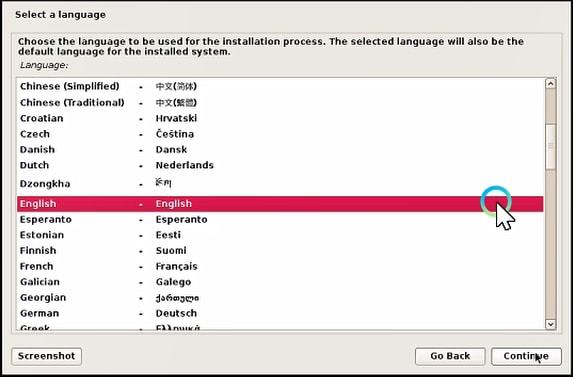
☆ Step 11:-
According to your compatibility, select your language which you want to use in the installation process. The selected languages will also be the default language for the installed system
☆ Step 12:-
The selected location will be used to set your time zone (According to your location) and also, for example, to help select the system location and time. This is a shortlist of location based on the language you selected choose "other" if your location is not listed. You select your location according to your country, I am from India, so I have selected India.

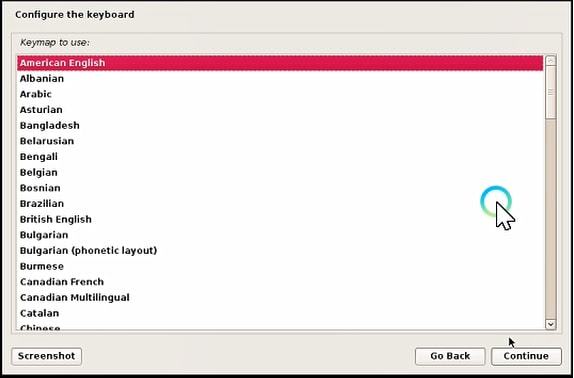
☆ Step 13:-
You can configure your keyword according to your compatibility language, I am choosing American English in this tutorial, you can select it if you want.
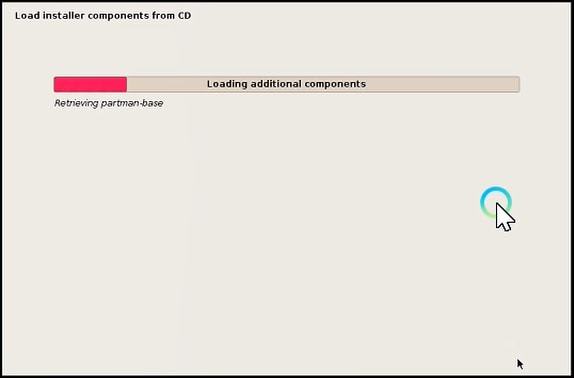
☆ Step 14:-
load installer components for CD wait for few minutes
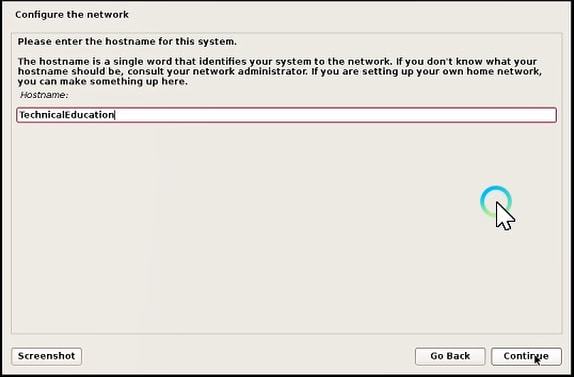
☆ Step 15:-
Enter the hostname for this system. I have given the name of my system Technical Education, you should keep any name according to you
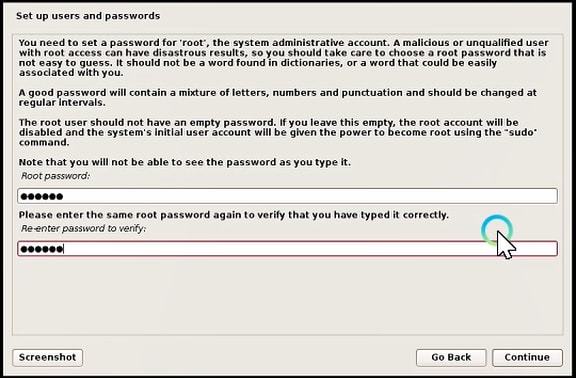
☆ Step 16:-
Set up users and passwords, so that your system is safe from any malicious or unqualified access and hit continue button.
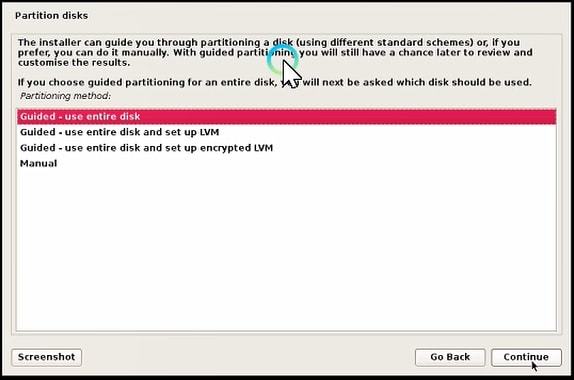
☆ Step 17:-
If you choose guided partitioning for an entire disk and will next be asked which disk should be used you will still have a chance later to review and customize to results. Select Guided - use entire disk and click the Continue button.
☆ Step 18:-
note that all data on this disk you select will be crashed, but not before yours have confirmed that you really want to make the changes. Select disk to partition: 21.5G VMware Virtuals.

☆ Step 19:-
Thi disk can be partitioned using one of several different schemes. If you are unsure, choose the first one. Select Partitioning scheme: All files in one partition(recommended for new users).

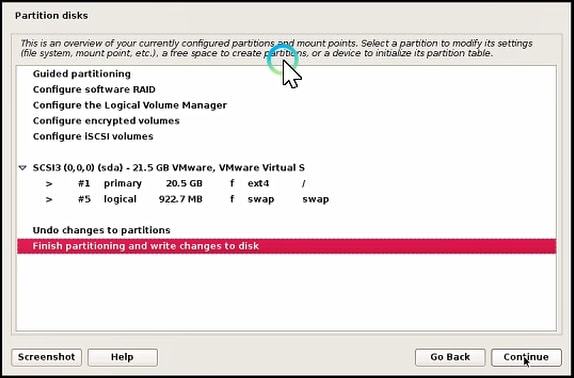
☆ Step 20:-
This is an overview of your currently configured partition and mount points. Now click "Finish partitioning and write changes to disk" and click Continue Button to the next step.
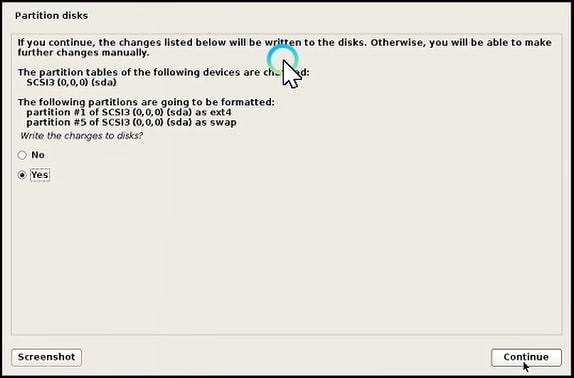
☆ Step 21:-
The partition table of the following device is changed. The following partition is going to be formatted. Write the changes to disk? Click "Yes" and hit the continue button.
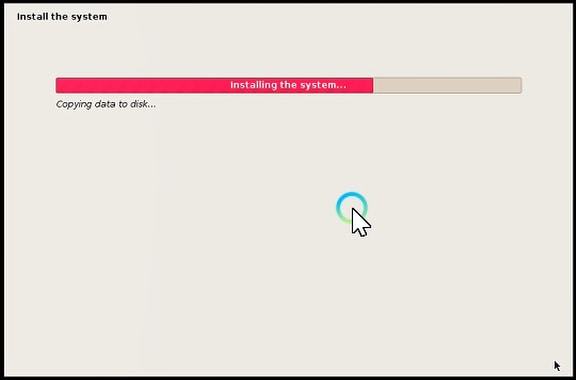
☆ Step 22:-
Installation of the system "Copying data to disk" Please wait new Minutes.
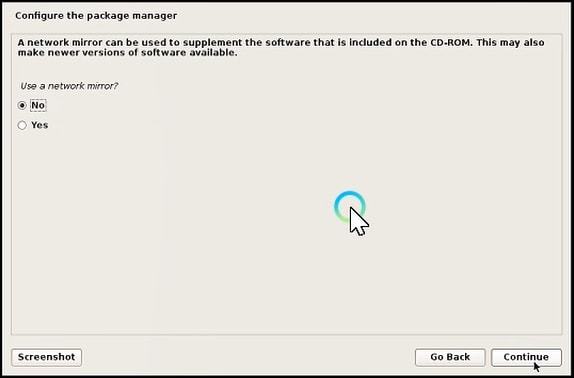
☆ Step 23:-
Configure the package manager. Use a network mirror? Click "No" and hit the continue button.
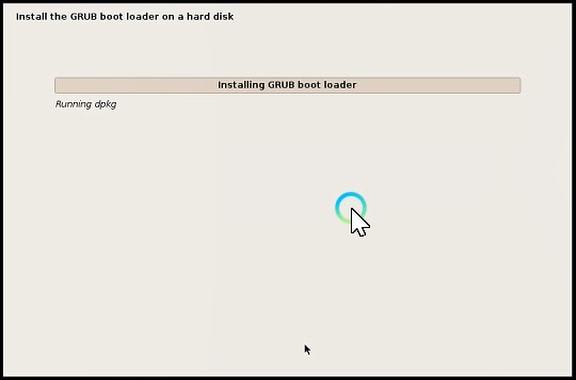
☆ Step 24:-
Installation the GROUB boot loader on a hard disk please wait 15-20 Minutes.
☆ Step 25:-
Installation of the GROUB boot loader to the master boot record. Click Yes and Continue.

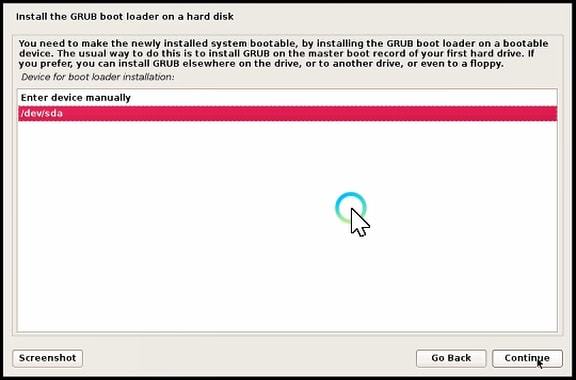
☆ Step 26:-
Select device for boot loader installation location. Select /dev/sda and click the Continue button.
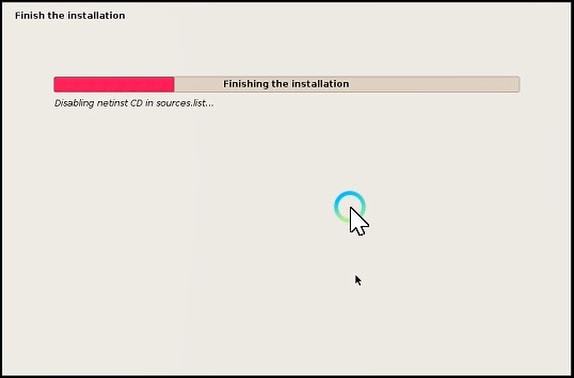
☆ Step 27:-
Finishing the installation wait a few minutes.
☆ Step 28:-
Congratulation! Installation is Complete, Click Continue.

☆ Step 29:-
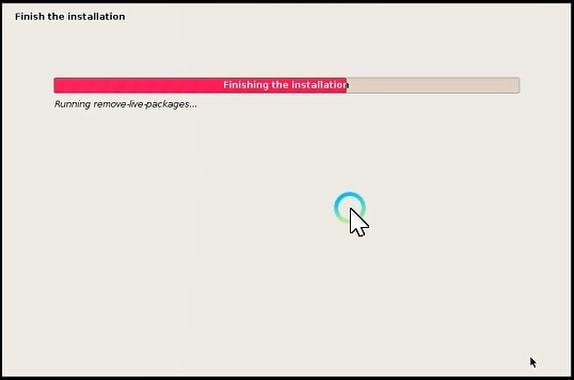
Finishing the installation wait for few seconds.
☆ Step 30:-
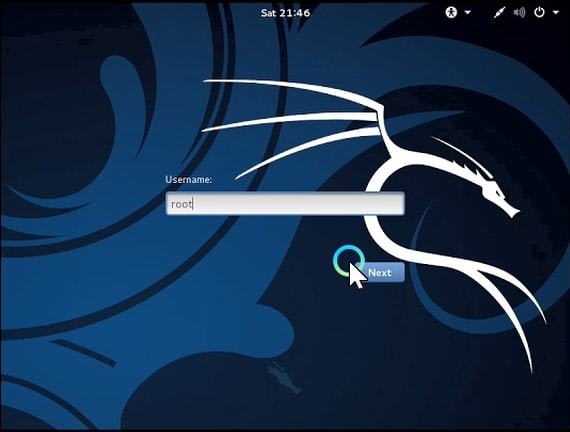
Enter your Username. Your User name is by default "root".
☆ Last Step 31:-
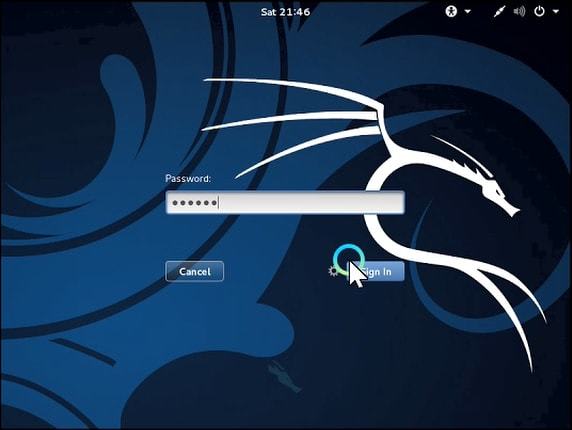
Enter your password. No one should enter the same password that you had set at the time of installation, because it will not open by entering the wrong password.
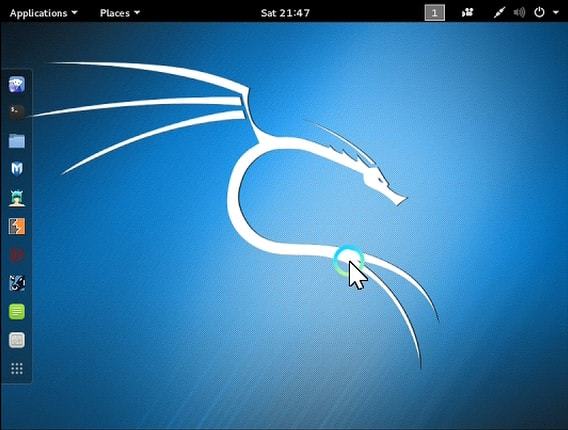
Welcome! Your Kali Linux is successfully installed. Now Enjoy it.
Learn Technical Tutorials for free in Use My Notes

Top comments (0)