
Follow me on Twitter, happy to take your suggestions on topics or improvements /Chris
This fourth part aims to show you how you can utilize auto-scaling as your scaling strategy. We've shown you scaling with a desired state but this is probably even more powerful
- Part I - from the beginning, Part I, Basics, Deployment and Minikube In this part, we cover why Kubernetes, some history and some basic concepts like deploying, Nodes, Pods.
- Part II - introducing Services and Labeling In this part, we deepen our knowledge on Pods and Nodes. We also introduce Services and labeling using labels to query our artifacts.
Part III - Scaling
In this part, we look at scaling using desired state. We specify how many Pods we want and let Kubernetes do the heavy lifting in terms of ensuring that your Pods are scaled up to the desired number but also maintaining it by using something called self-healing.Part IV - Auto scaling We are here
In this article, we will cover the following:
- Why auto scaling, we will discuss different scenarios in which it makes sense to rely on auto scaling over defining it statically like we do with desired state
- How, lets talk about Horizontal Auto Scaling the concept/feature that allows us to scale in an elastic way.
-
Lab - lets scale, we will look at how to actually set this up in
kubectland simulate a ton of incoming requests. We will then inspect the results and see that Kubernetes acts the way we think
Resources
- Horizontal Pod Auto scale This describes in detail how everything works. On a flow as well as API level
- Free Azure Account If you want to try out AKS, Azure Kubernetes Service, you will need a free Azure account
- Kubernetes.io One of the best resources to learn about Kubernetes is at this official Kubernetes site by Google.
- Kubernetes overview An overview of Kubernetes, all its parts and how it works
- Kubernetes in the Cloud Do you feel you know everything about Kubernetes already and just want to learn how to use a managed service? Then this link is for you
- Documentation on AKS, Azure Kubernetes Service Azure Kubernetes Service, a managed Kubernetes
- Best practices on AKS You already know AKS and want to learn how to use it better?
Why
So in our last part, we talked about desired state. That's an OK strategy until something unforeseen happens and suddenly you got a great influx of traffic. This is likely to happen to businesses such as e-commerce around a big sale or a ticket vendor when you release tickets to a popular event.
Events like these are an anomaly which forces you to quickly scale up. The other side of the coin though is that at some point you need to scale down or you suddenly have overcapacity you might need to pay for. What you really want is for the scaling to act in an elastic way so it scaled up when you need it to and scales down when there is less traffic.
How
Horizontal auto-scaling, what does it mean?
It's a concept in Kubernetes that can scale the number of Pods we need. It can do so on a replication controller, deployment or replica set. It usually looks at CPU utilization but can be made to look at other things by using something called custom metrics support, so it's customizable.
It consists of two parts a resource and a controller. The controller checks utilization, or whatever metric you decided, to ensure that the number of replicas matches your specification. If need be it spins up more Pods or removes them. The default is checking every 15 seconds but you can change that by looking at a flag called --horizontal-pod-autoscaler-sync-period.
The underlying algorithm that decides the number of replicas looks like this:
desiredReplicas = ceil[currentReplicas * ( currentMetricValue / desiredMetricValue )]
Lab - lets scale
Ok, the first thing we need to do is to scale our deployment to use something other than desired state.
We have two things we need to specify when we do autoscaling:
- min/max, we define a minimum and maximum in terms of how many Pods we want
-
CPU, in this version we set a certain CPU utilization percentage. When it goes above that it scales out as needed. Think of this one as an
IFclause, if CPU value greater than the threshold, try to scale
Set up
Before we can attempt our scaling experiment we need to make sure we have the correct add-ons enabled. You can easily see what add-ons you have enabled by typing:
minikube addons list
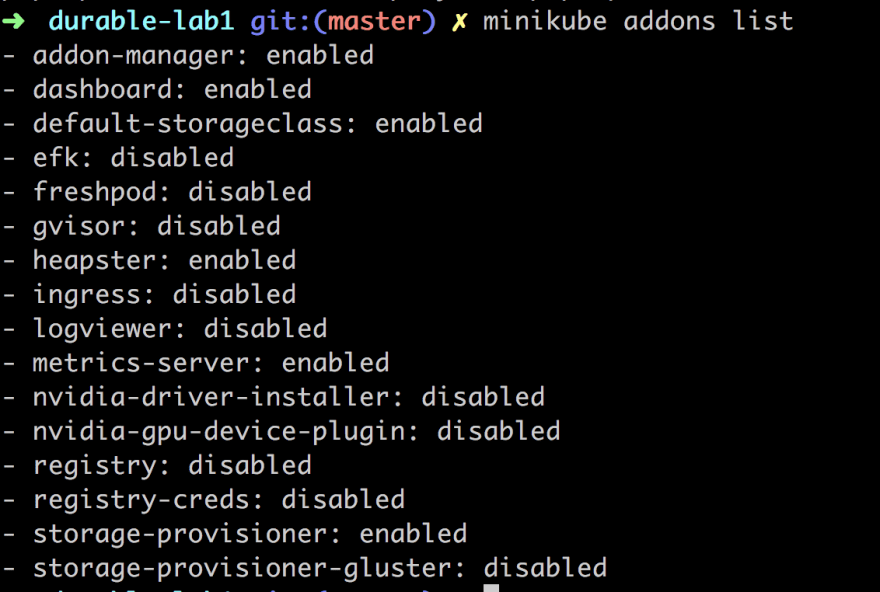
If it looks like the above we are all good. Why am I saying that? Well, what we need, to be able to auto-scale, is that heapster and metrics-server add ons are enabled.
Heapster enables Container Cluster Monitoring and Performance Analysis.
Metrics server provide metrics via the resource metrics API. Horizontal Pod Autoscaler uses this API to collect metrics
We can easily enable them both with the following commands (we will need to for auto-scaling to show correct data):
minikube addons enable heapster
and
minikube addons enable metrics-server
We need to do one more thing, namely to enable Custom metrics, which we do by starting minikube with such a flag like so:
minikube start --extra-config kubelet.EnableCustomMetrics=true
Ok, now we are good to go.
Running the experiment
We need to do the following to run our experiment
- Create a deployment
- Apply autoscaling
- Bombard the deployment with incoming requests
- Watch the auto scaling how it changes
Create a deployment
kubectl run php-apache --image=k8s.gcr.io/hpa-example --requests=cpu=200m --expose --port=80
Above we are creating a deployment php-apache and expose it as a service on port 80. We can see that we are using the image k8s.gcr.io/hpa-example
It should tell us the following:
service/php-apache created
deployment.apps/php-apache created
Autoscaling
Next up we will use the command autoscale. We will use it like so:
kubectl autoscale deployment php-apache --cpu-percent=50 --min=1 --max=10
It should say something like:
horizontalpodautoscaler.autoscaling/php-apache autoscaled
Above we are applying the auto-scaling on the deployment php-apache and as you can see we are applying both min-max and cpu based auto scaling which means we give a rule for how the auto scaling should happen:
If CPU load is
>= 50%create a new Pod, but only maximum 10 Pods. If the load is low go back gradually to one Pod
Bombard with requests
Next step is to send a ton of requests against our deployment and see our auto-scaling doing its work. So how do we do that?
First off let's check the current status of our horizontal pod auto-scaler or hpa for short by typing:
kubectl get hpa
This should give us something like this:

The above shows us two pieces of information. The first is the TARGETS column which shows our CPU utilization, actual usage/trigger value. The next bit of interest is the column REPLICAS that shows us the number of copies, which is 1 at the moment.
For our next trick open up a separate terminal tab. We need to do is to set things up so we can send a ton of requests.
Next up we create a container using this command:
kubectl run -i --tty load-generator --image=busybox /bin/sh
This should take us to a prompt within the container. This is followed by:
while true; do wget -q -O- http://php-apache.default.svc.cluster.local; done
The command above should result in something looking like this.

This will just go on and on until you hit CTRL+C, but leave it be for now.
This throws a ton on requests in while true loop.
I thought
while trueloops were bad?
They are but we are only going to run it for a minute so that the auto scaling can happen. Yes, the CPU will sound a lot but don't worry :)

Let this go on for a minute or so, then enter the following command into the first terminal tab (not the one running the requests), like so:
kubectl get hpa
It should now show something like this:

As you can see from the above the column TARGETS looks different and now says 339%/50% which means the current load on the CPU and REPLICAS is 7 which means it has gone from 1 to 7 replicas. So as you can see we have been bombarding it pretty hard.
Now go to the second terminal and hit CTRL+C or you will have a situation like this:

It will actually take a few minutes for Kubernetes to cool off and get the values back to normal. A first look at the Pods situation shows us the following:
kubectl get pods

As you can see we have 7 Pods up and running still but let's wait a minute or two and it should look like this:

Ok, now we are back to normal.
Summary
Now we did some great stuff in this article. We managed to set up auto-scaling, bombard it with requests and without frying our CPU, hopefully ;)
We also managed to learn some new Kubernetes commands while at it and got to see auto-scaling at work giving us new Pods based on our specification.

Oldest comments (9)
Hey. I tried
So I changed it to
hi Theofanis. Thanks for pointing that out :)
Hi Chris,
Thanks for another great article.
I am getting some troubles setting up autoscaling on minikube.
Running this command:
minikube start --extra-config kubelet.EnableCustomMetrics=trueResults with this error:
Problems detected in "kubelet":Jun 17 06:42:12 minikube kubelet[3112]: F0617 06:42:12.577169 3112 server.go:152] unknown flag: --EnableCustomMetrics
Running minikube version: v1.1.1 and Kubernetes v1.14.3
hey.. so my minikube version is 0.35. I'm thinking something has changed in later versions. I need to investigate..
I'm having the same problem with minikube 1.4.0
I don't think this flag is available anymore in kubelet config but not sure what it's been changed to
godoc.org/k8s.io/kubernetes/pkg/ku...
heapster is RETIRED see
github.com/kubernetes/minikube/iss...
Thank you so much Chris Noring for this amazing and easily followable tutorial series. This is the first time i am learning about kubernetes and from your blogs, I have got confident that, I can do it !
Some comments may only be visible to logged-in visitors. Sign in to view all comments.