

A small request
I'm trying to reach 1K GitHub stars for "Bose" - an open source bot development framework I just launched for easily creating advanced selenium based bots.
Can you help us out by starring the GitHub repository? It would help us a lot! Thank you! https://github.com/omkarcloud/bose
Introduction
Picture this: 📸 You have developed a stunning website, and now it's time to make it accessible to the world. But the deployment process seems daunting, right? 😰
Fear not, because Kubernetes is here to save the day. 🦸♂️ With its powerful features and intelligent container management, Kubernetes takes the complexity out of website deployment.
In this tutorial, we will demystify Kubernetes and guide you through the process of deploying your website effortlessly. Get ready to unlock the magic of Kubernetes and witness your website thrive in realms of the Cloud. ✨🌐
What we will do
We will guide you through the process of deploying your website from running locally on your localhost to the Cloud.
The website will be a full stack website with frontend and backend with a SQLite database served over SSL.
We will also make a CI Pipeline to deploy code on commit to master Branch.
To accomplish this, we will perform the following steps:
- Dockerize the Next.js frontend and Django backend.
- Write Kubernetes manifests for frontend and backend servers, including a Persistent Volume for the Django SQLite database and obtaining an SSL certificate using Cert Manager.
- Create a Kubernetes cluster in GCP.
- Configure the domain's DNS.
- Write GitHub Actions YAML for building and deploying applications to GCP.
- Push code to GitHub for deployment.
This tutorial involves several technologies, and if you encounter any unfamiliar concepts, don't worry. As you progress through the tutorial, you will gain a better understanding of each technology and its role in the deployment process.
Prerequisites
To successfully complete this tutorial, you will need:
- A GCP Account
- A Domain Name
If you haven't purchased a domain name yet, I recommend using Namecheap as I have personally used them and had a good experience.
I highly recommend to read through the tutorial 2-3 times before proceeding with the deployment on your own.
Dockerization
For this tutorial, a repository has been created consisting of two folders: frontend and backend.
The frontend folder contains the code for the Next.js-based application, while the backend folder contains the code for the Django-based application.
To begin, you will need to clone the starter code:
git clone https://github.com/omkarcloud/kubernetes-website-deployment-tutorial-starter
Open the project in Visual Studio Code by running:
code kubernetes-website-deployment-tutorial-starter/
Dockerizing Frontend
To Dockerize the frontend code built with Next.js, create a Dockerfile in the frontend folder with the following contents:
frontend/Dockerfile
FROM node:16-alpine

COPY package.json .
RUN rm -rf node_modules/ .next/* && npm install --legacy-peer-deps
COPY . .

RUN npm run build

CMD ["npm", "run", "start"]
Additionally, create a .dockerignore file in the frontend folder with the same contents as .gitignore by running following command:
cp frontend/.gitignore frontend/.dockerignore
Dockerizing Backend
Now, let's Dockerize the Django-based backend code by creating a Dockerfile in the backend folder with the following contents:
backend/Dockerfile
FROM python:3.9
ENV PYTHONBUFFERED 1

COPY requirements.txt .
RUN python -m pip install -r requirements.txt

RUN mkdir app
WORKDIR /app
COPY . /app

CMD gunicorn --workers 3 -b 0.0.0.0:8000 config.wsgi
Next, create a .dockerignore file in the backend folder with the same contents as .gitignore by running following command:
cp backend/.gitignore backend/.dockerignore
Creating PVC for Backend
To ensure persistence of our SQLite database file used in the Django application, let's create a Persistent Volume Claim (PVC) by creating pvc.yaml file at k8s/volumes/ with the following contents, which provisions 4GB of storage in GCP:
k8s/volumes/pvc.yaml
apiVersion: v1
kind: PersistentVolumeClaim
metadata:
  name: csi-pvc
spec:
  accessModes:
    - ReadWriteOnce
  resources:
    requests:
      storage: 4Gi
  storageClassName: standard-rwo
Creating Service for Backend and Frontend
To make the backend and frontend pods accessible within the cluster, create the following manifest files:
- Backend Deployment (
k8s/app/backend-depl.yaml): ```yaml
apiVersion: apps/v1
kind: Deployment
metadata:
name: backend-depl
spec:
replicas: 1
selector:
matchLabels:
app: backend
template:
metadata:
labels:
app: backend
spec:
volumes:
- name: app-data
persistentVolumeClaim:
claimName: csi-pvc
containers:
- name: backend
image: placeholder/backend:1.0.5
volumeMounts:
- mountPath: /app-data
name: app-data
apiVersion: v1
kind: Service
metadata:
name: backend-srv
spec:
selector:
app: backend
ports:
- name: backend
protocol: TCP
port: 8000
targetPort: 8000
2.  Frontend Deployment (`k8s/app/frontend-depl.yaml`):
```yaml


apiVersion: apps/v1
kind: Deployment
metadata:
  name: frontend-depl
spec:
  replicas: 1
  selector:
    matchLabels:
      app: frontend
  template:
    metadata:
      labels:
        app: frontend
    spec:
      containers:
        - name: frontend
          resources:
            requests:
              ephemeral-storage: "800Mi"
            limits:
              ephemeral-storage: "800Mi"
          image: placeholder/frontend:1.0.4
---
apiVersion: v1
kind: Service
metadata:
  name: frontend-srv
spec:
  selector:
    app: frontend
  ports:
    - name: frontend
      protocol: TCP
      port: 3000
      targetPort: 3000
Creating Load Balancer
To expose our pods via services, we need to create an Ingress resource. Create a file named ingress.yaml in k8s/app/ with the following contents, replacing "www.your-domain.com" with your domain name:
k8s/app/ingress.yaml
apiVersion: networking.k8s.io/v1
kind: Ingress
metadata:
  name: ingress-service
  annotations:
    kubernetes.io/ingress.class: nginx
    cert-manager.io/issuer: "letsencrypt-prod"
    nginx.ingress.kubernetes.io/proxy-body-size: 80m
    nginx.ingress.kubernetes.io/proxy-connect-timeout: "30"
    nginx.ingress.kubernetes.io/proxy-send-timeout: "600"
    nginx.ingress.kubernetes.io/proxy-read-timeout: "600"
spec:
  rules:
    - host: "www.your-domain.com"
      http:
        paths:
          - path: /backend
            pathType: Prefix
            backend:
              service:
                name: backend-srv
                port:
                  number: 8000
          - path: /
            pathType: Prefix
            backend:
              service:
                name: frontend-srv
                port:
                  number: 3000

  tls:
    - hosts:
        - "www.your-domain.com"
      secretName: ssl-certificate
Getting SSL Certificate
To obtain an SSL certificate for your domain, you can create a YAML file named certificates.yaml in the k8s/certificates directory.
Replace www.your-domain.com with your actual domain name and optionally replace youremail@gmail.com with your email address to receive SSL-related emails from Let's Encrypt (Our SSL Provider).
k8s/certificates/certificates.yaml
apiVersion: cert-manager.io/v1
kind: Issuer
metadata:
  name: letsencrypt-prod
spec:
  acme:
    server: https://acme-v02.api.letsencrypt.org/directory
    email: youremail@gmail.com
    privateKeySecretRef:
      name: letsencrypt-prod
    solvers:
      - http01:
          ingress:
            class: nginx
        selector:
          dnsNames:
            - "www.your-domain.com"
Create Github Actions
To automate the deployment process of your application on each commit to the master branch, you can utilize GitHub Actions.
The following workflow defines the necessary steps to authenticate with Google Cloud Platform (GCP), build Docker images, push them to Google Container Registry, and deploy the application to Google Kubernetes Engine (GKE) cluster.
Please note that the deployment includes deleting the previous backend deployment, which will result in temporary downtime of 4 to 5 minutes whenever you deploy code by pushing to Github.
We also utilize various Google Cloud Platform (GCP) environment variables for the deployment, which we will store securely in the secrets of our GitHub repository later.
To use this workflow create a file called deploy.yaml in the .github/workflows directory. Here is the content for the deploy.yaml file:
.github/workflows/deploy.yaml
name: Build and Deploy to GKE

on:
  push:
    branches:
      - master

env:
  PROJECT_ID: ${{ secrets.GKE_PROJECT }}
  GKE_CLUSTER: my-application-cluster
  GKE_PROJECT: ${{ secrets.GKE_PROJECT }}
  GKE_CLUSTER_NAME: my-application-cluster
  GKE_ZONE: asia-south1-a
  GKE_EMAIL: ${{ secrets.GKE_EMAIL }}
  GKE_KEY: ${{ secrets.GKE_KEY }}
  GITHUB_SHA: ${{ github.sha }}
  ACTIONS_ALLOW_UNSECURE_COMMANDS: "true"
  USE_GKE_GCLOUD_AUTH_PLUGIN: "True"

jobs:
  setup-build-publish-deploy:
    name: Setup, Build, Publish, and Deploy
    runs-on: ubuntu-latest
    environment: production
    permissions:
      contents: 'read'
      id-token: 'write'

    steps:
      - name: Checkout
        uses: actions/checkout@v3

      - name: Set Images as enviroment variables
        run: |
          echo "FRONTEND=$(echo "gcr.io/""$GKE_PROJECT""/frontend:""$GITHUB_SHA")" >> $GITHUB_ENV
          echo "BACKEND=$(echo "gcr.io/""$GKE_PROJECT""/backend:""$GITHUB_SHA")" >> $GITHUB_ENV

      - name: update images
        run: |
          FRONTEND_ESCAPE=$(printf '%s\n' "$FRONTEND" | sed -e 's/[\/&]/\\&/g')
          sed -i -e 's/placeholder\/frontend:1.0.4/'"$FRONTEND_ESCAPE"'/g' frontend-depl.yaml
          cat frontend-depl.yaml
          BACKEND_ESCAPE=$(printf '%s\n' "$BACKEND" | sed -e 's/[\/&]/\\&/g')
          sed -i -e 's/placeholder\/backend:1.0.5/'"$BACKEND_ESCAPE"'/g' backend-depl.yaml
          cat backend-depl.yaml
        working-directory: k8s/app

      - id: 'auth'
        uses: 'google-github-actions/auth@v1'
        with:
          credentials_json: '${{ secrets.GCP_CREDENTIALS }}'

      - name: Set up Cloud SDK
        uses: google-github-actions/setup-gcloud@v1

      - name: Install Gke
        run: |
          gcloud components install gke-gcloud-auth-plugin

      - name: Cluster Login
        run: |
          gcloud container clusters get-credentials $GKE_CLUSTER_NAME --zone $GKE_ZONE --project $GKE_PROJECT

      - name: Configure Docker
        run: gcloud --quiet auth configure-docker

      - run: docker build --tag "$FRONTEND" .
        working-directory: frontend

      - run: docker build --tag "$BACKEND" .
        working-directory: backend

      - name: Push Images
        run: |
          docker push "$FRONTEND"
          docker push "$BACKEND"

      - name: Deploy
        run: |
          kubectl delete deployment backend-depl || true
          kubectl apply --recursive -f k8s/
          deploy=$(kubectl get deploy -o name) &&  for i in $deploy; do kubectl rollout status $i -w --timeout=30s; done || true
          kubectl get pods
GCP Setup
Now, we will set up the GCP Cluster.
I will tell you when there you need to change some variables. Please only modify the variables I tell you and keep the other variables untouched, such as the cluster name and zone etc.
As they are hardcoded and will be used multiple times in the commands of this Tutorial. Once you have become familiar with the tutorial, feel free to rename them according to your preference.
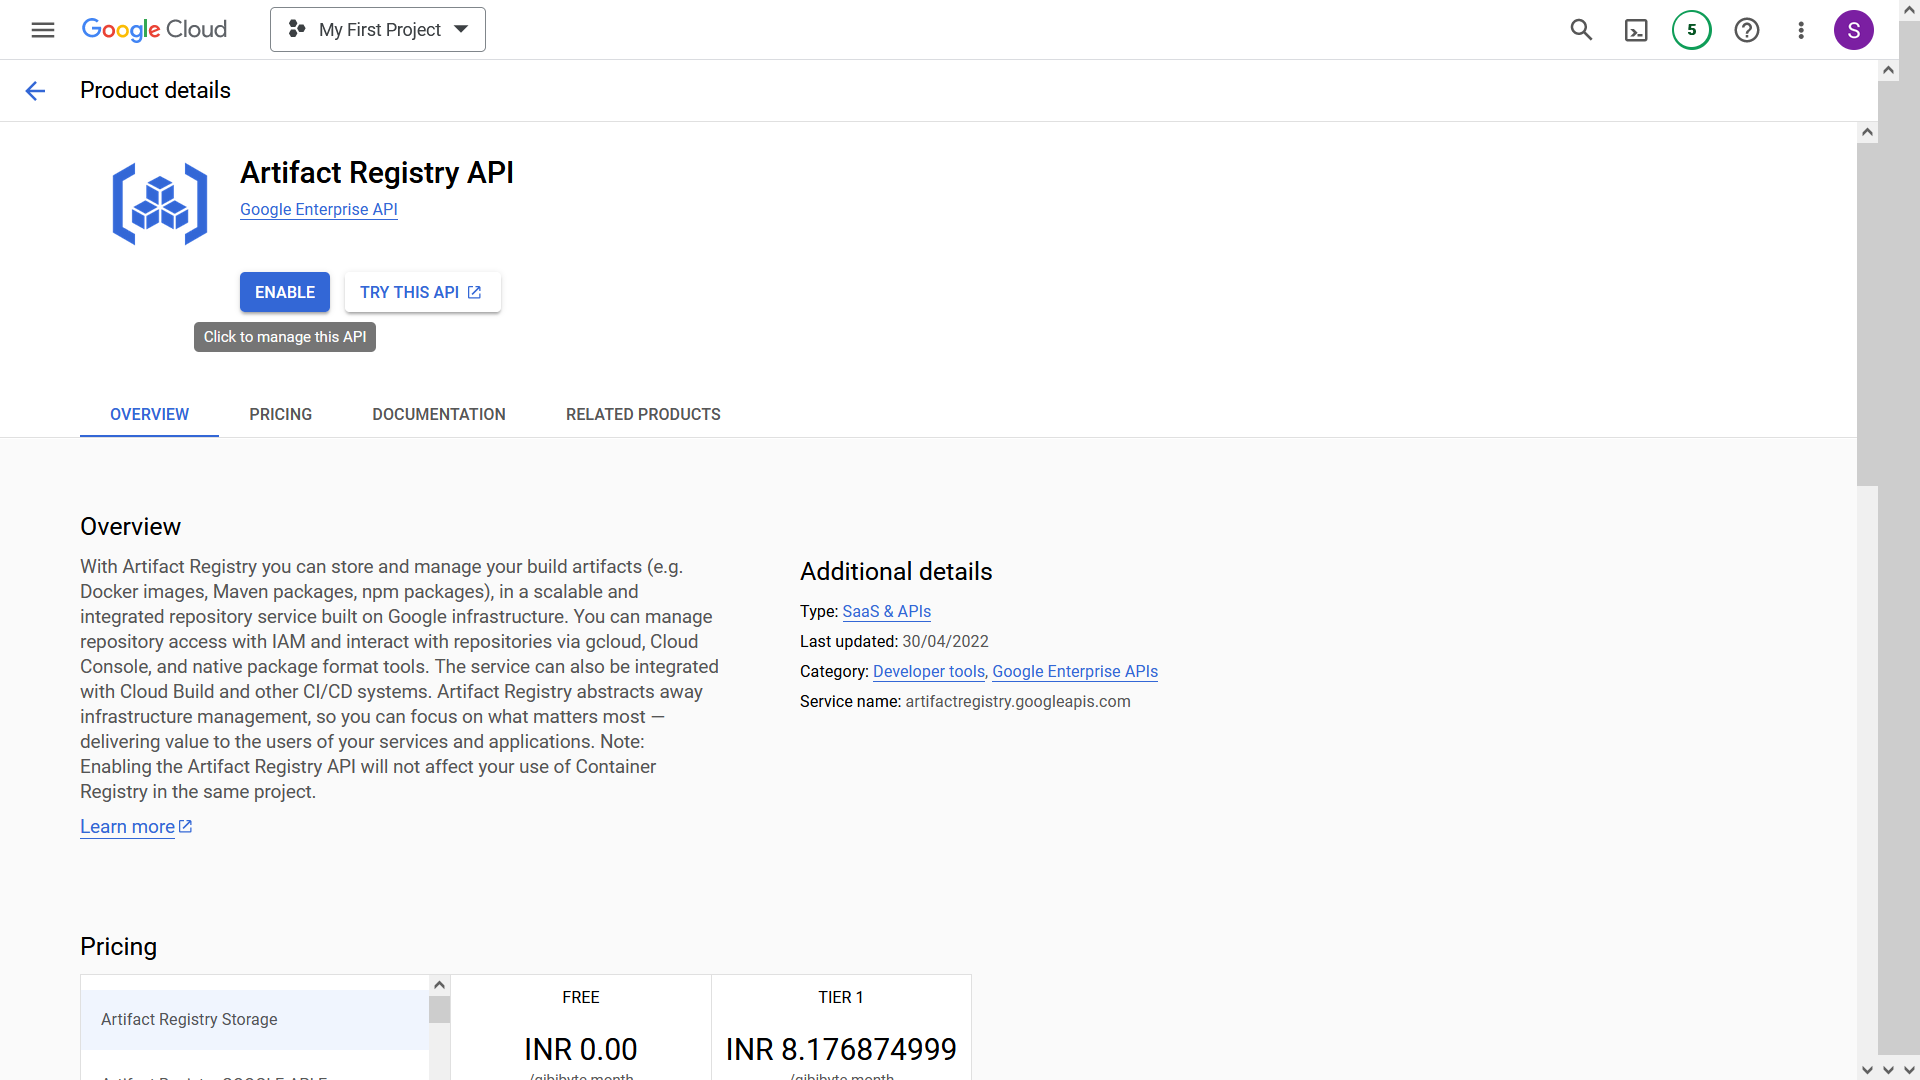
- Enable the following APIs for your Project to create a GKE cluster: ```bash
Artifact Registry: https://console.cloud.google.com/marketplace/product/google/artifactregistry.googleapis.com
Kubernetes Engine: https://console.cloud.google.com/marketplace/product/google/container.googleapis.com
Compute Engine: https://console.cloud.google.com/marketplace/product/google-cloud-platform/compute-engine
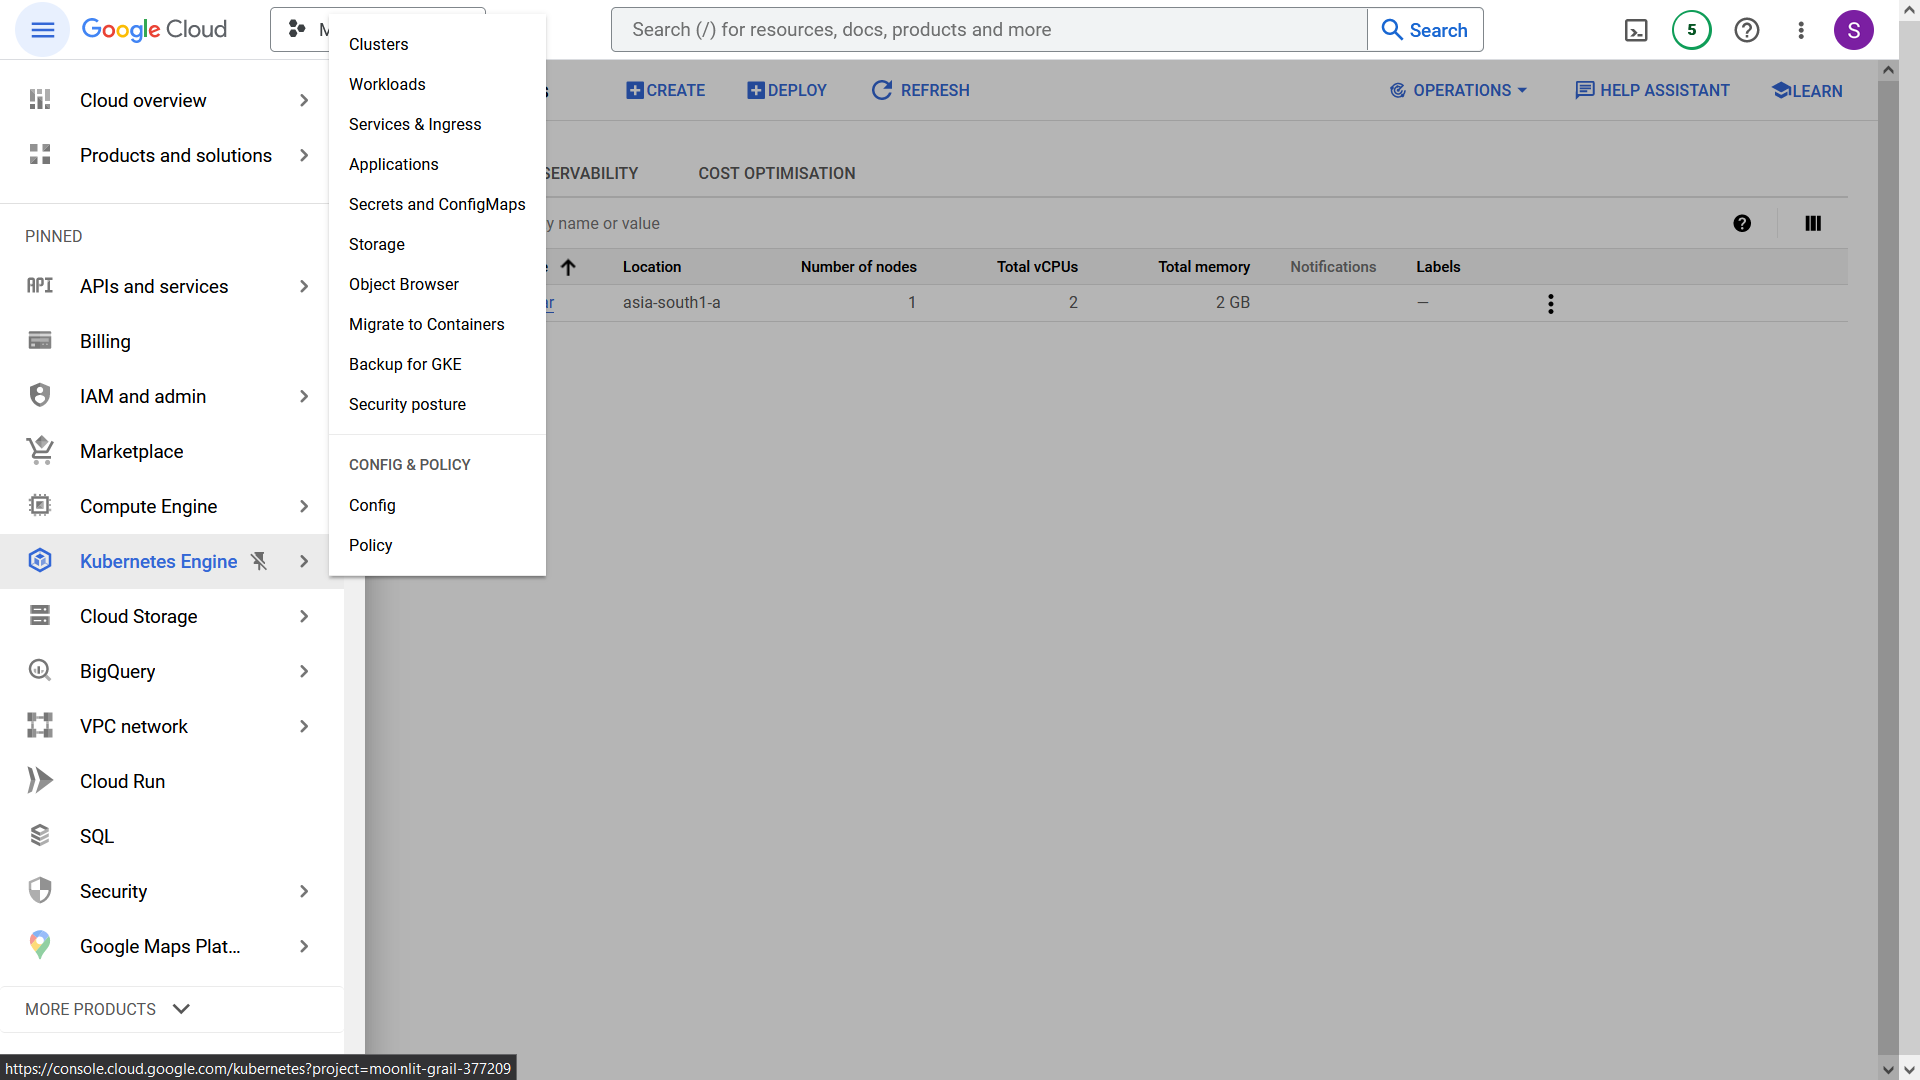
2. In the sidebar, click on the "Kubernetes Engine" button.
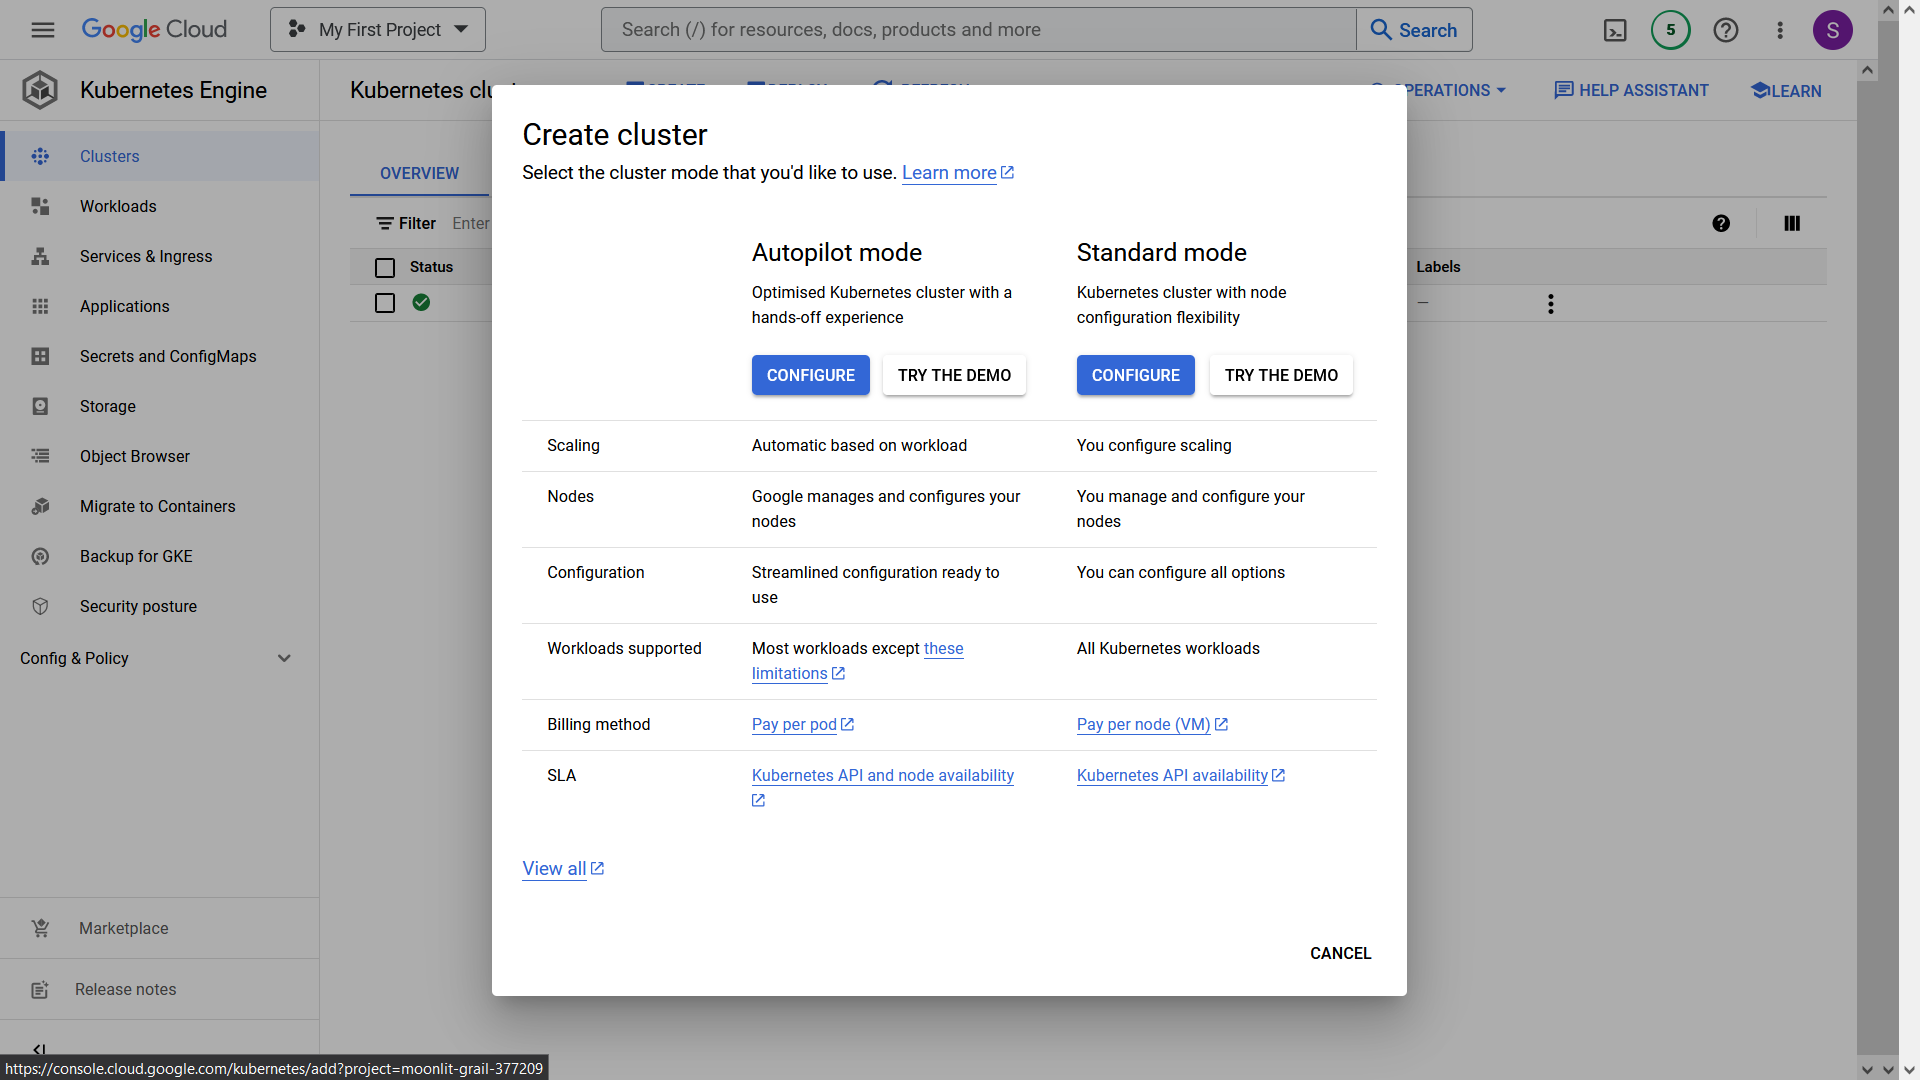
3. Click on the "Create" button to create a new cluster. Configure the "Standard Mode" Cluster, as it is more cost-effective.
4. Provide the following details for the cluster:
```bash
Cluster Name: my-application-cluster
Location Type: zonal
Zone: asia-south1-a

- In the sidebar, select "default-pool" and change the number of nodes to 1 instead of 3 to save costs.

- In the sidebar, select "Nodes" and use the following settings to save costs:
Machine Type: e2-small
Boot Disk Size: 20 GB

The estimated cost should be around $90. If this is your first cluster in GCP, the cost will be charged around $27 after 1 Month discounting $73 discount for the first cluster.
Click the "Create" button, and the cluster will be created in approximately 5-6 minutes.
Open the GCP Shell by clicking the shell icon in the top-right corner.

- Authenticate in your cluster by running the following command. Replace "clear-world-31478" with your GCP project name.
gcloud container clusters get-credentials my-application-cluster --zone asia-south1-a --project clear-world-31478
- Create an IP address by running the following command: ```bash
gcloud compute addresses create my-application-cluster-ip --region asia-south1
11. Note the created IP address by running the command:

```bash


gcloud compute addresses describe my-application-cluster-ip --region asia-south1
- In your Domain Name Service (DNS) provider, such as Namecheap, add the following records. Replace "31.91.11.253" with the IP address obtained in the previous step.
A @ 31.91.11.253
A www 31.91.11.253
Ensure that the TTL (Time to Live) is set to the lowest possible value, such as 1 minute, to allow for fast DNS propagation.
If you are using Namecheap, select the 1-minute TTL option, which will take 1 minute to propogate DNS Changes.
- Execute the following commands to install
ingress-nginxandcert-managerwhich are needed do load balancing get the SSL certificate. In the following commands, replace 31.91.11.253 with the IP address you created earlier.
helm repo add ingress-nginx https://kubernetes.github.io/ingress-nginx
helm upgrade --install ingress-nginx-chart ingress-nginx/ingress-nginx --set controller.service.loadBalancerIP=31.91.11.253 --set controller.service.externalTrafficPolicy=Local

helm repo add jetstack https://charts.jetstack.io
helm repo update
kubectl apply -f https://github.com/cert-manager/cert-manager/releases/download/v1.8.0/cert-manager.crds.yaml
helm install cert-manager jetstack/cert-manager --namespace cert-manager --create-namespace --version v1.8.0
Github Setup
This is the final step where we will configure GitHub Secrets for our deployment workflow and push the code.
Create a Github Repository
Create a service account JSON file by visiting https://console.cloud.google.com/iam-admin/serviceaccounts. The service account will have full access to all resources (Owner) in Google Cloud (GCP). Keep the JSON file secure, as it will be required for deploying to Google Kubernetes Engine (GKE). Save the file as account.json.

- Create Github secrets which are used in Workflow by going to your Repository GitHub Settings > Secrets > Actions and creating three secrets with the following names and values: ```
GKE_PROJECT="clear-world-31478"
GKE_EMAIL="owner-709@project.iam.gserviceaccount.com"
GKE_KEY="JodHRWCzov...L3D3dy5n"
Here,
  - `GKE_PROJECT` is your project name.
  - `GKE_EMAIL` is email located in the `account.json` file.
  - `GKE_KEY` is your service account encoded as base64. You can obtain it by running `cat account.json | base64`.

4. Now, push the code to the repository. Once pushed, the site will be ready 4-5 minutes after the GitHub Action is completed. It takes 4-5 minutes as it will obtain SSL certificates etc.

You can view status of your actions by visiting Action Tabs of your Github Repository.

After Action is Completed, you can access the website at your domain.

## Delete the Resources

Remember to delete the GCP resources to avoid incurring charges. Follow these steps to delete the GCP resources:

1. Delete the created IP address by running the following command. In this command, replace "clear-world-31478" with your GCP project name.
gcloud compute addresses delete my-application-cluster-ip --region asia-south1 --project clear-world-31478
2. Use the GKE Dashboard to delete the cluster using the graphical user interface.


## FAQ

**Q: How can I connect PostgreSQL to Django in Kubernetes?**

A: If you are just starting out, I highly recommend using SQLite to save both money and development time. However, if you prefer to use PostgreSQL, you can follow the tutorial at https://cloud.google.com/python/django/kubernetes-engine.


**Q: Where is the final Code?**

A: You can find the final code at https://github.com/omkarcloud/kubernetes-website-deployment-tutorial-finished.


## Final Words

Congratulations on successfully deploying your website! You have accomplished website deployment with SSL, DNS, GitHub Actions, etc.

If you have any questions, feel free to ask them in the comments.

---

Also, this article is licensed under MIT, so you are free to use it as you wish.

If you are a YouTuber, I encourage you to create a video of this article on your channel. By doing so, you can potentially help thousands of developers solve their deployment problems and earn great amounts of punya. Additionally, you can send me your Video URL and I will feature your video at the top of the article, boosting its views.

---
Did you enjoy this article or need an experienced Kubernetes Developer for a remote contract-based role? Feel free to contact me.

[WhatsApp](https://www.omkar.cloud/l/whatsapp)

<!--
Some of my brilliant Creations, that you don’t want to miss out are:

1.  Bose Framework: An Open Source Framework that is Swiss Army Knife for Selenium. Read the docs at https://www.omkar.cloud/bose/

2.  Free Tools: Simplify your daily tasks with the Free Omkar Tools, an all-in-one dashboard that offers a range of free utilities. Whether it's formatting JSON, comparing text, or testing RegExp, these tools have got you covered. Say goodbye to unreliable websites and use it at https://www.omkar.cloud/tools/.

3.  Omkar Cloud: My Samurai Lead Generation Software allows you to access over 200M+ LinkedIn leads, enabling you to win clients. It's like Sales Navigator with superpowers. You can use it at https://www.omkar.cloud/.

4.  Omkar Cloud Datasets: Enhance your analysis with meticulously scraped datasets from Stack Overflow, G2, and many more reputable sources. These fresh datasets are readily available for your data analysis at https://www.omkar.cloud/datasets/.

5.  Kubernetes Consultation: Take your DevOps practices to the next level with our team of Ninja Developers. Through our Kubernetes Consultation service, we can help you turbocharge your DevOps processes and enable you to move at the speed of light. Whatsapp us for a consultation at .

-->

Dhanyawad 🙏! Vande Mataram!

Top comments (20)
Saved. Thanks for sharing!
Thanks it means a lot to Me.
What are some of the resources you'll recommend for learning all these?
Which Technologies you are interested to learn?
Next.js, Django, Docker & kubernetes and GitHub actions
Django: Mosh Hamedani Django Course https://www.youtube.com/watch?v=rHux0gMZ3Eg&pp=ygUMZGphbmdvIG1vc2gg [Paid]
Docker: Mosh Hamedani Docker Course https://www.youtube.com/watch?v=pTFZFxd4hOI&pp=ygUMZG9ja2VyIG1vc2gg [Paid]
Next.js: Docs nextjs.org/learn/foundations/about... [Free]
GitHub Actions: It is just YAML Manifest. Read many YAMLs written by people at https://github.com/search?q=path%3A.github%2Fworkflows+language%3AYAML&type=Code&ref=advsearch&l=YAML and you are good to go. [Free]
Thanks, Chetanam! Followed you!
This deserved more read time and engagement, thanks for such great article
Dhanyawad!
Great post, though i have some suggestions to improve the section where you deploy in the github actions, as the current version would imply having downtime and not a rolling update , to improve i would go for either a
kubectl set image deployment/<your-deployment> --image=IMAGE:tagor just remote thekubectl delete deployment backend-depl || truefrom the deploy version as kubernetes would handle removing the old replicaset when it sees that image has changed from theupdate imagesstep in the new applied yamlThanks for sharing the whole stack, we rarely see that 👏
You show a letsencrypt certificate without the cert-manager installation, if I'm not mistaken.
At the end, you should not define your work as 'brilliant', self-kissing can gives
a bad impression. And even if it is not the case, it is subjective, it does not give any useful information : of course you won't say it is bad 😉
I appreciate your thoughts.
Also, we are using cert-manager for SSL Certificates.
cool, i might try it in my freetime! Thanks
Dhanyawad!
very detailed guide, though there are many errors one can face while actually deploying
Have you faced some?
Some comments may only be visible to logged-in visitors. Sign in to view all comments.