
This series intends to show how I build app to serve content from my WordPress blog by using react native. Since, my blog is talking about react-native, the series and the articles are interconnected. We will learn how to set-up many packages that make our lives comfortable and learn how to deal with WordPress APIs. Here, the most prominent features talked about in the book are the dark theme , offline mode, infinite scroll and many more. You can discover much more in this series.this inspiration to do this tutorial series came from the React Native Mobile Templates from instamobile
In case of wanting to learn from the beginning, all the previous parts for this tutorial series are available below:
- Build WordPress Client App with React Native #1: Overview
- Build WordPress Client App with React Native #2: Setting Up Your Environment
- Build WordPress Client App with React Native #3: Handle Navigation with React navigation
- Build WordPress Client App with React Native #4: Add Font Icon
- Build WordPress Client App with React Native #5 : Home Screen with React native paper
- Build WordPress Client App with React Native #6 : Using Html renderer and Moment
- Build WordPress Client App with React Native #7: Add pull to refresh and Infinite scroll
- Build WordPress Client App with React Native #8: Implementing SinglePost Screen
- Build WordPress Client App with React Native #9: implement simple share
- Build WordPress Client App with React Native #10: Setup and save bookmark
- Build WordPress Client App with React Native #11: Remove and Render Bookmark
- Build WordPress Client App with React Native #12: Categories screen
- Build WordPress Client App with React Native #13: Configuring firebase in contact screen
Now, we need to goto Setting.js file and implement a Contact menu option UI in order to navigate to the Contact screen. For that, we need to use the code from the following code snippet in the Setting.js file:
  import React, {Component} from 'react';
    import {View, TouchableOpacity} from 'react-native';
    import {List, Icon} from 'react-native-paper';
    class Setting extends Component {
      constructor(props) {
        super(props);
        this.state = {};
      }
      render() {
        return (
          <View>
            <TouchableOpacity
              onPress={() => this.props.navigation.navigate('Contact')}>
              <List.Item
                title="Contact Us"
                left={() => <List.Icon icon="chevron-right" />}
              />
            </TouchableOpacity>
          </View>
        );
      }
    }
    export default Setting;
Here, we have imported all the necessary packages and components in order to
implement the Settings screen UI. Then, we used the TouchableOpacity component
wrapping the List component in order to show the Contact option in the Settings
screen. Then, we have set up the navigation config in the TouchableOpacity
component.
Hence, we will get the following result in the emulator screen:


As we can see, we have got the Contact option in the Settings screen.
Implementing Contact Screen
Here, we need to create a new screen called Contact screen. For that, we need to
create a new file called Contact.js in the ‘./screens/’ folder. Then, we
need to import the Contact.js file to the App.js file and then add it to
the stack navigator as shown in the code snippet below:
    const StackNavigator = createStackNavigator({
      DashboardTabNavigator: DashboardTabNavigator,
      SinglePost: SinglePost,
      CategorieList: CategorieList,
      Contact:Contact
    });
Now, we need to go back to the Contact.js file and import the required packages.
Here, we are going to make use of the react-native-firebase and
tcomb-form-native packages as shown in the code snippet below:
    import {
      View,
      StyleSheet,
      TouchableHighlight,
      Text,
      Alert,
      ActivityIndicator,
      Image,
    } from 'react-native';
    import firebase from 'react-native-firebase'
    import t from 'tcomb-form-native'; // 0.6.9
    export default class Contact extends Component {
      constructor(props) {
        super(props);
        this.state = {
          submit: false
        };
      }
    }
Here, we have defined a state called submit which will handle the submitting of
form to firebase.
Now, we are going to make use of tcomb-form-native package to initialize the
form instance and define the structure of the form. Then, we are going to use it
in the render() function as shown in the code snippet below:
    render() {
        const Form = t.form.Form;
        const ContactForm = t.struct({
          email: t.String,
          name: t.String,
          message: t.String,
        });
        return (
          <View style={styles.container}>
            <Form type={ContactForm}  />
          </View>
        );
    const styles = StyleSheet.create({
      container: {
        justifyContent: 'center',
        marginTop: 50,
        padding: 20,
        backgroundColor: '#ffffff',
      },
      buttonText: {
        fontSize: 18,
        color: 'white',
        alignSelf: 'center',
      },
      button: {
        height: 36,
        backgroundColor: '#48BBEC',
        borderColor: '#48BBEC',
        borderWidth: 1,
        borderRadius: 8,
        marginBottom: 10,
        alignSelf: 'stretch',
        justifyContent: 'center',
      },
    });
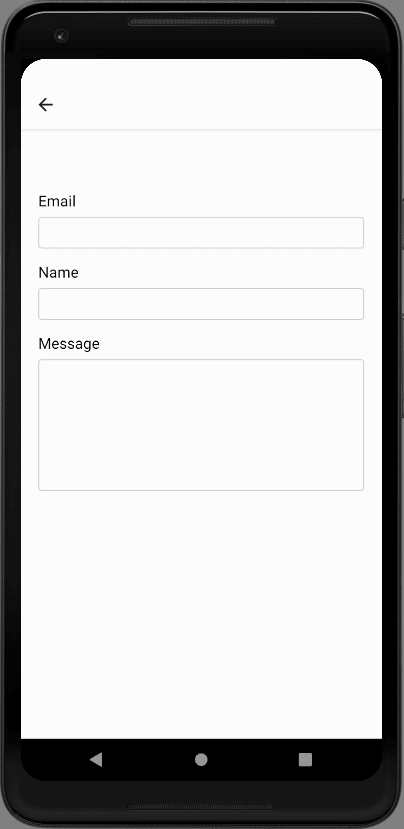
Hence, we will get the following result in the emulator screens:


As we can, we have got the form interface in the Contact screen.
Now, instead of using the text field in the message input, we are going to
implement the text area into it. For that, we need to use the code from the
following code snippet:
    const Form = t.form.Form;
    const options = {
      fields: {
        message: {
          multiline: true,
          stylesheet: {
            ...Form.stylesheet,
            textbox: {
              ...Form.stylesheet.textbox,
              normal: {
                ...Form.stylesheet.textbox.normal,
                height: 150,
              },
              error: {
                ...Form.stylesheet.textbox.error,
                height: 150,
              },
            },
          },
        },
      },
    };
Here, we have defined the options object in order to configure the Form
component. Now, we need to integrate the options constant to the Form component
as shown in the code snippet below:
<Form
  type={ContactForm}
  options={options}
/>
Hence, we will get the result as shown in the following emulator screen on the
next page:

Saving message to Firebase database
Now, we are going to implement the feature to save the users message to the
Firebase database. For that, we need to use the ref prop to get the value from
the form as shown in the code snippet below:
    <Form
      type={ContactForm}
      ref={c => (this._form = c)}
      options={options}
    />
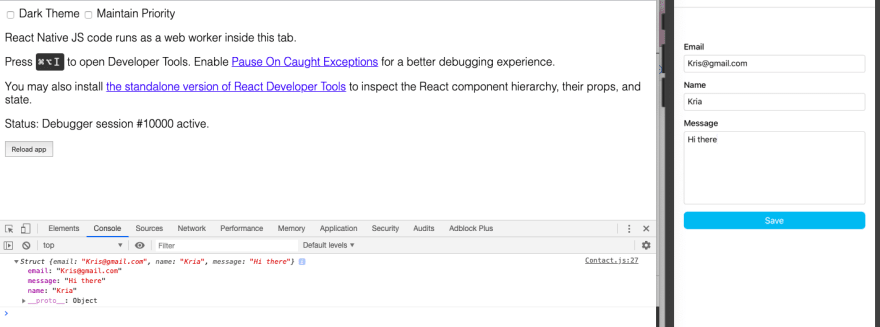
Next, we need to create a function called handleSubmit which will get the value
from the form and submit to the firebase. For now, we are going to add a simple
log to it as shown in the code snippet below:
    handleSubmit = async () => {
        // this.setState({submit: true});
        const value = this._form.getValue();
        console.log(value)
    }
Now, we will add the firebase configuration to it as shown in the code snippet
below:
    firebase
       .database()
       .ref('contact/')
       .push(value)
       .then(res => {
         Alert.alert('thank for reaching me')
       })
       .catch(err => {
         console.error(err);
       });
Here, we have used the firebase module to call the database function. Then, we have used the contact ref function and pushed tie value. As a result, we have shown an alert box.
Hence, we will get the following result in the emulator screens on the next page:
The result on firebase:

Summary
In this chapter we leaned how to set up the react-native-firebase in the react native application.Then, we learned how to make use of components from tcomb-form-native package in order to implement the form in the Contact screen. Then, we implemented the sending of message to the firebase.
The post Build WordPress Client App with React Native #14 : Implementing Settings Screen appeared first on Kriss.

Top comments (0)