Azure Key Vault is a cloud service that securely stores and manages application secrets in a centralised cloud location where it is safeguarded by industry-standard algorithms and hardware security modules in order to control access, permission and login.
The key vault securely keep sensitive information like keys, secrets, certificates, passwords etc.
Azure key vaults are created and managed through the Azure portal.
In this QuickStart, we will concentrate on creating a Key Vault, then add Key, Secret and Certificate to it.

Steps To Create Azure Key Vault:
Step 1:
Create a Microsoft Azure account and login

Step 2:
Search for 'Key Vault' and click

Step 3:
Click on 'Create key vault'

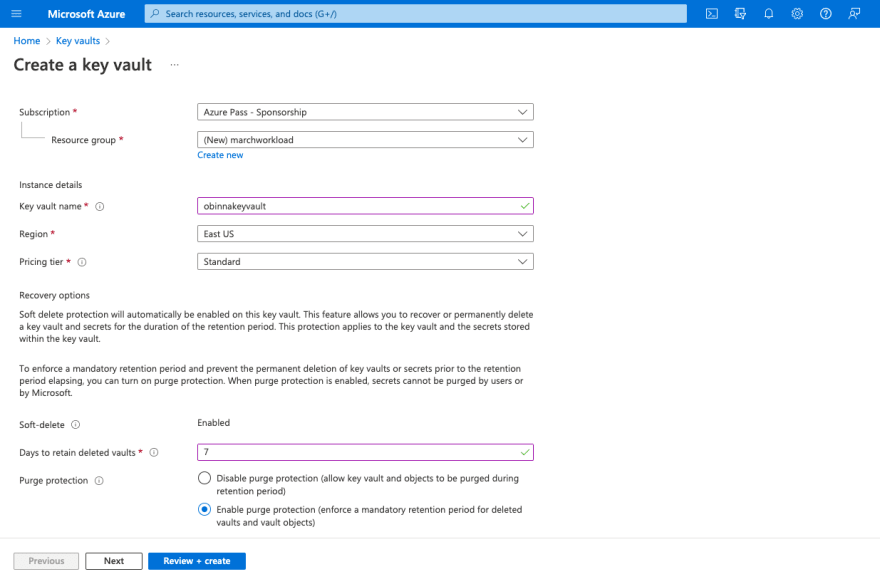
Step 4:
Subscription - Choose your prefer Subscription
Resource group - I like to use the month workload so I can segregate my resource groups by months.
Key vault name - Choose a unique name
Region - It's up to you
Pricing tier - Standard
Soft delete - This feature allows you to recover or permanently delete a key vault and secrets for the duration of the retention period. It is automatically enabled in a key vault.
Days to retain deleted vaults - The retention period is 7 to 90 days. This means if you purposefully or mistakenly delete a key vault, you can recover it within 7 - 90 days, depending on the number of days you chose when creating your key vault.
Purge protection - It enforces mandatory retention period and prevents the permanent deleting of key vaults prior to the retention period elapsing.
I advice you choose the enable purge protection so that you can recover your key vault before the end of the retention period.
Click on 'Review + Create'
Step 5:
Click on 'Create'

Step 6:
Click on 'Go to resource'

Step 7:
Your Key Vault is ready
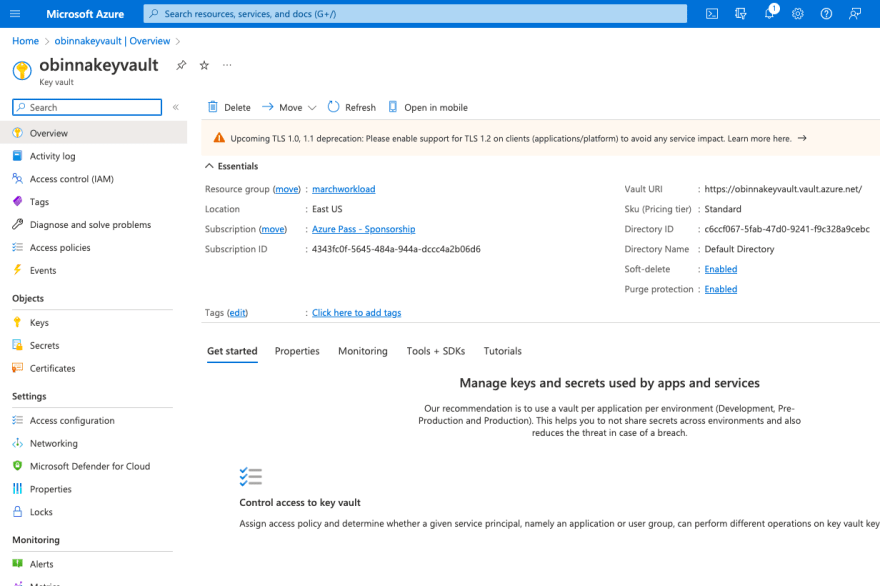
Step 8:
How to create keys in key vault
Click on 'Keys'

Step 9:
Click on 'Generate/Import'

Step 10:
Name - Choose a unique name
Leave key type and RSA key size as default
Click on the 'Set activation date' and 'Set expiration date' boxes to determine your time frame of usage.
Enabled - Yes
Tags - Click on 'Tags' to choose a Tag Name and Tag Value for the project. Eg. Tag Name - Apple and Tag Value - MacBook Pro
Click on 'Create'

Step 11:
Key has been successfully created

Step 12:
How to create Secrets in key vault
Click on 'Secrets'

Step 13:
Click on Generate/Import

Step 14:
Name - Choose a unique name
If you decide to set activation, deactivation date and tags then it is up to you.
Please look up how it was done for 'Key' in Step 10.
Click on 'Create'

Step 15:
Secret has been successfully created

Step 16:
How to create Certificates in key vault
Click on Certificates

Step 17:
Click on Generate/Import

Step 18:
Method of Certificate Creation - You can Generate or Import existing certificate
Certificate Name - It's up to you
Type of Certificate Authority - Choose best option
Subject - CN here stands for Common Name. You can use any name of your choice but it must follow my format. Eg CN=mycertificate.com
DNS Names - Click and fill a name of your choice
Validity Period - Set up validity period. Note that most certificates are valid for 12 months although I used 1 month for this demo
Content Type - Choose PKCS (Public-Key Cryptography Standards). It is a common standard for Microsoft environments
Lifetime Action Type - Choose the option that suits your plan
Advanced Policy Configuration - It helps to specify some Extended Key Usages (EKUs) codes and also customise other values that you want. I advice you do not change anything.
Finally click 'Create' on the bottom left of your screen.

Final Step:
You have created a certificate
Click on your certificate name to view
You can delete or download a backup of your certificate whenever you want

The Keys, Secrets and Certificates are the 3 main objects that an Azure Key Vault can generate.
Your Key Vault, Key, Secret and Certificate have been created.
NOTE: I always advice you delete your Key Vault, Key, Secret and Certificate when you don't need them anymore in order to save your Microsoft Azure credit because of Microsoft 'per hour' billing system.
Thank you!

Top comments (0)