
Detecting data anomalies in a constant event stream of IIoT sensor data
Manufacturing companies look for ways to automatically analyze recorded sensor data, detect errors and improve production processes. Anomaly detection in industrial sensor data is a challenge to many manufacturing companies, because there exists a large variety of sensor types and manufacturers on the IIoT market.
Popular IIoT applications often require anomaly detection, such as asset monitoring and alerting, predictive maintenance for machines and safety and security on the factory floor.
In this post, we show how to create a constant event stream of sensor data using our IIoT factory model, and how to manually add data anomalies. Record the event stream data and add the recordings to our simulator to replay them at will. Set up data pipelines to detect those data anomalies and respond to them by sending text notifications.
Producing a continuous stream of valid data with the camera-based product reader
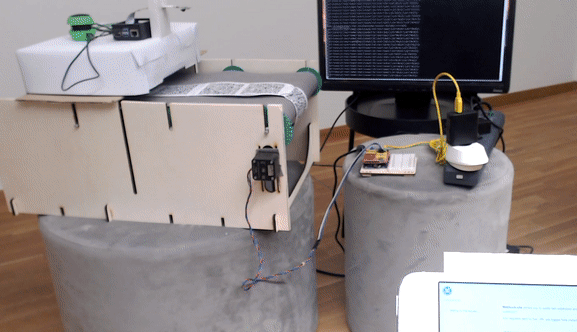
In a previous blog post, we explained how to build an IIoT conveyor belt model. We made a camera-based product-reader model that reads product data from QR code strips. We also showed how to flexibly create such QR codes from a JSON file with product data.
In this post, we use the same method and add dimension measures as attributes “x_mm” and “y_mm” and values around 800.0 to the input data file. Vary each dimension measure by less than plus or minus 0.5 mm of tolerance and generate the QR codes. This is a sample of our product data:
[
  [ {"name":"product_id","value":"123456","data":{"variant":"2b","color":"green","x_mm":"800.21","y_mm":"799.85"}},    {"name":"product_id","value":"123451","data":{"variant":"2b","color":"green","x_mm":"800.49","y_mm":"799.96"}}
  ] //,...
]
Print the QR codes and glue them together to a strip long enough to wrap around the conveyor belt. Start the IIoT factory model and it produces a constant stream of product data including the dimension measures.
Manually adding data anomalies to the product data stream
Again, use the QR code maker script to create and print product data encoded in QR codes. This time they shall contain data anomalies. Create a new JSON file and vary at least one dimension value per record by more than plus or minus 0.5 mm of tolerance.
[
  [
{"name":"product_id","value":"123456","data":{"variant":"2b","color":"green","x_mm":"800.21","y_mm":"799.45"}},
{"name":"product_id","value":"123451","data":{"variant":"2b","color":"green","x_mm":"800.51","y_mm":"799.96"}}
  ],
  [
{"name":"product_id","value":"123452","data":{"variant":"2b","color":"green","x_mm":"799.81","y_mm":"798.85"}},    {"name":"product_id","value":"123457","data":{"variant":"2d","color":"red","x_mm":"801.22","y_mm":"800.35"}}
  ]
]
Generate the QR codes, print them and cut them out with scissors. Glue the QR codes to the back of coasters so we can throw them onto the conveyor belt of our IIoT factory model at will.
Recording the event stream of IIoT sensor data for a simulator
With the QR code strip and coasters with encoded product data in place, start the factory model and watch the event stream get printed to the monitor of your Raspberry Pi. Per default, the model will only produce valid product data as encoded on the QR code strip in an endless loop. Throw a coaster onto the conveyor belt and the model will add the respective data anomaly to the event stream. The factory model does not know what constitutes a data anomaly and will only report sensor data as measured.
Run the IIoT factory model two times for five minutes each and record the data. The first time do nothing with the coasters and therefore record a flawless stream of valid product data. The second time, use the coasters to add a few data anomalies to the recorded event stream. The HTTP API of our Raspberry Pi provides POST endpoints to start and stop the recording. The response body of the stop endpoint contains the recorded data.

The Ruby Sinatra code for recording the event streams we added to the open source Xapix IIoT Server looks like this:
$rec = nil

def recording?
  !$rec.nil?
end

def record_event!(event)
  event = event.slice('name', 'value', 'data').merge('timestamp' => Time.now.to_f)
  $rec << event if recording?
  event
end

post '/start_rec' do
  raise('already recording') if recording?
  $rec = []
  status 201
rescue StandardError => error
  status 400
  { error: error.message }.to_json
end

post '/stop_rec' do
  raise('not recording') unless recording?
  res_payload = $rec.to_json
  $rec = nil
  res_payload
rescue StandardError => error
  status 400
  { error: error.message }.to_json
end

# Make sure to call record_event! in your event endpoint
post '/event' do
  payload = parse_body(request)
  record_event!(payload)
  #...
end
The recorded data returned by the HTTP API has lots of doubles. This is because the limited number of product data QR codes on the conveyor belt repeat in a loop. To get unique product IDs and to save the recorded data to a trace file in which each line holds the data record of a single event in JSON format, run a script on the data that looks like this:
require 'json'

res_body = '[{ YOUR JSON RESPONSE }, ...]'
File.open("./iiot_factory_product_dimensions_regular.json", 'w') do |f|
  JSON.parse(res_body).each.with_index do |row, i|
    row['value'] = (100000 + i).to_s;
    f.puts(row.to_json)
  end
end
Run the factory model twice to get two trace files, one with anomalies and one without any. The trace files can have hundreds of records and look like this:
{"name":"product_id","value":"100001","data":{"variant":"2b","color":"green","x_mm":"800.21","y_mm":"799.85"},"timestamp":1601371059.556218}
{"name":"product_id","value":"100002","data":{"variant":"2b","color":"green","x_mm":"799.81","y_mm":"799.85"},"timestamp":1601371062.339446}
{"name":"product_id","value":"100003","data":{"variant":"2c","color":"gray","x_mm":"800.11","y_mm":"800.05"},"timestamp":1601371065.3834803}
{"name":"product_id","value":"100004","data":{"variant":"2c","color":"gray","x_mm":"800.33","y_mm":"799.65"},"timestamp":1601371067.9262557}
{"name":"product_id","value":"100005","data":{"variant":"2b","color":"green","x_mm":"800.33","y_mm":"799.77"},"timestamp":1601371070.470316}
Replaying multiple event streams of IIoT sensor data with a simulator
We at Xapix added our two trace files to our simulator to replay the trace files on the simulator at will. In a previous blog post, we briefly explained how to build such a simulator yourself, in case you do not want to use ours.
Replay the trace file without anomalies multiple times simultaneously to simulate a lot of regular data volume. Next, replay a single trace file containing an anomaly in the simulator. The anomaly is hard to detect in the regular data traffic and therefore a good test for anomaly detection software.
Anomaly detection data pipelines
You could either build by hand a software script with decision logic reporting the data anomalies if an incident is recorded on your own Kafka server. It would need to work well with your simulator.
Or > CONTINUE READING < the full version of the article on our Xapix blog and create a free Xapix Community Edition account.
Join our Home IoT community
We are working on follow-ups to this blog series to inspire you with new ideas about how to use the Xapix IIoT Server once you have set it up. We would love to hear your ideas and collaborate!
Contact me on Twitter if you would like to discuss this tutorial or if you have questions or feedback about the Xapix Community Edition. Or really anything else as well. We look forward to hearing from you!

Top comments (2)
Nice one!
Thanks! :) We're gonna add a robot arm next, so stay tuned. Would love to hear some further ideas!