
In our recent project "Dragonfly Mini" here at Stratiteq we used different technologies and programming languages in order to build an autonomous vehicle powered by NVIDIA Jetson Nano, equipped with a drone, that collects and processes data and uploads it to the Microsoft's Azure cloud. Following this project we will publish series of blogposts here at Dev.to explaining how to achieve specific things and in this first blog post I will show how easy it is to train a model for custom detection with Azure Custom Vision and how you can use this model via Python.
Puffin is, as you probably know, a small bird with brightly coloured beak and Iceland is home to the Atlantic puffins. One of use cases we demonstrated in "Dragonfly Mini" project was inspired by protection of endangered species by use of AI, therefore we trained a custom model that is capable of detecting puffins. If you want to build a model that can recognise different birds you can use: Wah C., Branson S., Welinder P., Perona P., Belongie S. "The Caltech-UCSD Birds-200-2011 Dataset" Computation & Neural Systems Technical Report, CNS-TR-2011-001. You can also find many other datasets on Kaggle for this use. Data preparation is manual work and takes some time, but more effort you invest in preparing and tagging your images the results will be better.
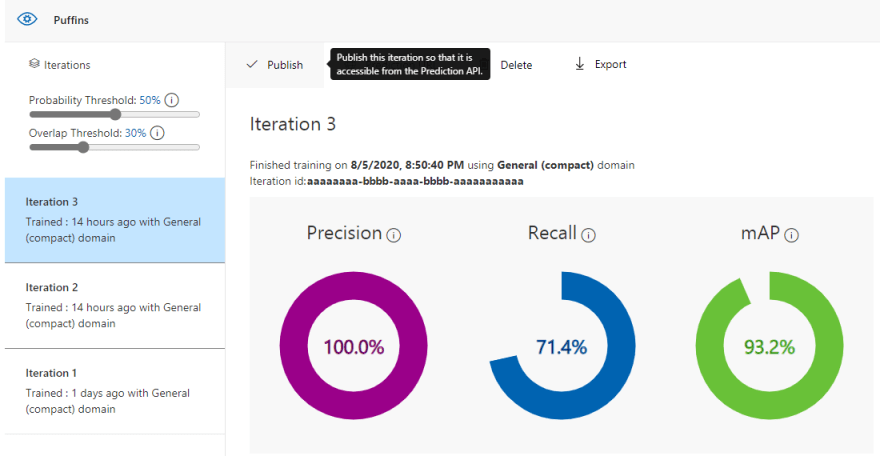
It is really easy to create object detection project with Azure Custom Vision, and I explained this with step-by-step walkthrough in one of the previous blogposts "Where's Chewie? Object detection with Azure Custom Vision". Log into the Custom Vision, create new project for object detection, add and tag images, train your project and publish the trained iteration. Before you publish the iteration make sure you make few tests with different images. Using only Caltech dataset will not be sufficient to make good recognition so try to add more images from other datasets or from other Internet sources.
We can use this model from Python in less than 20 lines of code. First let's install OpenCV and Custom Vision service SDK for Python by running following commands:
pip install opencv-python
pip install azure-cognitiveservices-vision-customvision
pip install msrest
OpenCV will be used to get image from the camera, we'll save this and resulting image with it, and we'll also use it to draw bounding boxes for objection detection results.
Create a new Python script and import packages you just installed.
import cv2
from azure.cognitiveservices.vision.customvision.prediction import CustomVisionPredictionClient
from msrest.authentication import ApiKeyCredentials
Define the camera and set properties for width and height, keep in mind you should keep aspect ratio, in my case it will be 640 by 480 pixels.
camera = cv2.VideoCapture(0)
camera.set(cv2.CAP_PROP_FRAME_WIDTH, 640)
camera.set(cv2.CAP_PROP_FRAME_HEIGHT, 480)
OpenCV's VideoCapture can use input from a camera, but it can also use a video file as input which is a really useful feature.
Next thing we need to do is to define credentials which we will use for our predictor.
credentials = ApiKeyCredentials(in_headers={"Prediction-key": "<PREDICTION_KEY>"})
predictor = CustomVisionPredictionClient("<ENDPOINT_URL>", credentials)
Prediction key can be found in the Custom Vision interface by clicking on "Prediction URL" button. In the window that pops up you will see it below URL.

Endpoint URL can be found if the project settings, in top bar click the settings and you will find endpoint URL (use it without Resource ID). In settings you will also find the project ID which will be in the following format: aaaaaaaa-bbbb-cccc-dddd-eeeeeeeeeeee.
We will take an image from camera and we will save it as "capture.png" with following two lines of code.
ret, image = camera.read()
cv2.imwrite('capture.png', image)
The image we saved we will use for detection and you will have to use the project ID and name of the published iteration. If you are interested in more details how results look like you can print them out.
with open("capture.png", mode="rb") as captured_image:
    results = predictor.detect_image("<PROJECT_ID>", "<ITERATION_NAME>", captured_image)
We are now able to loop through our results and we will take predictions that have probability over 50%. With these predictions we will draw bounding boxes on the image and store it as new image "result.png". For the bounding boxes we make simple calculation based on the image size, we set bounding box color and border thickness.
for prediction in results.predictions:
    if prediction.probability > 0.5:
        bbox = prediction.bounding_box
        result_image = cv2.rectangle(image, (int(bbox.left * 640), int(bbox.top * 480)), (int((bbox.left + bbox.width) * 640), int((bbox.top + bbox.height) * 480)), (0, 255, 0), 3)
        cv2.imwrite('result.png', result_image)
In the end we release the camera we have used.
camera.release()
When you execute the code, camera will turn on, take an image, Azure Custom Vision should be invoked via URL to get the results and results will be saved as new image. Here is quick test I made by using fridge magnet with puffins.

If you do not get really good results at first, you can retrain your model by adding and tagging additional images.
Full code we used in this tutorial is here:
import cv2
from azure.cognitiveservices.vision.customvision.prediction import CustomVisionPredictionClient
from msrest.authentication import ApiKeyCredentials

camera = cv2.VideoCapture(0)
camera.set(cv2.CAP_PROP_FRAME_WIDTH, 640)
camera.set(cv2.CAP_PROP_FRAME_HEIGHT, 480)

credentials = ApiKeyCredentials(in_headers={"Prediction-key": "<PREDICTION_KEY>"})
predictor = CustomVisionPredictionClient("<ENDPOINT_URL>", credentials)

ret, image = camera.read()
cv2.imwrite('capture.png', image)

with open("capture.png", mode="rb") as captured_image:
    results = predictor.detect_image("<PROJECT_ID>", "<ITERATION_NAME>", captured_image)

for prediction in results.predictions:
    if prediction.probability > 0.5:
        bbox = prediction.bounding_box
        result_image = cv2.rectangle(image, (int(bbox.left * 640), int(bbox.top * 480)), (int((bbox.left + bbox.width) * 640), int((bbox.top + bbox.height) * 480)), (0, 255, 0), 3)
        cv2.imwrite('result.png', result_image)

camera.release()
I hope you learned how simple it is to utilise Azure Custom Vision via Python, and as you were able to see it was done in less than 20 lines of code.
Thanks for reading!

Top comments (0)