Let’s take a look at using TakeShape to create a webpage for your portfolio in a few quick steps. This template can be used for your developer portfolio 👩💻👨💻, design portfolio 🖼, or anything between.
Signup for an account at app.takeshape.io/signup. With TakeShape’s G-Suite integration, this process can be easy as 2 clicks.

There are many templates to help you out with the design of the webpage, and we’ll get to all of them soon. For this example, let’s click on “Shape Portfolio.” Then we can name our project, and click “Create Project.”

If we head to the navigation bar on the left, we can click on “Project” and explore the projects already integrated with the template. You can also add more projects by clicking “New Project” in the top right.

We can also explore the pictures, videos, and other assets by clicking on the “Asset Library” at the top of the navigation bar. We can upload more assets by simply dragging from the desktop, or clicking “Upload” in the top right.

We have a good looking site, so let’s let the world see it. TakeShape can deploy your site to Amazon S3, Google Cloud Storage, FTP, and Netlify. For this example, we will deploy to Netlify using one-click integration. Let’s navigate to the drop-down at your project name in the top left → “Static Site” → “New Static Site” in the top right. Here we can link our TakeShape project to Netlify.
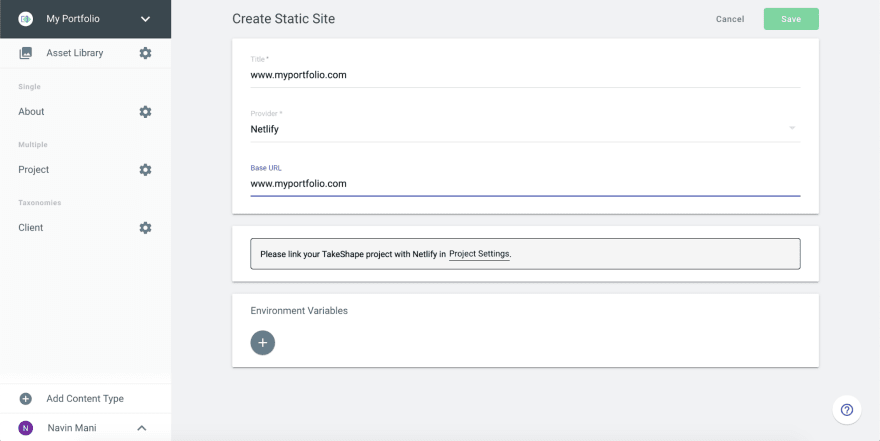
Here’s what it looks like when linked to Netlify.

Now let’s hit “Save” and Publish!

Check out your awesome Site!
-
Now that the template is up and running, it’s time to customize. Let’s clone the Github repository so we can personalize it!
git clone https://github.com/takeshape/takeshape-samples.git takeshape-samples && cd takeshape-samples/shape-portfolio To install all dependencies, lets run
npm install. Double check your Node versionnode -vand make sure you are usingv10.16.2.Run
npx tsg initand follow the command prompts to set up communication between your local environment and TakeShape.Run
npm startto start the server. It will run on http://localhost:5000 by default.Now we can make plenty of customizations to make use of this template. To save room, I want to remove the project images from the homepage. We can easily mockup how this will look in the
index.htmlfile. The changes can be seen in the local site immediately!

Run
npx tsg deployto deploy your changes to the site hosted on Netlify.Navigate to the website and check out your updates live!

In these few steps, we got a TakeShape website up 🆙and running 🏃♀️and we made changes that can be viewed live on the site. From here, the possibilities are endless ♾. We’d love to see the websites you all create from this template! 🤩

Top comments (0)