
This series of tutorials will explore the Vonage Video API (formerly TokBox OpenTok) and what you can build with it. The Video API is very robust and highly customizable, and in each post, we’ll show how to implement a specific feature using the API. This time we will look at how to broadcast your video chat to many viewers online.
As this application will require some server-side code, we will use Glitch for ease of setup. You can also download the code from this Glitch project and deploy it on your server or hosting platform of choice (may probably require some configuration tweaking based on the requirements of your platform).
We will not be using any front-end frameworks for this series, just vanilla Javascript to keep the focus on the Video API itself. At the end of this tutorial, you should be able to broadcast your video chat live to a large audience using HTTP live streaming (HLS) or an RTMP stream.

The final code for this application can be found in this GitHub repository or remixed on Glitch.
Prerequisites
Before we get started, you will need a Vonage Video API account, which you can create for free here. You will also need Node.js installed (if you are not using Glitch).
This tutorial builds on the first introductory post in the series: Building a Basic Video Chat. If this is your first time using the Video API, we highly suggest you go through that because it covers the following basic setup:
- Create a Vonage Video API project
- Setting up on Glitch
- Basic project structure
- Initializing a session
- Connecting to the session, subscribing and publishing
- Basic layout styles for a video chat
Broadcasts with the Vonage Video API
The platform supports two types of broadcasts, Live interactive video broadcasts and live streaming broadcasts. Both types of broadcast require you to use a routed session (a session that uses the Vonage Video API Media Router). More on this in the next section.
Live interactive video broadcasts enable many clients to publish and subscribe to each others' audio-video streams in real-time. Routed sessions can support live interactive video broadcasts for up to 3,000 streams between clients.
Live streaming broadcasts let you share an HTTP live streaming (HLS) stream or an RTMP stream with large numbers of viewers. The HLS or RTMP stream is a single video composed of the individual streams published to the session. For this tutorial, this is the type of broadcast we will be using.
HTTP Live Streaming (HLS) is a media streaming protocol which aims to deliver continuous and long-form video over the Internet reliably. It was developed by Apple and released in 2009.
HLS uses CDN for delivery and is a traditional broadcast with high latency (15–20 seconds) and no interaction. An HLS viewer will receive the content at a latency of 15–20 seconds, so it does not lend itself directly to interactive use-cases.
Real-Time Messaging Protocol (RTMP) is a TCP-based protocol designed for the transmission of audio, video and data. Originally developed as a proprietary protocol by Macromedia, it is now an open specification released by Adobe.
Although RTMP has lower latency (around 5 seconds) than HLS, it also does not lend itself to use-cases that require interactivity. You would use RTMP to push content created with the Vonage Video API to social media video platforms, such as Facebook or YouTube Live.
Initial Setup
As we are building onto a basic video chat, start by remixing the project for the basic video chat built in the previous tutorial. Click the big Remix button below to do that. 👇

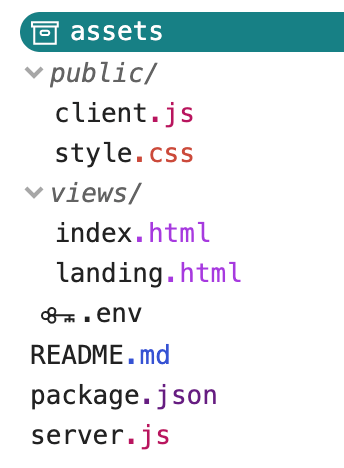
Your folder structure should resemble something like this:
As mentioned at the start, TokBox OpenTok is now Vonage Video API. We haven’t made any changes to our package names, so you will still reference OpenTok in your code.
If you had remixed the Glitch project, your server.js file should already look like this:
const express = require("express");
const app = express();
const OpenTok = require("opentok");
const OT = new OpenTok(process.env.API_KEY, process.env.API_SECRET);

let sessions = {};

app.use(express.static("public"));

app.get("/", (request, response) => {
  response.sendFile(__dirname + "/views/landing.html");
});

app.get("/session/:room", (request, response) => {
  response.sendFile(__dirname + "/views/index.html");
});

app.post("/session/:room", (request, response) => {
  const roomName = request.params.room;
  // Check if the session already exists
  if (sessions[roomName]) {
    // Generate the token
    generateToken(roomName, response);
  } else {
    // If the session does not exist, create one
    OT.createSession((error, session) => {
      if (error) {
        console.log("Error creating session:", error);
      } else {
        // Store the session in the sessions object
        sessions[roomName] = session.sessionId;
        // Generate the token
        generateToken(roomName, response);
      }
    });
  }
});

function generateToken(roomName, response) {
  // Configure token options
  const tokenOptions = {
    role: "publisher",
    data: `roomname=${roomName}`
  };
  // Generate token with the Video API Client SDK
  let token = OT.generateToken(
    sessions[roomName],
    tokenOptions
  );
  // Send the required credentials back to to the client
  // as a response from the fetch request
  response.status(200);
  response.send({
    sessionId: sessions[roomName],
    token: token,
    apiKey: process.env.API_KEY
  });
}

const listener = app.listen(process.env.PORT, () => {
  console.log("Your app is listening on port " + listener.address().port);
});
To get the video chat up and running, go to the .env file and fill in your API key and secret for your project, which you can find from the dashboard. Once that's done, we will be working on the client-side code to get the text chat working before revisiting the server.js file again.
Add the Required Markup
Our application will be made up of three pages. a landing page for users to create or join a session, a video chat page for participants of the video chat, and a page that displays the broadcast stream.
We will need to create an additional page for the broadcast. Let's add a broadcast.html file to the views folder by clicking the New File button in the left sidebar. Name the file views/broadcast.html and paste the following markup into the page.

<!DOCTYPE html>
<html lang="en">
  <head>
    <title>Broadcast Video Chat</title>
    <meta
      name="description"
      content="Broadcast your video chat to a large audience with Vonage Video API in Node.js"
    />
    <link
      id="favicon"
      rel="icon"
      href="https://tokbox.com/developer/favicon.ico"
      type="image/x-icon"
    />
    <meta charset="utf-8" />
    <meta http-equiv="X-UA-Compatible" content="IE=edge" />
    <meta name="viewport" content="width=device-width, initial-scale=1" />

    <link rel="stylesheet" href="/style.css" />
  </head>

  <body>
    <header>
      <h1>Video broadcast</h1>
    </header>

    <main>
      <video id="video" class="broadcast-video"></video>
    </main>

    <footer>
      <p>
        <small
          >Built on <a href="https://glitch.com">Glitch</a> with the
          <a href="https://tokbox.com/developer/">Vonage Video API</a>.</small
        >
      </p>
    </footer>

    <script src="https://cdn.jsdelivr.net/npm/hls.js@latest"></script>
    <script src="/broadcast.js"></script>
  </body>
</html>
There isn't a lot going on here, the key portion is the video element which will house the HLS stream when the broadcast starts.
We will also add some broadcast-related markup to the index.html page, like the buttons to start and stop the broadcast, as well as to generate a shareable HLS link.
<main>
  <div id="subscriber" class="subscriber"></div>
  <div id="publisher" class="publisher"></div>

  <!-- Add the broadcast controls -->
  <div class="broadcast">
    <button id="startBroadcast">Start Broadcast</button>
    <button id="stopBroadcast" class="hidden">Stop Broadcast</button>
  </div>
</main>
Style the broadcast controls
Next, let's put in some styles for the newly added markup. Nothing too fancy here, just some positioning and also button states, which we will talk about when we start working on starting/stopping the broadcast.
/* To position the controls in the bottom-right corner */
.broadcast {
  position: absolute;
  right: 0;
  bottom: 0;
  display: flex;
  flex-direction: column;
  align-items: flex-end;
}

.broadcast a,
.broadcast button {
  margin-bottom: 1em;
}

/* This is to centre the broadcast video */
.broadcast-video {
  margin: auto;
}
Now, when you start the session, your interface should look something like this:

This is not the final styling, but it will do for now as we build out the broadcast functionality of the application.
Starting/Stopping a Broadcast
The key to broadcasting with the Vonage Video API is the startBroadcast() method and the stopBroadcast() method. These methods will be called from the server.js file. The startBroadcast() method takes in three parameters: the session ID for the session, options for the broadcast, and a callback function. We will get the session ID from the client-side via a POST request. Let's set up the route for that.
// Required to read the body of a POST request
app.use(express.json());

// Declare an object to store the broadcast information returned by the SDK
let broadcastData = {};

app.post("/broadcast/start", (request, response) => {
  const sessionId = request.body.sessionId;

  const broadcastOptions = {
    outputs: {
      hls: {},
    },
  };

  OT.startBroadcast(sessionId, broadcastOptions, (error, broadcast) => {
    if (error) {
      console.log(error);
      response.status(503);
      response.send({ error });
    }
    // Assign the response from the SDK to the broadcastData object
    broadcastData = broadcast;
    response.status(200);
    response.send({ broadcast: broadcast });
  });
});
There are more optional properties you could include as broadcast options like resolution, layout and so on, but for now, we will be using the defaults. Refer to the API reference for specifics.
Let's also set up the route to stop a broadcast. The stopBroadcast() method requires the broadcast ID, which we will also obtain from the client-side.
app.post("/broadcast/stop", (request, response) => {
  const broadcastId = request.body.broadcastId;
  OT.stopBroadcast(broadcastId, (error, broadcast) => {
    if (error) console.log(error);
    response.status(200);
    response.send({
      status: broadcast.status
    });
  });
});
There are some tweaks to be made to the client.js file to cater for this new functionality. In the client.js file, make session a global variable.
Before:
function initializeSession(apiKey, sessionId, token) {
  const session = OT.initSession(apiKey, sessionId);
  // more code below
}
After:
let session;

function initializeSession(apiKey, sessionId, token) {
  session = OT.initSession(apiKey, sessionId);
  // more code below
}
We must also change the media mode of the session to a routed one, instead of the default relayed mode.
Before:
app.post("/session/:room", (request, response) => {
  const roomName = request.params.room;
  // Check if the session already exists
  if (sessions[roomName]) {
    // Generate the token
    generateToken(roomName, response);
  } else {
    // If the session does not exist, create one
    OT.createSession((error, session) => {
      if (error) {
        console.log("Error creating session:", error);
      } else {
        // Store the session in the sessions object
        sessions[roomName] = session.sessionId;
        // Generate the token
        generateToken(roomName, response);
      }
    });
  }
});
After:
app.post("/session/:room", (request, response) => {
  const roomName = request.params.room;
  // Check if the session already exists
  if (sessions[roomName]) {
    // Generate the token
    generateToken(roomName, response);
  } else {
    // Set the media mode to routed here
    OT.createSession({ mediaMode: "routed" }, (error, session) => {
      if (error) {
        console.log("Error creating session:", error);
      } else {
        // Store the session in the sessions object
        sessions[roomName] = session.sessionId;
        // Generate the token
        generateToken(roomName, response);
      }
    });
  }
});
We also need to declare a broadcast variable to hold information about the broadcast that will be used to stop the broadcast as well. For now, let's also log the responses to the console so we can verify things are working as expected.
let broadcast;

const startBroadcastBtn = document.getElementById("startBroadcast");
startBroadcastBtn.addEventListener("click", startBroadCast, false);

function startBroadCast() {
  fetch("/broadcast/start", {
    method: "POST",
    headers: { "Content-Type": "application/json" },
    body: JSON.stringify({ sessionId: session.sessionId })
  })
    .then(res => {
      return res.json();
    })
    .then(res => {
      broadcast = res.broadcast;
      console.log(res);
    })
    .catch(handleCallback);
}

const stopBroadcastBtn = document.getElementById("stopBroadcast");
stopBroadcastBtn.addEventListener("click", stopBroadCast, false);

function stopBroadCast() {
  fetch("/broadcast/stop", {
    method: "POST",
    headers: { "Content-Type": "application/json" },
    body: JSON.stringify({ broadcastId: broadcast.id })
  })
    .then(res => {
      return res.json();
    })
    .then(res => {
      console.log(res);
    })
    .catch(handleCallback);
}
If you open your console when starting and stopping the broadcast, you should see the following:

In theory, we could stop here, because we now have access to an HLS link to stream the video chat to a player that supports the format. And if you already have something that handles HLS streams, feel free to do things your way. The rest of this tutorial covers a basic implementation so you can have a look at what the broadcast stream looks like.
Handle button states
But first, some additional styling for button states. If you noticed, there is some time lag between you pressing the Start Broadcast button and the response which gets logged to console. To improve the user experience, we want to provide some indication to the user that their request did get sent to the server.
The flow would work something like this:

Instead of displaying both start and stop buttons, we only show one relevant button at a time. Also, once a button is clicked, we don't want users to click it multiple times while processing is on-going. Let's add some CSS classes to deal with the hidden and disabled states.
/* These are for the button states */
.hidden {
  display: none;
}

.disabled {
  cursor: not-allowed;
  opacity: 0.5;
  pointer-events: none;
}
Given that start and stop have the same flow, the required CSS classes for state changes would be the same for both buttons, just applied in an alternating fashion. We can abstract those changes into a function that takes in the string "start" or "stop" and targets the appropriate button.
// Button state while awaiting response from server
function pendingBtnState(statusString) {
  const btn = document.getElementById(statusString + "Broadcast");
  btn.classList.add("disabled");
  btn.setAttribute("data-original", btn.textContent);
  btn.textContent = "Processing…";
}

// Switch button state once server responds
function activeBtnState(statusString) {
  const activeBtn =
    statusString === "start"
      ? document.getElementById("startBroadcast")
      : document.getElementById("stopBroadcast");
  const inactiveBtn =
    statusString === "stop"
      ? document.getElementById("startBroadcast")
      : document.getElementById("stopBroadcast");

  inactiveBtn.classList.remove("disabled");
  inactiveBtn.textContent = inactiveBtn.getAttribute("data-original");
  inactiveBtn.removeAttribute("data-original");
  inactiveBtn.classList.add("hidden");
  activeBtn.classList.remove("hidden");
}
Let's incorporate these functions into our fetch requests for starting and stopping the broadcast.
function startBroadCast() {
  // To put the Start button into the pending state
  pendingBtnState("start");

  fetch("/broadcast/start", {
    method: "POST",
    headers: { "Content-Type": "application/json" },
    body: JSON.stringify({ sessionId: session.sessionId })
  })
    .then(res => {
      return res.json();
    })
    .then(res => {
      broadcast = res.broadcast;
      // To hide the Start button and show the Stop button
      activeBtnState("stop");
    })
    .catch(handleCallback);
}

function stopBroadCast() {
  // To put the Stop button into the pending state
  pendingBtnState("stop");

  fetch("/broadcast/stop", {
    method: "POST",
    headers: { "Content-Type": "application/json" },
    body: JSON.stringify({ broadcastId: broadcast.id })
  })
    .then(res => {
      return res.json();
    })
    .then(res => {
      // To hide the Stop button and show the Start button
      activeBtnState("start");
    })
    .catch(handleCallback);
}
Create Shareable HLS Link
The Broadcast object returned from the SDK contains a HLS broadcast URL that can be consumed by any video players which support HLS. Let's make use of this to create a link to a Broadcast page. We already created a broadcast.html file at the start, so let's pipe our broadcast into that page. Let's set up a route in the server.js file for it.
app.get("/broadcast/:room", (request, response) => {
  response.sendFile(__dirname + "/views/broadcast.html");
});
We're going to add another route that checks for the existence of the session to be broadcast. If it does, the success response will pass over the URL for the broadcast and its status.
app.get("/broadcast/hls/:room", (request, response) => {
  const roomName = request.params.room;
  if (sessions[roomName]) {
    response.status(200);
    response.send({
      hls: broadcastData.broadcastUrls.hls,
      status: broadcastData.status
    });
  } else {
    response.status(204);
  }
});
On our index.html page, add in the following to the broadcast controls div:
<div class="broadcast">
  <!-- Add link to the Broadcast page and a means to copy to clipboard -->
  <a class="hidden" id="hlsLink" target="_blank" rel="noopener noreferrer"
    >Open Broadcast page</a
  >
  <p class="invisible" id="hlsCopyTarget"></p>
  <button class="hidden" id="copyLink">Copy HLS link</button>

  <button id="startBroadcast">Start Broadcast</button>
  <button id="stopBroadcast" class="hidden">Stop Broadcast</button>
</div>
And some additional CSS to styles.css:
.invisible {
  position: absolute;
  opacity: 0;
  z-index: -1;
}
The result of this will be a link that opens the Broadcast page in a separate tab or window, as well as a button that copies the link to the Broadcast page for people to share it around. We'll need to grab the HLS URL from the broadcast response, as well as the room name (from the URL) to compose the link for the broadcast page.
const url = new URL(window.location.href);
const roomName = url.pathname.split("/")[2];

// To show/hide the HLS links when the broadcast starts/stops
function hlsLinkState(statusString) {
  if (statusString === "start") {
    document.getElementById("hlsLink").classList.remove("hidden");
    document.getElementById("copyLink").classList.remove("hidden");
  } else {
    document.getElementById("hlsLink").classList.add("hidden");
    document.getElementById("copyLink").classList.add("hidden");
  }
}

// Create the link to the broadcast page
function composeHlsLink(link) {
  hlsLinkState("start");
  const hlsLinkUrl =
    "https://" + location.host + "/broadcast/" + roomName + "?hls=" + link;
  const hlsLink = document.getElementById("hlsLink");
  const hlsCopyTarget = document.getElementById("hlsCopyTarget");
  hlsLink.href = hlsLinkUrl;
  hlsCopyTarget.innerHTML = hlsLinkUrl;
}
Let's add these new functions to the fetch requests for starting/stopping the broadcast as well:
function startBroadCast() {
  pendingBtnState("start");

  fetch("/broadcast/start", {
    method: "POST",
    headers: { "Content-Type": "application/json" },
    body: JSON.stringify({ sessionId: session.sessionId })
  })
    .then(res => {
      return res.json();
    })
    .then(res => {
      broadcast = res.broadcast;
      activeBtnState("stop");
      // Compose the link to the broadcast page
      composeHlsLink(res.broadcast.broadcastUrls.hls);
    })
    .catch(handleCallback);
}

function stopBroadCast() {
  pendingBtnState("stop");

  fetch("/broadcast/stop", {
    method: "POST",
    headers: { "Content-Type": "application/json" },
    body: JSON.stringify({ broadcastId: broadcast.id })
  })
    .then(res => {
      return res.json();
    })
    .then(res => {
      activeBtnState("start");
      // Hide the links when the broadcast has stopped
      hlsLinkState("stop");
    })
    .catch(handleCallback);
}
There are numerous video players that can handle HLS streams and offer different levels of customization over the player interface, but to keep things basic, this tutorial loads up hls.js to play the stream. Create a broadcast.js file in the public folder.
const url = new URL(window.location.href);
const roomName = url.pathname.split("/")[2];
const hlsLink = url.searchParams.get("hls");

fetch("/broadcast/hls/" + roomName)
  .then(res => {
    return res.json();
  })
  .then(res => {
    playStream(hlsLink);
  })
  .catch(error => console.error(error));

// Refer to hls.js documentation for more options
function playStream(hlsLink) {
  const video = document.getElementById("video");
  const videoSrc = hlsLink;

  if (Hls.isSupported()) {
    const hls = new Hls();
    hls.loadSource(videoSrc);
    hls.attachMedia(video);
    hls.on(Hls.Events.MANIFEST_PARSED, function() {
      video.play();
    });
  } else if (video.canPlayType("application/vnd.apple.mpegurl")) {
    video.src = videoSrc;
    video.addEventListener("loadedmetadata", function() {
      video.play();
    });
  }
}
The final bit of this tutorial is a native implementation of copy to clipboard. Feel free to use a library like clipboard.js for a simpler API.
const copyLinkBtn = document.getElementById("copyLink");
copyLinkBtn.addEventListener("click", copyHlsLink, false);

function copyHlsLink() {
  const hlsCopyTarget = document.getElementById("hlsCopyTarget");
  const range = document.createRange();
  range.selectNode(hlsCopyTarget);
  window.getSelection().addRange(range);

  try {
    const successful = document.execCommand("copy");
    const msg = successful ? "successful" : "unsuccessful";
    console.log("Copy command was " + msg);
  } catch (err) {
    console.log("Oops, unable to copy");
  }
  window.getSelection().removeAllRanges();
}
After all that, you should finally get something like this for the video chat page and the broadcast page respectively:


What's Next?
The final code on Glitch and GitHub contains everything we covered in this lengthy post but re-organized, so the code is cleaner and more maintainable. Feel free to remix or clone the code and play around with it yourself.
There are additional functionalities we can build with the Vonage Video API, which will be covered in future tutorials, but in the meantime, you can find out more at our comprehensive documentation site. If you run into any issues or have questions, reach out to us on our Community Slack. Thanks for reading!

Top comments (0)