(Note: these posts are migrated from my previous medium.com blog)
It’s been a while since my last post Control your Intel Edison in Realtime with Websockets! There’s been tons of updates on documentation, tools, and libraries that allow setting up and development a lot easier. Check out the downloads page to get the new installer and latest firmware.
The following tutorial assumes an Intel Edison already updated and setup with connectivity. If you have a fresh out of the box Intel Edison, please follow this guide or my previous post.
1. Read sensor data using the UPM repository
UPM is a high level repository for sensors/actuators that uses MRAA. Check out the list of supported sensors here. If the sensor you are using is already supported by UPM, you will save a lot of time by getting a high level interface.
If the sensor you are using is not found in UPM, feel free to submit an issue or a pull request on Github. You can of course always use MRAA to read raw data from your sensor (e.g. via Analog, I²C, SPI, UART, etc.)
For this tutorial, I will be using the temperature sensor from my Grove Starter Kit:
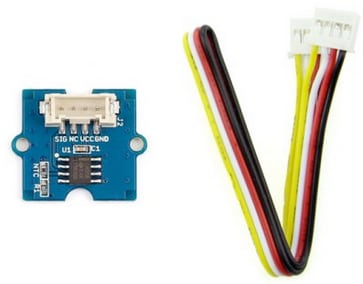
This temperature sensor uses a thermistor to detect temperature. A thermistor is a device that will change its resistance when the temperature changes. By measuring the voltage output from this sensor with an analog pin, we are able to determine the temperature by looking up the sensor’s datasheet. Luckily for us, UPM has done that for use already. Learn more about thermistors here.
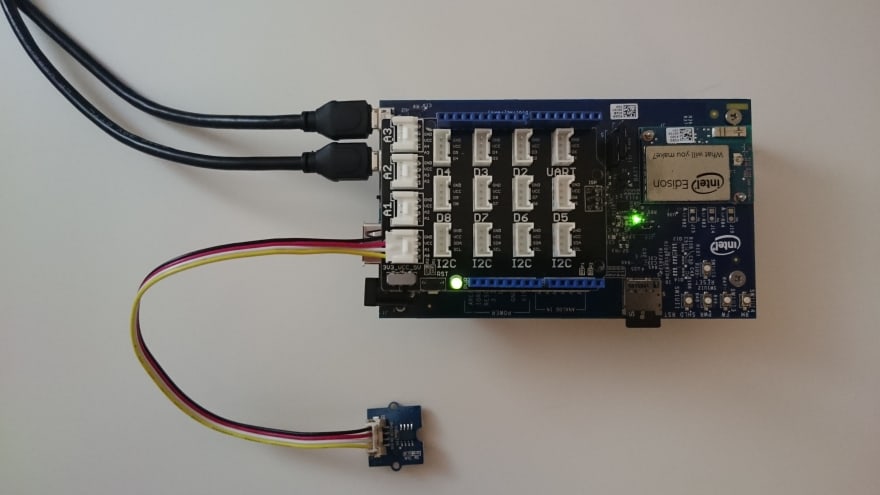
I connected my temperature sensor to analog pin A0, as shown in the picture below:
UPM supports the Grove Temperature Sensor and also includes example code. I am going to wget the example code on my Intel Edison and run it:
…and you should see the following output:

If you look at the code in grovetemp.js, you will see that it is basically instantiating the temperature sensor object and repeatedly calling temp.value() to get the latest temperature reading.
2. Pushing sensor data via Websockets
Well that was easy :) Now all we have to do is push this data via websockets to a UI, using Socket.IO like the last tutorial:
Put these two files on your Intel Edison and run:
node tempsensorsocket.js
Be sure to have express and socket.io installed already, and change the IP address in index.html
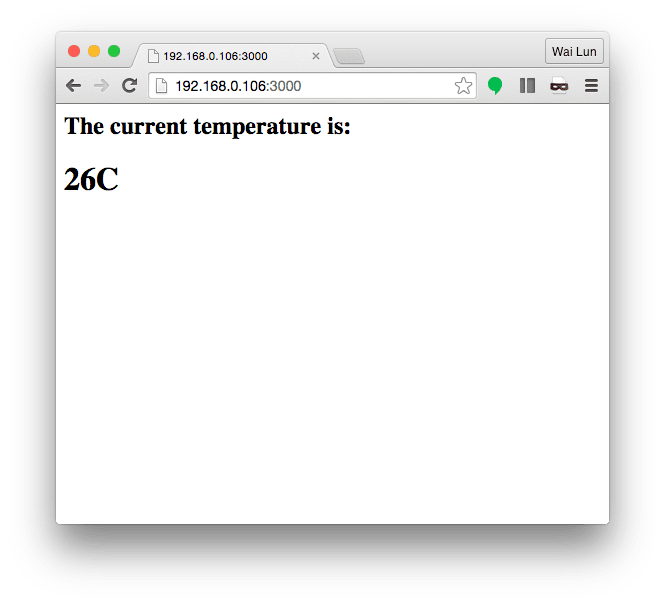
You should be seeing the live temperature data in your browser, try touching the sensor to see the temperature go up :)
In 40 lines of code we were able to stream live temperature sensor data via websockets! This is only possible with great open source libraries like Socket.IO, Express, UPM, and MRAA.
This tutorial itself serves as a starting point and there are tons of other things you could add on to it. A fancy CSS dashboard? Cloud Analytics? Turning on your AC when it gets too hot? Start the sprinklers?
What will you make?

Top comments (0)