
In this post, I'll be teaching you how to update a DEV post title, The Tom Scott way.
YouTuber Tom Scott's latest video titled, "This Video Has X Views", continually updates itself to reflect its own view count.
Basically what he does is run a background job that hits the YouTube API to update the title with the latest view count every few minutes.
Here's another one from Mr. Beast but instead of updating the title of the video, the thumbnail gets updated every few minutes with the amount of money given away.
Getting Started
We will use Firebase Cloud Functions to make a script that will update our DEV post title every x minutes. Also, Node.js and axios to get and update a DEV article.
1. Configure Firebase
Create a Firebase Project using the Firebase Developer Console.
Then install the Firebase CLI globally.
$ npm install -g firebase-tools
Having installed the Firebase CLI in the last step, we’re now able to login to Firebase by using the following command:
$ firebase login
Now you’re ready to create a new Firebase Cloud Functions project. First create a new empty project folder:
$ mkdir this-post-has-n-views
$ cd this-post-has-n-views
and execute the following command:
$ firebase init functions

Select a default Firebase project for this directory: your-project-name
What language would you like to use? JavaScript
Do you want to use ESLint to catch probable bugs? No
Do you want to install dependencies with npm now? Yes
Here's what we've got:
-
firebase.json: Contains settings for our project -
.firebaserc: For configuring multiple projects -
functions/index.js: Boilerplate provided by Firebase
Let's also install axios to communicate with the DEV API later.
$ cd functions
$ npm install axios
2. DEV API Key
Next, we need a DEV API Key which you can obtain here. We need it to authorize our requests to the DEV API. Keep the API key for now.
3. Scripting Time
Assuming that all went well, we now have a starting point for what we want to do. It's time for the fun stuff.
First, we need to set the dev.api_key and dev.post_id environment variables for our project. For this use:
$ firebase functions:config:set dev.api_key="YOUR_DEV_API_KEY" dev.post_id="DEV_POST_ID_TO_UPDATE"
Tip: To get a post ID, right-click and inspect your dev post page and look for the data-article-id attribute.
Next, open file firebase/index.js and insert the following implementation:
const functions = require("firebase-functions");
const axios = require("axios");

const articlesEndpoint = "https://dev.to/api/articles";

// A recursive function that checks if a post
// is present in the current response and returns it.
async function getPost(postId, pageNo = 1) {
  const { data } = await axios.get(
    `${articlesEndpoint}/me/all?per_page=10&page=${pageNo}`,
    {
      headers: {
        "api-key": functions.config().dev.api_key,
      },
    }
  );

  const post = data.find((i) => i.id == postId);

  if (!post) {
    return getPost(postId, pageNo + 1);
  }

  return post;
}

// A snippet taken from SO that adds commas to a number.
// https://stackoverflow.com/a/2901298/4698790
function addCommas(x) {
  return x.toString().replace(/\B(?=(\d{3})+(?!\d))/g, ",");
}

// A function that updates a post title
// to the current views, reactions and comments
// count by its id.
async function updatePost(postId) {
  const {
    page_views_count,
    public_reactions_count,
    comments_count,
  } = await getPost(postId);
  const data = {
    title: `This Post Has ${addCommas(page_views_count)} Views, ${addCommas(
      public_reactions_count
    )} Reactions And ${addCommas(comments_count)} Comments`,
  };
  const res = await axios.put(`${articlesEndpoint}/${postId}`, data, {
    headers: {
      "api-key": functions.config().dev.api_key,
    },
  });
  return res.data;
}

// A function that uses the scheduler and
// pubsub APIs to run a given code every
// 3 minutes.
exports.updatePostTitle = functions.pubsub
  .schedule("every 3 minutes")
  .onRun(() => {
    const postId = functions.config().dev.post_id;
    return updatePost(postId);
  });
The area of focus in the code above is the getPost, updatePost, and the updatePostTitle functions.
The getPost function is a recursive function that gets the user's articles and runs until the given post id is found. We do this because currently, the DEV API endpoint https://dev.to/api/articles/YOUR_POST_ID_HERE doesn't return the page_views_count property that we need to add to the title of the post.
The updatePost function updates a post's title by including the current views, reactions and comments count of the post. The format looks like this.
This Post Has 1,001 Views, 532 Reactions And 69 Comments
Lastly, the updatePostTitle, is a cloud function that uses the Pub/Sub and the Cloud Scheduler APIs to update the post title every 3 minutes.
4. Deployment
To deploy our Cloud Function, simply run:
$ firebase deploy --only functions
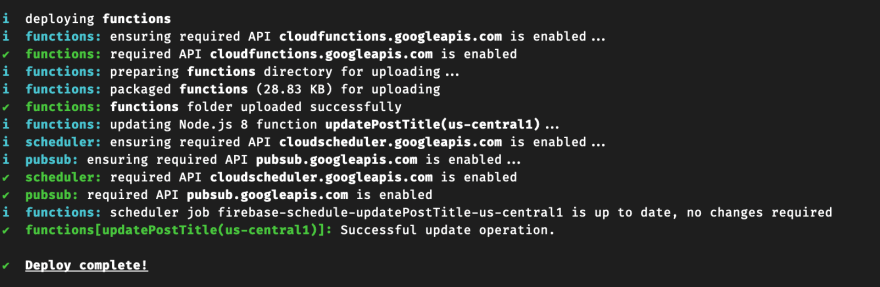
Now that your deployment is complete, you can go to your Firebase console and find your function.

You can find the complete soure code here:
 wobsoriano
/
this-post-has-n-views
wobsoriano
/
this-post-has-n-views
Use the DEV API to update a post title
Update DEV Post Title Programmatically.
This sample shows how to automatically update a DEV post title in the background.
Further reading:
- DEV API: https://docs.dev.to/api/
- Firebase SDK: https://firebase.google.com/docs/functions
Functions Code
See file functions/index.js for the code.
The dependencies are listed in functions/package.json.
Deploy and test
To test this integration:
- Create a Firebase Project using the Firebase Developer Console
- Enable billing on your project by switching to the Blaze or Flame plan. See pricing for more details. This is required to be able to do requests to non-Google services.
- Configure this sample to use your project using
firebase use --addand select your project. - Install dependencies locally by running:
cd functions; npm install; cd - - Get a DEV API key
- Set the
dev.api_keyanddev.post_idenvironment variables for your project. For this use:firebase functions:config:set dev.api_key="YOUR_DEV_API_KEY" dev.post_id="DEV_POST_ID_TO_UPDATE"
- Deploy your project using
firebase deploy --only functions
Final Thoughts
I hope you enjoyed this tutorial on automatically updating a DEV post title in the background using Cloud Functions.
Note: The background job is on a 3 minute interval, so it won't be very accurate.
Happy coding! 🚀
Cover photo by NESA by Makers on Unsplash


Top comments (26)
You just destroyed my next post idea!! 😢😭😢😭
Do it anyway. Maybe do it in a different language so it helps different people.
And it's always interesting to see how the same problem is solved in different languages!
Eurgh - now I'm tempted to do it in Go.
I just don't have the time.
In that case, I am booking python for this.
Here is a Go variant dev.to/napicella/this-article-has-...
Cool!
✌️✌️
First there were static easter eggs like this by Numberphile :)
Apparently, now they stepped it up :)
Checking Numberphile now 🚀
It's awesome and easy to get addicted if you like numbers :)
Trying to see if this counts.
Welcome to DEV!
These are fun 😄
Indeed! 😁
Hi Robert, funny idea.
I made this with my Twitter name (Manuel and the x followers) => @mnlwldr and a cronjob that run the code below every minute :)
Haha looks cool!
Commenting just to see the count increase :)
This is brilliant!
Thanks!
That's cool! 👍
Thanks!
Funny thing is that people will just react or comment to see the counter going up! 😂
...eeeee.....