

Welcome to part-13 of the series. In this part we will create a new addon called Website Stats. It will show statistics about the web-pages, which you had visited. It will also save the data in local storage, so that it is saved. This extension in useful for people, who want to find out how many time they visited social network like facebook or other addictive sites like netflix. It can help them to get out of the addiction.
So, go ahead and create a folder WebsiteStats and inside it another folder icons. Inside that folder place three icons. You can get them from the github link at the end of this post. We also have an icon for arrow, which we are going to use later in the project.
 WebsiteStats
Now, create a file manifest.json inside the folder WebsiteStats and put the below content in it. It is having a permission for storage and also webNavigation.
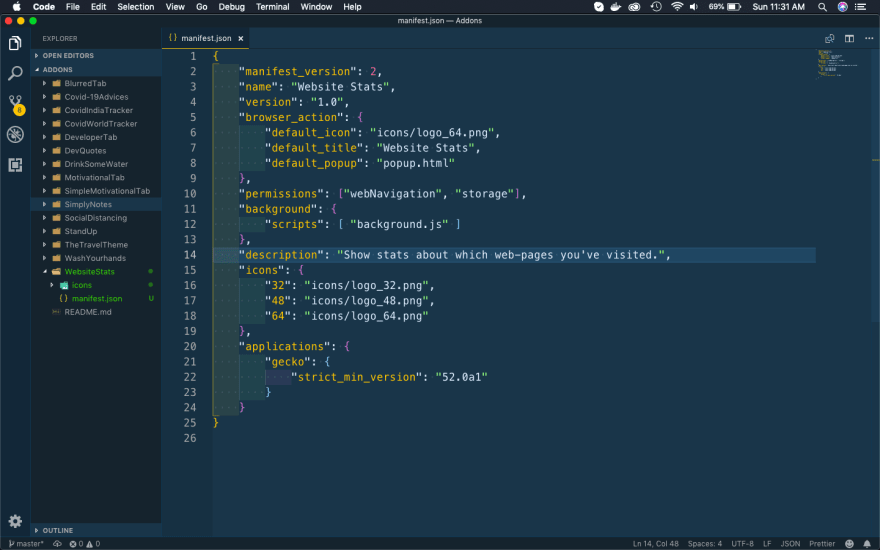 manifest.json
Next create a file popup.html inside the folder. Put the below content in it. It is a simple html file, in which the id will be replaced by our javascript code to display the statistics.
 popup.html
Next, we will create the styles for this html file. So, create a file popup.css in the same folder and the below content in it.
The html elements for theCount, hostName and typeName will be generated from javascript.
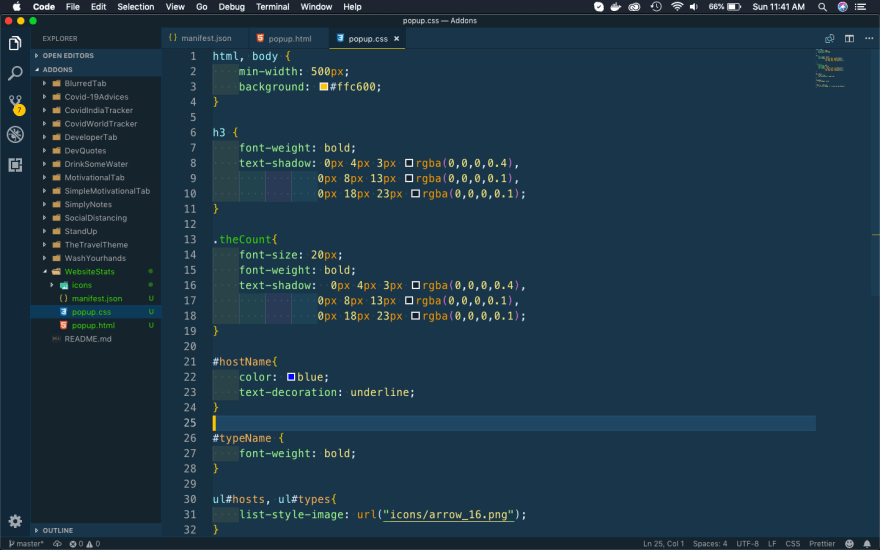 popup.css
Now, it time to add the javascript files. We will first add background.js file, which will run in the background and collect the data about the web-pages visited by the user.
We are first checking whether we have any local storage data. If we don’t have any, we are making the results.host and results.type as empty.
We are then using two method provided by firefox to keep a track of transaction type and url. These methods are webNavigation.onCommitted and webNavigation.onCompleted.
 background.js
Now, we will create the popup.js file in the same folder. We are writing code for two function sorter() and addElements() here. They will help us to sort and add elements.
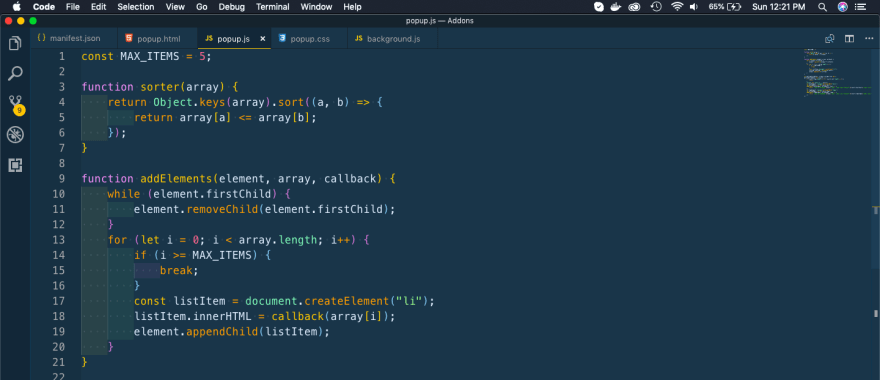 popup.js
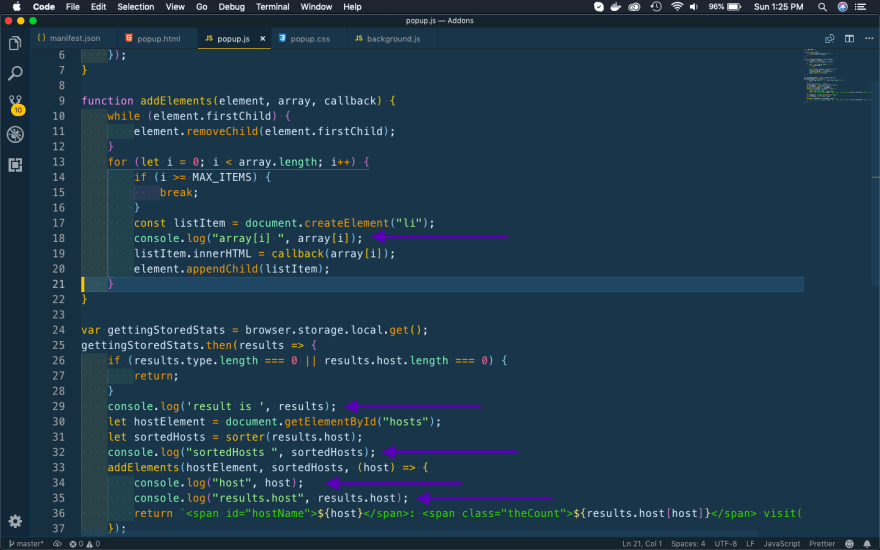
After that we are adding the main code of gettingStoredStats in popup.js file.
We are first checking whether any result is there and returning if none.
 popup.js
Now, to understand how the main function of addElements works, i had added some more console logs.
 popup.js
I had loaded the temporary addon and visited two sides. After that open the log and click on the addon icon.
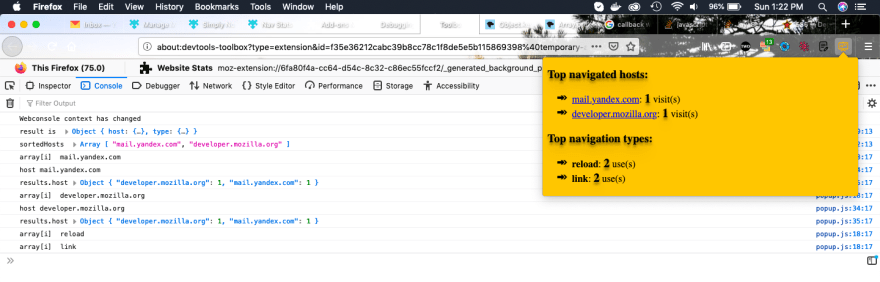 The log
The result is an object, which in turn contains two more objects — host and type. Now, sorter() first make results.host as an array and also sort it, before returning. So, the sortedHosts is an array containing only the web-page names.
 sortedHosts
Back to the addElements(), in which we pass two parameters -hostElement and sortedHosts.
Inside the function we loop through the array sortedHosts and create a new element li. Then we are passing a single element ie array[i] like mail.yandex.com, by the callback function. From there we are returning the below.
<span id="hostName">**mail.yandex.com**</span>: <span class="theCount">1</span> visit(s)
 addElements
So, back in the function this will be our innerHTML for li. After that we are appending it to the function.
So, it’s time to publish it in the mozilla addon store. I will follow the procedure from another of my blog in the series. The link is here.
I had submitted the addon and it is Awaiting Review from mozilla reviewers.
 Web stats
You can install this addon in your firefox browser from here.
This complete part-13 of the series.
You can find the code for the same in my github account here.

Top comments (0)