
Introduction
this is part 15 from the journey it's a long journey(360 day) so go please check previous parts , and if you need to walk in the journey with me please make sure to follow because I may post more than once in 1 Day but surely I will post daily at least one 😍.
And I will cover lot of tools as we move on.
Download app_015

if you follow part 9
cd location/DevOpsJourney/app_015/
git pull
replace location with where you put the DevOpsJourney
if your new go to part 9 and do same steps will download old lecture files and new one.
Networks in general
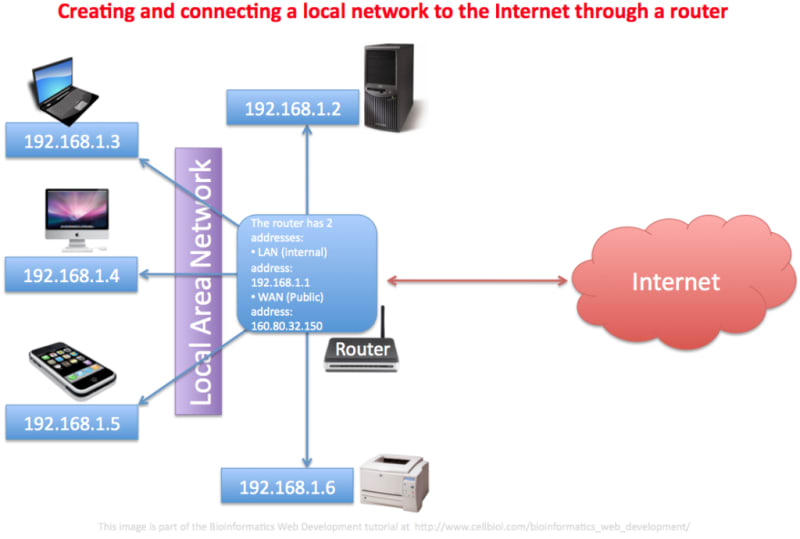
long story , short .
basically our local network work we have let's say 2 pcs they connected to same router , they shared under unique ip address and they can communicate threw this ip given by router.
that's not all for sure but it's good to start talking about docker.
docker network work in same way you can communicate over network you made or default one used by docker called bridge.
you can link 2 containers(or more) threw this network you don't need the ip of the 2 containers just names, we will see why.
create our network
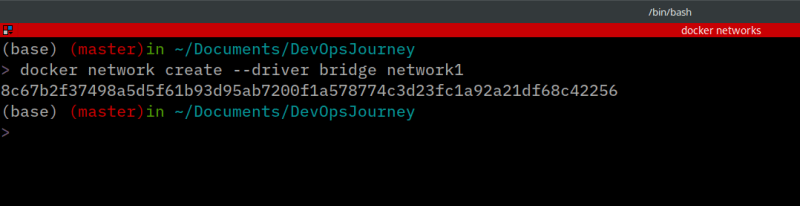
docker network create --driver bridge network1
now inspect the network we create
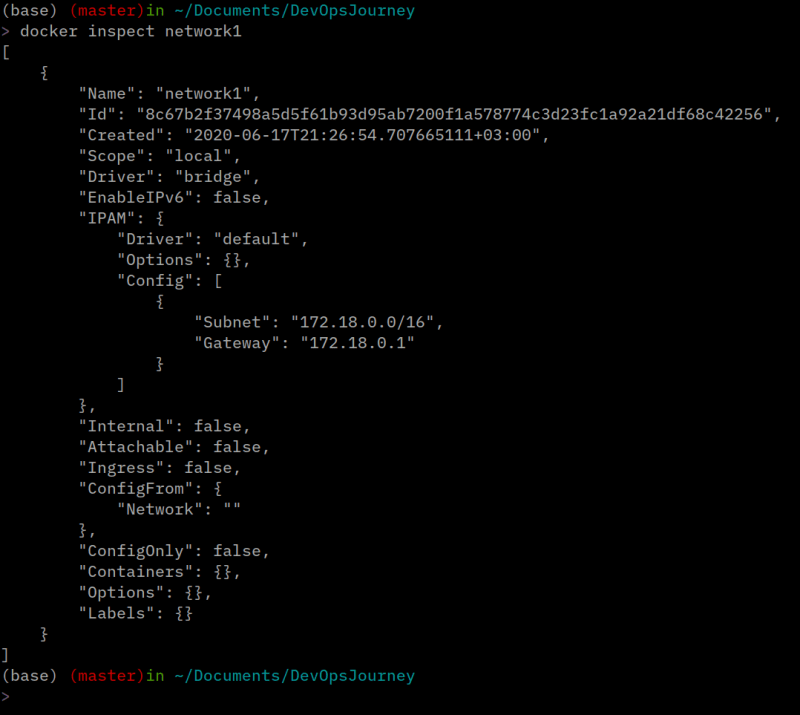
docker inspect network1
we can see that we get a special ip for our network 172.18.0.0
building images
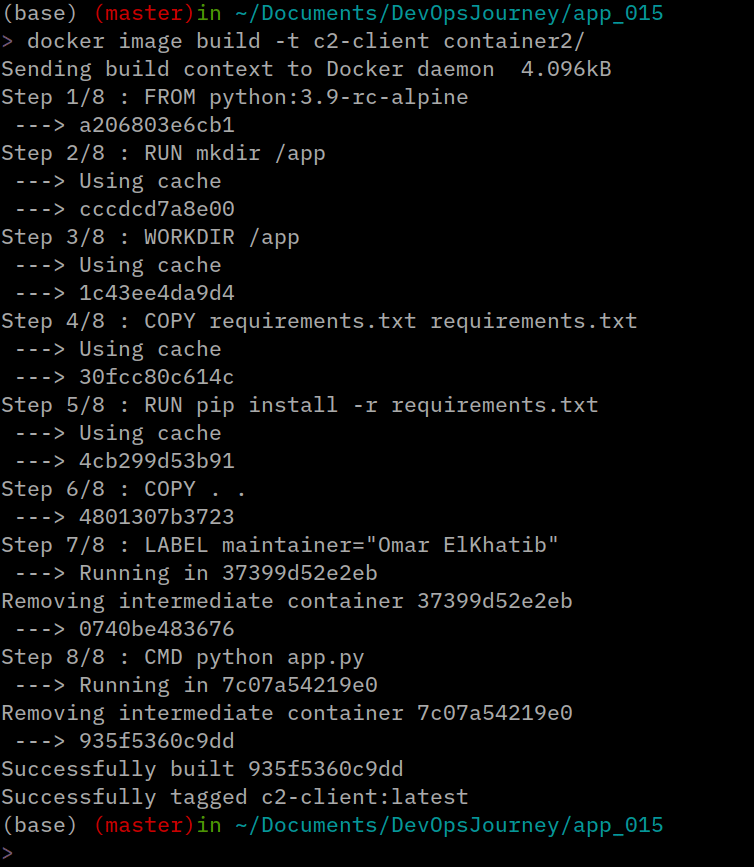
first make sure you are on DevOpsJourney/app_015/ folder then run
docker image build -t c1-server container1/
docker image build -t c2-client container2/

connect containers
let's now run our containers under same network , again I am using terminator to split terminal you can just create a new tab and leave old one running , or just go get terminator is amazing!
in tab 1
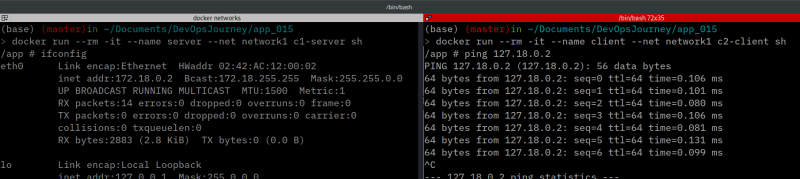
docker run --rm -it --name server --net network1 c1-server sh
the key in this line is --net network1 all other stuff we talk about before so go check in previous lectures.
--net network1 meaning i need this container to use network1 which is the network we create in the start of this lecture
same in tab2
docker run --rm -it --name client --net network1 c2-client sh
in tab1 i am going to type inside the interactive shell
ifconfig
it's a linux tool to get information about network
we can see addr:172.18.0.2 which is the special id for our container here.
in tab 2 , type
ping 172.18.0.2
ping is tool to make sure that we can connect to a server
and we see is sending request to server without any problems.
time to have fun
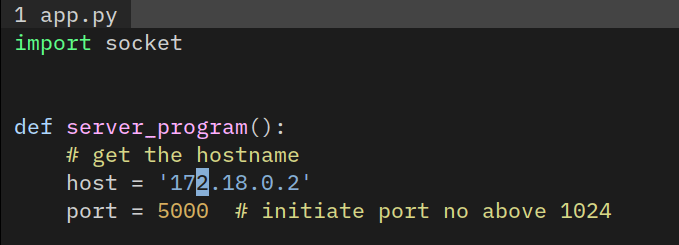
the app that i made is composed of 2 containers 1 for server(Container1 folder) and other for client (container2 folder)
first go to container1/app.py and change the host to the ip of the server container
in our case it's 172.18.0.2
also same to container2/app.py (client)
edit also to the host ip which is again 172.18.0.2
let's try to run now our server and client , I am splitting the terminal using terminator
in tab 1
docker run --rm -it --name server --net network1 c1-server
in tab 2
docker run --rm -it --name client --net network1 c2-client

as we see , it's an chat app between server and client and it's work!!!

Top comments (0)